
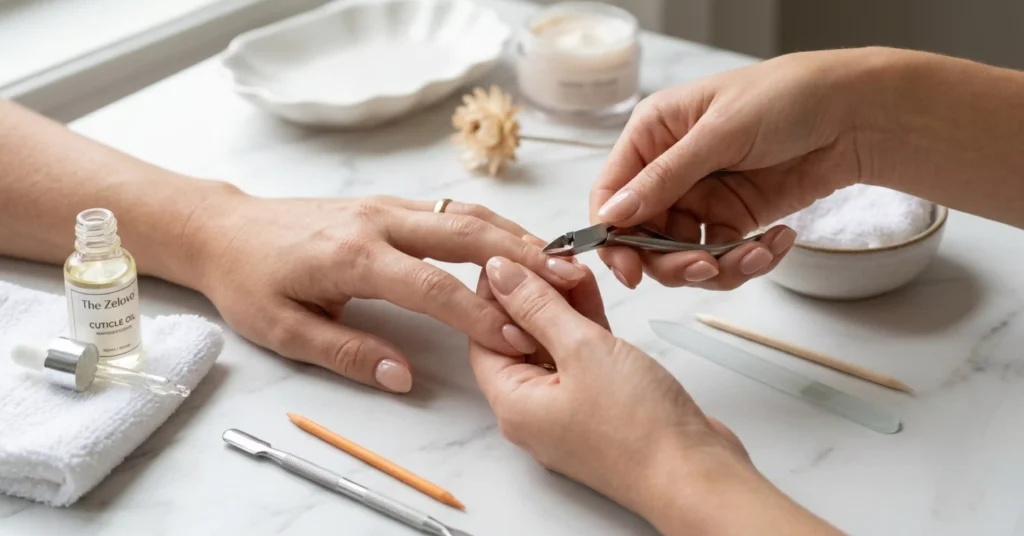
For years I couldn’t figure out why my at-home manicures looked… fine. The polish was neat, the shape was decent, but they never had that crisp, expensive salon look. Then a nail tech friend watched me do my nails and said, “You’re painting over dead skin. It’s all in the cuticles.”
She was right. The polish was never the problem – the frame around it was.
Good cuticle care is the difference between a manicure that looks homemade and one that looks professional, and it costs almost nothing to get right. This guide covers ten tips that transformed my prep game, a simple weekly routine, the mistakes that cause hangnails and infections, and answers to the cuticle questions everyone Googles at some point. Skip to whatever your fingers need.
What Exactly Is the Cuticle (And Why Does It Matter)?
The cuticle is the thin layer of dead skin that seals the gap between your nail plate and the living skin at the base of your nail, protecting the nail matrix – where new nail is made – from bacteria and water. The fold of living skin behind it is technically the proximal nail fold, though most people call the whole area “the cuticle.” Caring for it matters for two reasons: healthy cuticles mean the new nail grows in smooth and strong, and tidy cuticles are what make polish look cleanly framed instead of smudged into the skin. The golden rule of everything below: soften and push, never cut the living part.
1. Push Cuticles Back After a Shower, Not Before
Pushing cuticles back when they’re warm and soft from a shower moves them gently without tearing, while pushing dry cuticles cracks and splits them.
Best for: weekly maintenance – this is the core habit.
Difficulty: easy.
Tools: a wooden orange stick or a rubber-tipped pusher.
I keep an orange stick in my shower caddy for exactly this reason. Thirty seconds per hand while my skin is still damp, and the nail beds instantly look longer and cleaner.
2. Use Cuticle Remover Before You Push
Cuticle remover is a gel that dissolves the dead, stuck-on cuticle tissue on the nail plate so it slides off with a pusher instead of needing to be scraped.
Best for: cuticles that have grown up onto the nail and won’t budge with pushing alone.
Difficulty: easy – but follow the timing on the bottle.
Tools: a cuticle remover gel (the drugstore ones work well), a pusher, and a damp cloth to wipe off residue.
The first time I used remover, I understood salons. What I’d been trying to scrape off for years just wiped away. Don’t leave it on longer than directed — it dissolves dead skin, and it doesn’t know when to stop.
3. Trim Only the Dead, Lifted Bits – Never the Seal
Trimming means snipping only translucent, dead, lifted skin and hangnails with a clean nipper — never cutting into the living fold that seals the nail base.
Best for: tidying after pushing back and dealing with hangnails properly.
Difficulty: medium – restraint is the skill.
Tools: a sharp, clean cuticle nipper, rubbing alcohol to sanitize it.
Cutting the living seal is how you get redness, swelling, and infections, and the skin often grows back thicker and messier. My rule: if I’d have to pull or stretch the skin to cut it, it stays.
4. Oil Your Cuticles Every Single Day
Daily cuticle oil keeps the seal soft and flexible, which prevents the cracking and peeling that create hangnails in the first place.
Best for: everyone, every day – this is the highest-impact habit on the list.
Difficulty: easy.
Tools: a jojoba-based cuticle oil pen or dropper; sweet almond oil is a fine budget swap.
Placement beats discipline: one pen by the laptop, one on the nightstand. A bottle in a drawer is decoration. Massage it in — the rubbing boosts circulation to the nail matrix, and it’s the part most people skip.
5. Stop Picking, Biting, and Tearing
Keeping your hands off your cuticles prevents the ragged edges, raw spots, and infections that no product can fix afterward.
Best for: chronic pickers and biters – you know who you are.
Difficulty: hard, because it’s usually an unconscious habit.
Tools: a nipper in your bag for proper hangnail removal, oil to remove the dry texture that triggers picking.
I was a lifelong hangnail-tearer, and what finally worked wasn’t willpower – it was keeping my cuticles oiled so there was nothing rough to pick at, plus carrying a tiny nipper so a hangnail never survived long enough to tempt me.
6. Wear Gloves for Dishes and Cleaning
Gloves protect cuticles from hot water and cleaning chemicals, which strip the natural oils and turn the seal dry, ragged, and prone to splitting.
Best for: anyone who washes dishes by hand or cleans regularly.
Difficulty: easy once it’s a habit.
Tools: rubber or nitrile gloves; cotton liners underneath for long jobs.
Dish soap is designed to dissolve grease, and your cuticle oil is, chemically speaking, grease. Every gloveless dish session undoes a day of oiling.
7. Moisturize Hands After Every Wash
Applying hand cream after each hand wash replaces the moisture washing strips away, keeping the skin around the nails from drying into hangnail territory.
Best for: frequent hand-washers, dry climates, and every winter.
Difficulty: easy.
Tools: a tube of hand cream at every sink you use – kitchen, bathroom, desk.
This is a placement trick again. When the cream is sitting right there, you use it without deciding to. When it’s in another room, you don’t.
8. Never Cut Your Cuticles Before Polish or Gel
Skipping cutting right before a manicure prevents tiny nicks that sting under polish and open the door to bacteria under gel.
Best for: prep days, especially before gel or press-ons.
Difficulty: easy.
Tools: remover gel and a pusher instead – push and dissolve, don’t cut.
A nail tech taught me this one: any tiny cut near the nail becomes a burning surprise the moment remover, acetone, or gel touches it. Push-only prep looks just as clean and risks nothing.
9. Do a Weekly Overnight Cuticle Mask
An overnight treatment – a thick balm or oil layered under cotton gloves – deeply rehydrates cuticles in a way quick daytime applications can’t.
Best for: very dry, cracked, or winter-ravaged cuticles.
Difficulty: easy.
Tools: a heavy balm (shea butter, lanolin, or a classic like petroleum jelly over oil), cotton gloves.
I do this every Sunday night. It feels ridiculous for the first five minutes and then you wake up with someone else’s hands — in a good way.
10. Sanitize Your Tools Every Time
Wiping pushers and nippers with rubbing alcohol before each use keeps bacteria out of the tiny openings cuticle work inevitably creates.
Best for: every session, no exceptions – especially if anyone else ever borrows your tools.
Difficulty: easy.
Tools: 70% isopropyl alcohol, cotton pads.
It takes ten seconds. Paronychia – the red, swollen, painful infection at the nail fold – is usually caused by bacteria getting into broken skin, and dirty tools are a direct delivery route.
How to Do a Full Cuticle Care Session (Step by Step)
Here’s the whole weekly routine in order – it takes about fifteen minutes:
- Wash your hands, or better, do this right after a shower when everything is soft.
- Apply cuticle remover gel to each nail and wait the time stated on the bottle.
- Push the cuticles back gently with an orange stick or rubber pusher, then wipe away the dissolved residue.
- Trim only clearly dead, lifted flakes and any hangnails with a sanitized nipper – when in doubt, leave it.
- Oil every nail and massage it in for a few seconds each.
- Seal with hand cream, and you’re prepped for polish or just enjoying tidy bare nails.
How to Fix Cuticles That Are Already a Mess
If your cuticles are currently ragged, torn, or sore, skip the tools for a week and just flood them with moisture — oil twice daily, cream after washing, and an overnight balm session or two. Trim any loose hangnails flat with a clean nipper so they can’t catch and tear deeper, but leave everything else alone until the skin calms down.
Most ragged cuticles look dramatically better after seven to ten days of pure hydration and zero picking. If a spot becomes increasingly red, swollen, warm, or develops pus, that’s an infection, not dryness – see a doctor or pharmacist rather than treating it as a beauty problem.
Common Mistakes to Avoid with Cuticle Care
- Cutting the living seal. It protects the nail matrix; cutting it invites infection and thicker regrowth. Push and dissolve instead.
- Pushing back dry cuticles. Dry skin cracks under pressure – always soften with water or remover first.
- Tearing hangnails off. They rip into living skin and go deeper than you intend. Snip flat with a clean nipper.
- Leaving cuticle remover on too long. It keeps dissolving past the dead skin and starts irritating the healthy skin around it.
- Oiling only when you remember. Cuticle care compounds daily; one enthusiastic session a month can’t replace thirty small ones.
FAQs
Should you cut your cuticles or push them back?
Push them back. The only cutting should be clearly dead, lifted flakes and hangnails – the intact cuticle is a protective seal, and cutting it risks infection.
How often should I push my cuticles back?
Once a week is plenty for most people. More often than that irritates the area without any visible benefit.
What can I use instead of cuticle oil?
Sweet almond, jojoba, or even olive oil from the kitchen all work. The consistency of applying it daily matters far more than which oil you choose.
Why do I keep getting hangnails?
Hangnails are almost always a dryness problem – dry skin splits, and the split lifts into a hangnail. Daily oil, hand cream after washing, and gloves for dishes prevent most of them.
Final Thoughts
Cuticle care is the least glamorous part of a manicure and the part that decides how the whole thing looks. Ten minutes a week and a few seconds of oil a day will do more for your nails than any polish upgrade ever could.
Start with just two habits – push after showers, oil every night – and let the rest layer in over time. A month from now, your bare nails will look done even when they’re not, and that’s when you know the frame is finally as good as the picture.

Pingback: 21 Winter Nail Ideas That Look Cozy and Expensive - TheZelovo.com