Last year, I booked my birthday nail appointment three weeks early, walked in with zero plan, and panicked into plain pink glitter. The photos were fine. The nails were forgettable. This year, I promised myself I’d never wing it again, and this list is basically the mood board I wish I’d had.
Below are 14 birthday nail ideas that each do something different – no two are variations of the same glitter tip. Some are salon-level; some you can pull off at your kitchen table the night before. Skip around to whatever matches your party, your dress, and your patience level.
What Counts as Birthday Nails?
Birthday nails are any manicure designed around a celebration theme – think cake, candles, balloons, champagne, confetti, or a personal detail like your age or zodiac sign. What separates them from a regular “pretty manicure” is intention: at least one element should read as festive in photos, because your hands end up in every shot – holding the cake knife, the glass, the phone.
The best birthday sets balance one or two statement nails with simpler supporting nails so the whole hand photographs cleanly instead of chaotically.
1. Piped Frosting Texture Nails
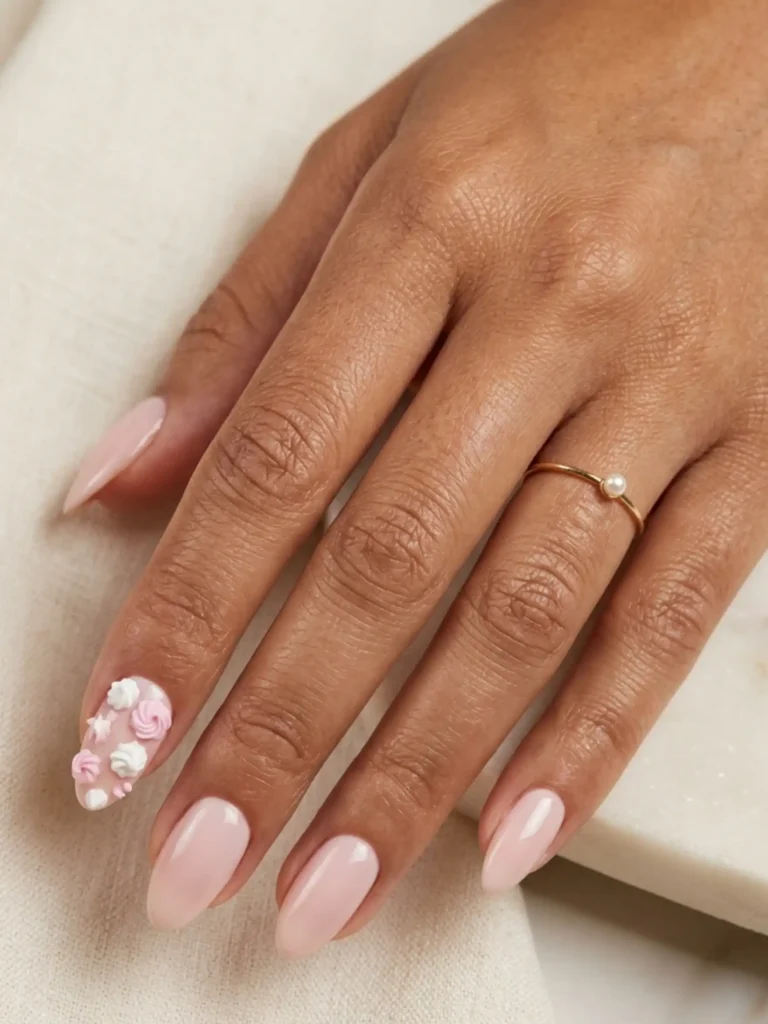
Piped frosting nails use thick 3D gel sculpted into tiny swirls and dollops, so one accent nail literally looks like buttercream on a cake.
Best for: anyone whose party centers on the cake moment – this nail next to a real slice is the photo.
Difficulty: hard – this is a salon or advanced-DIY design.
Tools: sculpting gel or 3D builder gel, a fine silicone tool, LED lamp.
Keep the frosting texture on one nail per hand, max. I’ve seen full sets of it and they snag on everything, including hair.
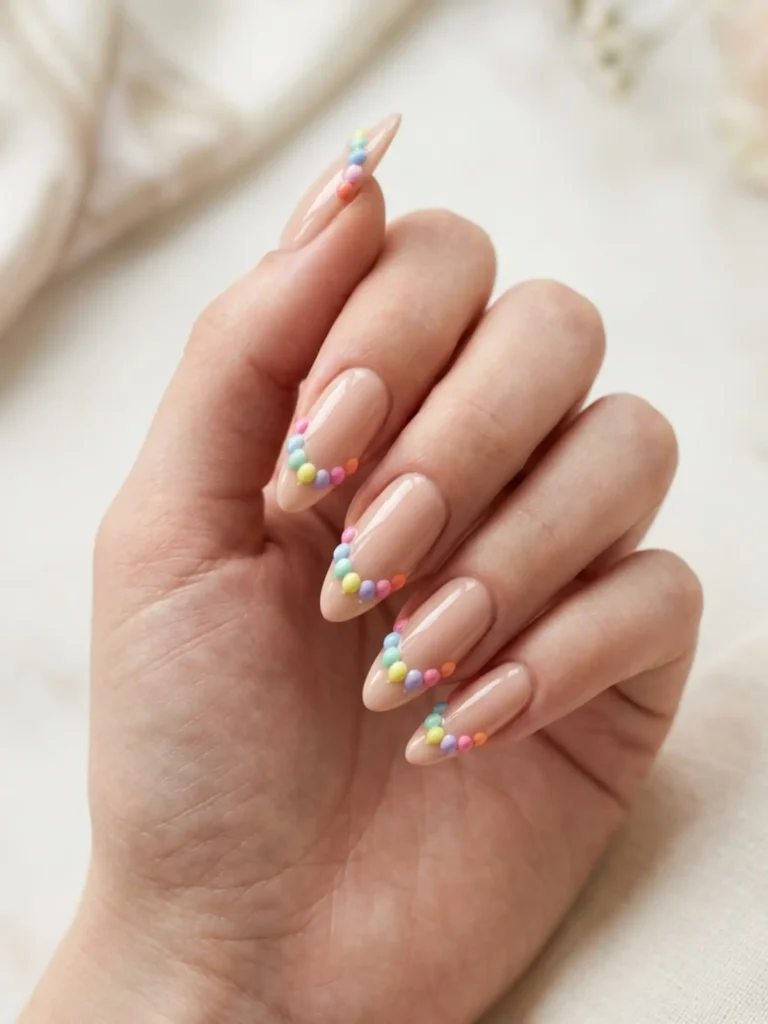
2. Balloon Arch French Tips Nails
Balloon arch tips replace the classic white French line with a row of tiny multicolor balloon shapes curving along the smile line.
Best for: milestone birthdays with an actual balloon arch – your nails match the decor.
Difficulty: medium.
Tools: a fine detail brush or dotting tool, 3–4 polish colors, glossy top coat.
Odd numbers of balloons per tip (three or five) look more natural than an even row. Vary the sizes slightly so it reads “balloons,” not “polka dots.”
3. Champagne Bubble Ombré Nails
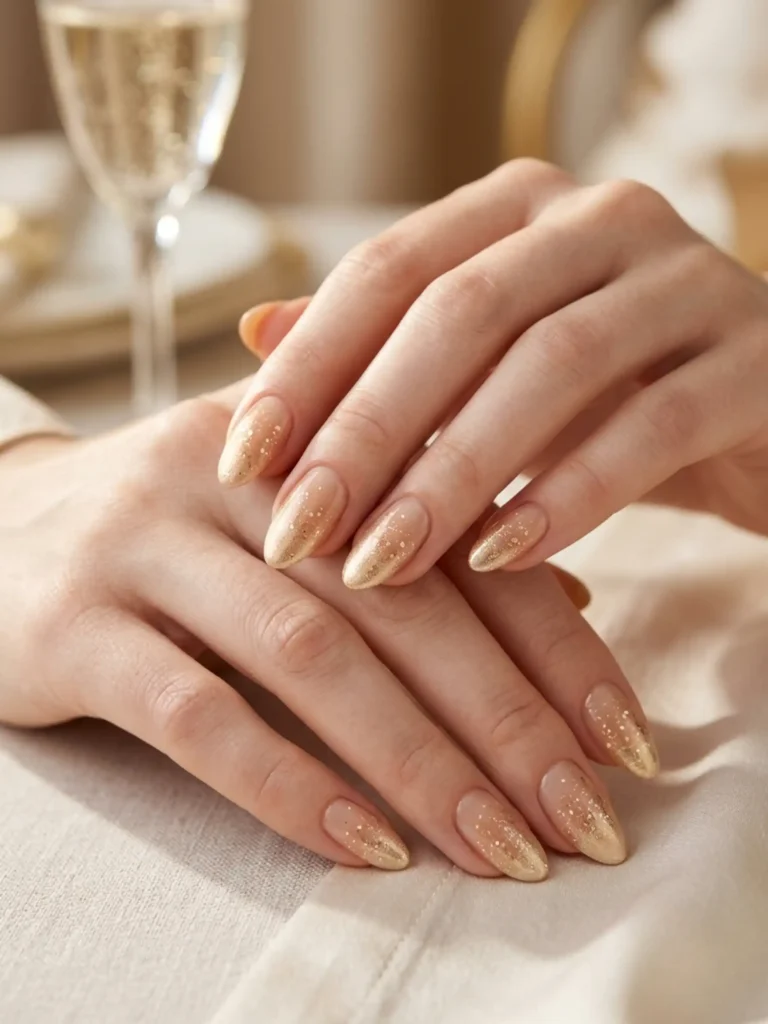
Champagne bubble ombré is a warm gold-to-nude gradient with tiny shimmer dots rising toward the tip like bubbles in a glass.
Best for: dinner party or rooftop birthdays where you’ll be photographed holding a glass.
Difficulty: easy to medium.
Tools: a makeup sponge for the gradient, a small dotting tool, champagne-gold and nude polish.
Cluster the dots unevenly – real bubbles rise in loose columns, not straight lines. That one detail is what makes people ask where you got them done.
4. Negative-Space “Birthday Girl” Script Nails
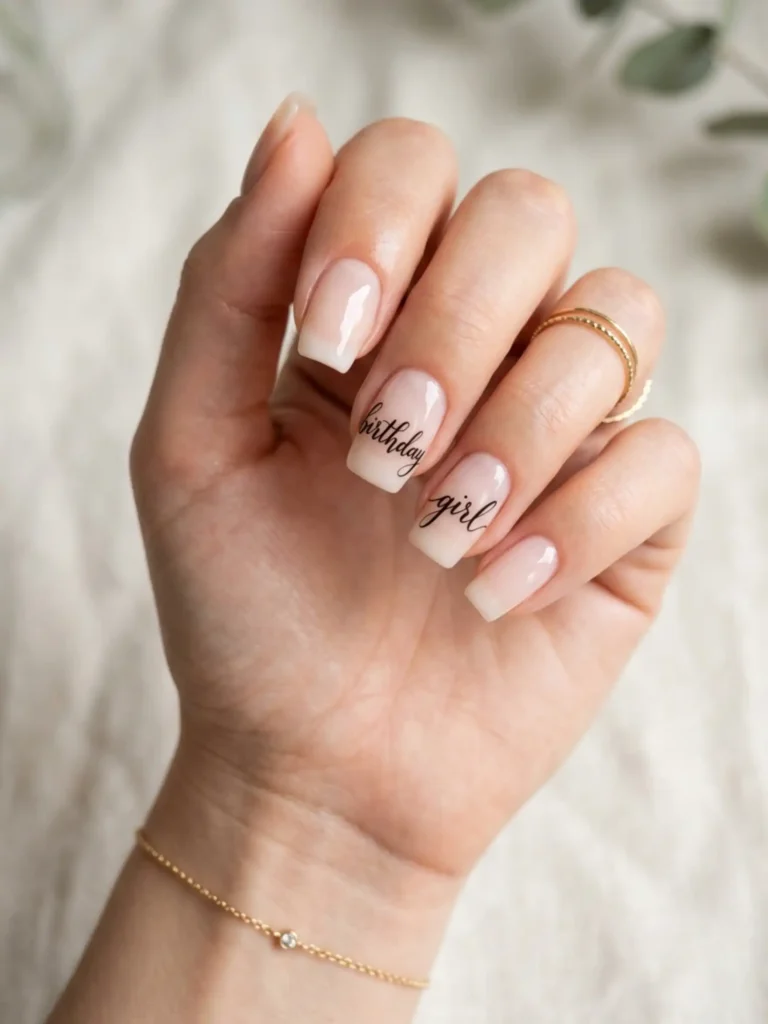
This design leaves most of the nail bare and adds thin cursive lettering – “birthday girl,” your age, or your initials – across one or two nails.
Best for: minimalists who still want the nails to say something in close-ups.
Difficulty: hard freehand, easy with stickers or stamping.
Tools: a striping brush and black or gold gel polish, or lettering nail stickers and top coat.
If you’re doing it yourself, use stickers. My freehand attempt looked like a signature on a pharmacy receipt.
5. Encapsulated Confetti Jelly Nails
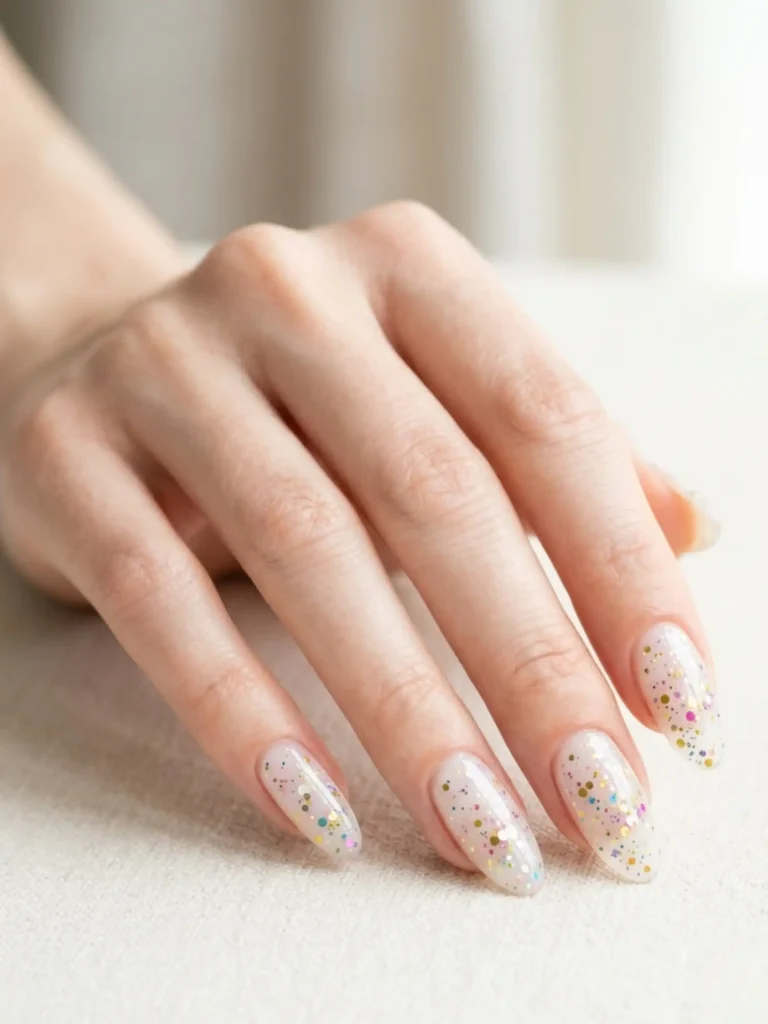
Confetti jelly nails suspend tiny multicolor glitter flecks inside a sheer milky or clear base, so the confetti looks like it’s floating mid-toss.
Best for: short and medium nails; the sheer base keeps confetti from looking heavy.
Difficulty: medium.
Tools: builder gel or a sheer jelly polish, loose confetti glitter, top coat.
Place the confetti sparsely. The floating effect dies the moment it looks packed – you want maybe six to ten flecks per nail.
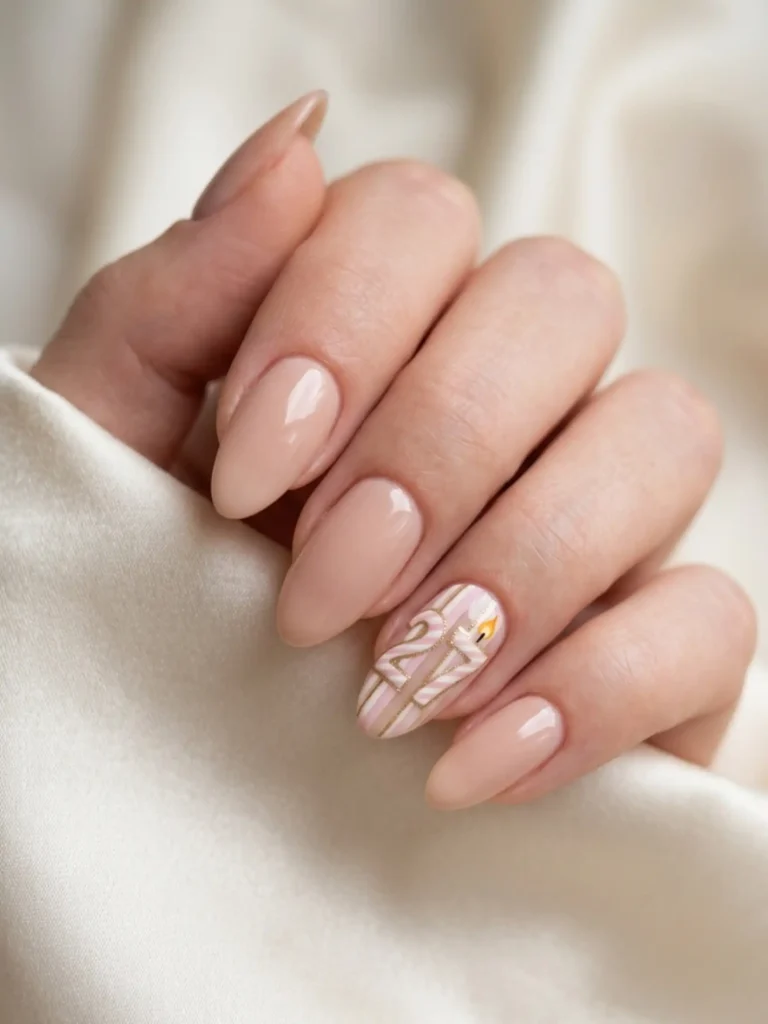
6. Number Candle Accent Nail
The number candle nail turns your age into art: a striped candle shape in your new number, complete with a tiny painted flame.
Best for: milestone years – 18, 21, 30, 40 – when the number is the whole point.
Difficulty: medium.
Tools: detail brush, two contrasting stripe colors, a touch of yellow-orange for the flame.
Paint the number large enough to read in photos. A tiny “30” gets lost; a bold, candle-striped numeral on a nude base pops.
7. Sprinkle Glazed Donut Nails
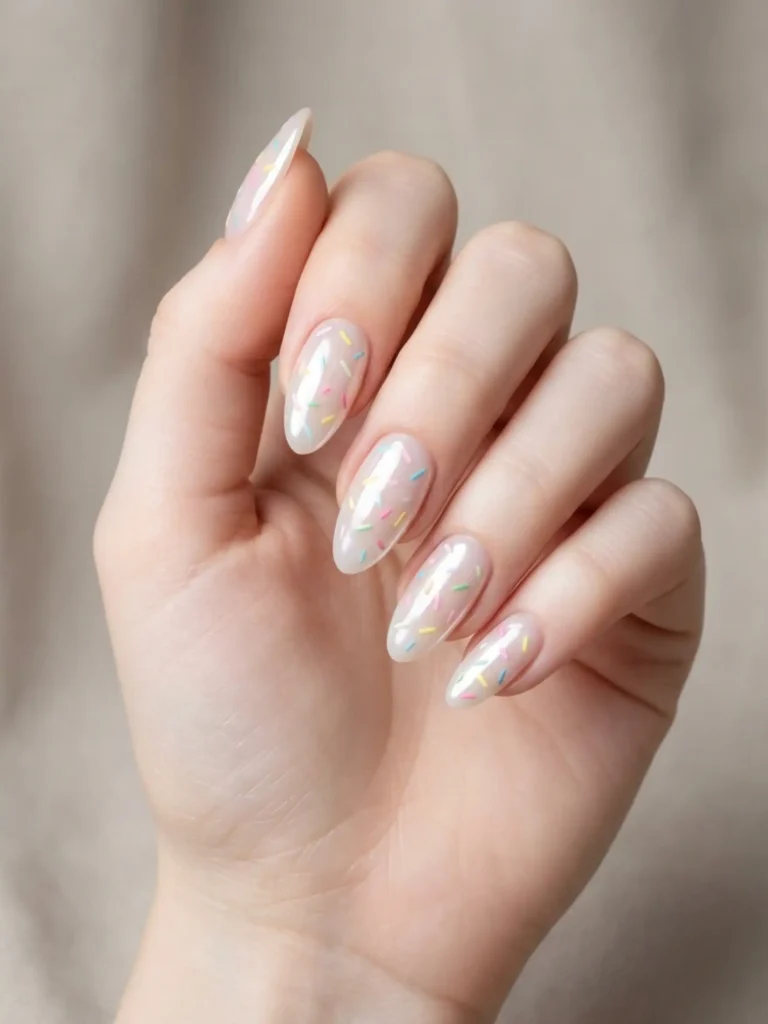
Sprinkle-glazed nails pair a milky sheer “glazed” base with short pastel dashes scattered like sprinkles on a donut.
Best for: brunch, birthdays, and anyone who wants festive without full glitter.
Difficulty: easy – genuinely one of the most forgiving designs here.
Tools: a milky white or sheer pink polish, 3–4 pastel polishes, a striping brush.
Sprinkles are dashes, not dots. Keep each stroke short and angle them randomly; uniform angles instantly look machine-printed.
8. Disco Ball Mirror Chrome Nails
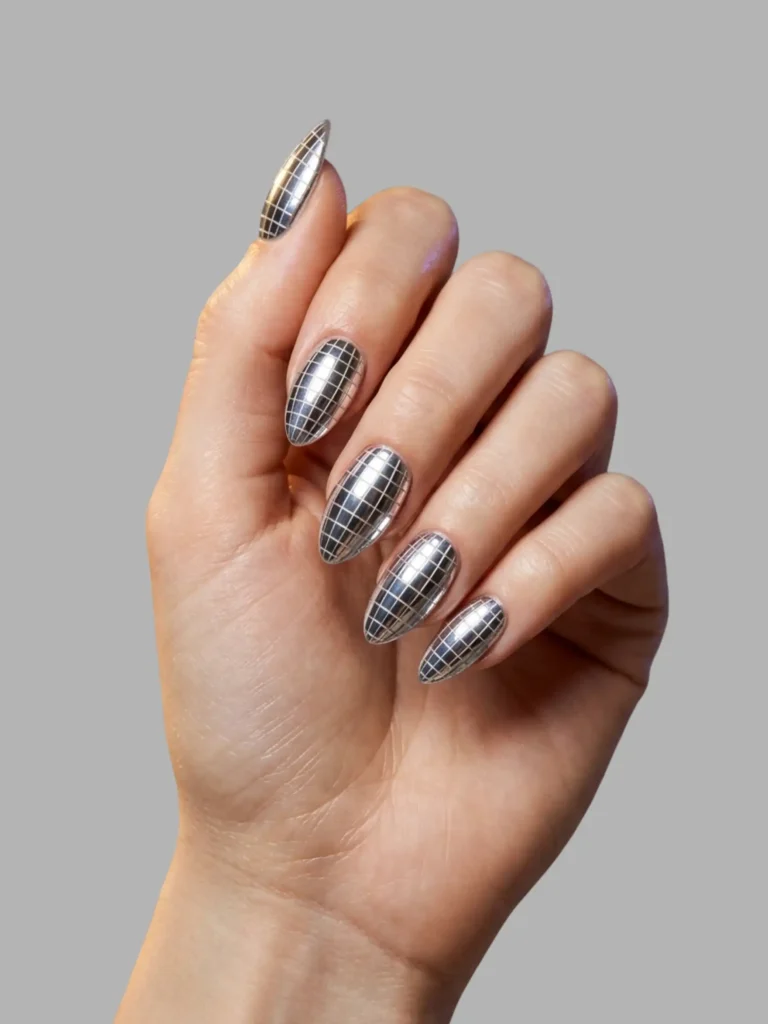
Disco ball nails use high-shine silver chrome with thin etched grid lines, so each nail reflects light like a tiny mirror ball.
Best for: night parties with flash photography – these nails catch light in every single shot.
Difficulty: medium with chrome powder, easy with disco-effect wraps.
Tools: silver chrome powder over gel, a fine liner for the grid, no-wipe top coat.
Do the grid lines in a slightly darker silver, not black. Black lines make it look like graph paper; tonal lines keep the mirror illusion.
9. Pastel Present Bow Accents Nails
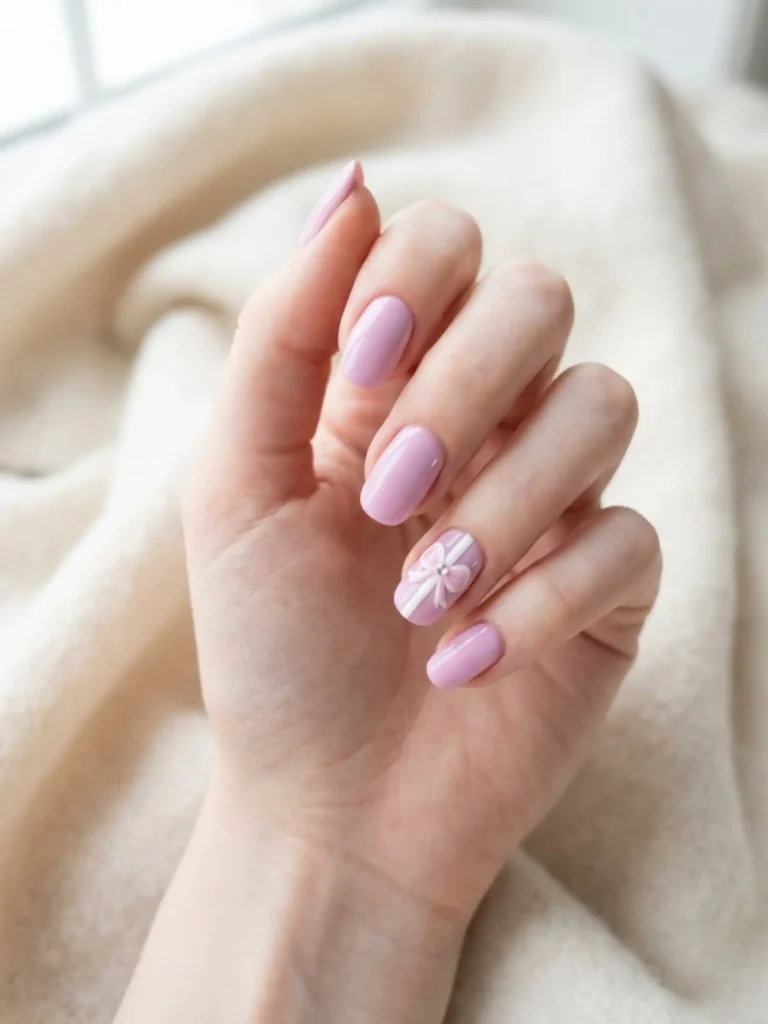
Present bow nails keep most nails a soft, solid pastel and add one hand-painted ribbon-and-bow nail, like a wrapped gift.
Best for: soft, feminine birthday aesthetics and daytime celebrations.
Difficulty: medium.
Tools: detail brush, one pastel base color, white or contrasting gel for the ribbon.
Paint the ribbon lines first and let them fully cure before adding the bow loops. I rushed it once, and the whole bow smeared into a sad knot.
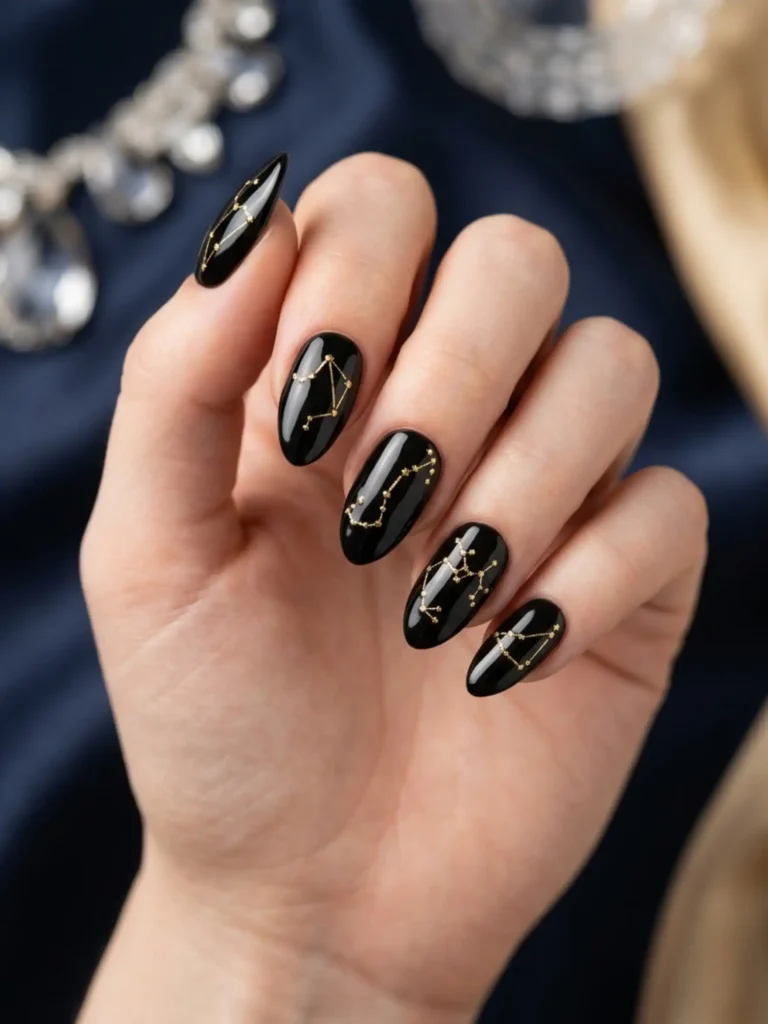
10. Zodiac Constellation Nails
Zodiac birthday nails map your star sign’s constellation in tiny gold dots and hairline connecting lines over a deep navy or black base.
Best for: people who love a personal detail – no one else at the party has your exact sky.
Difficulty: medium.
Tools: dark base polish, gold gel or foil, a dotting tool, and the thinnest liner you own.
Look up your actual constellation pattern before you start. Random dots read as generic stars; the real shape is what makes it a conversation piece.
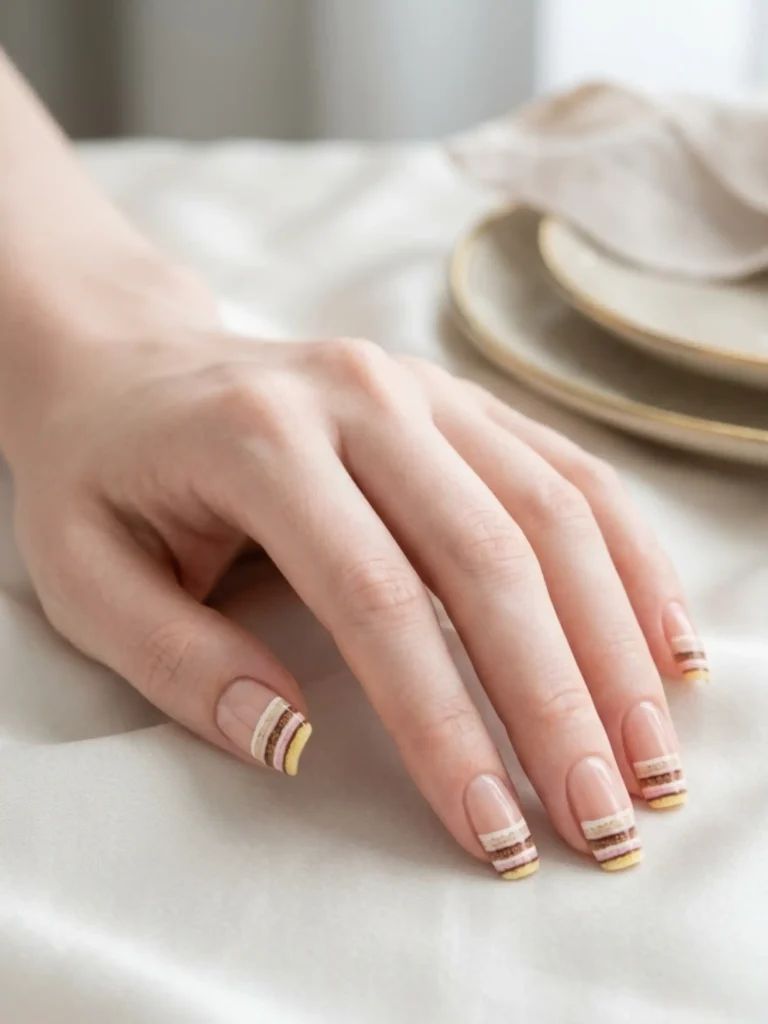
11. Layer Cake Slice Tips Nails
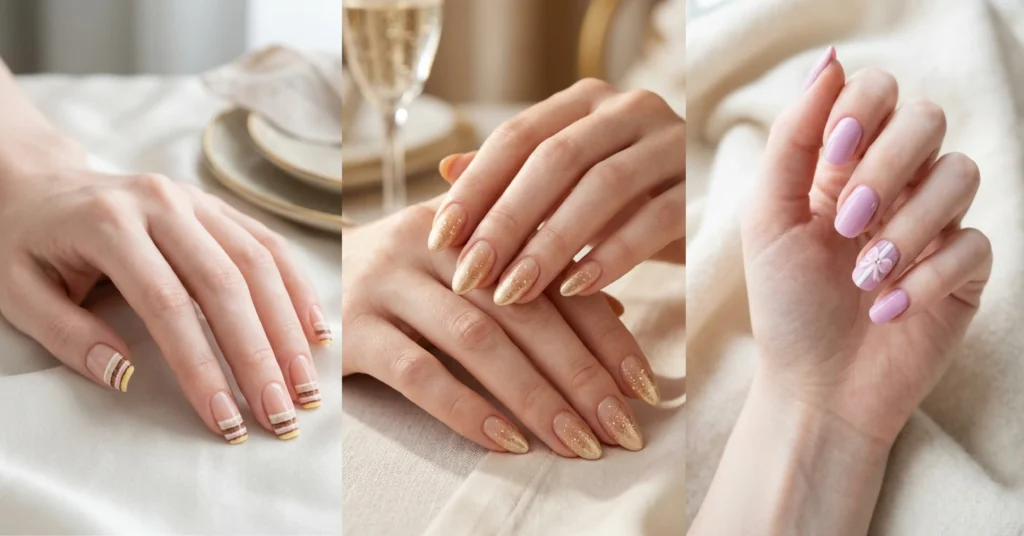
Cake slice tips paint the free edge of each nail as a cross-section of layer cake – thin alternating stripes of sponge and frosting colors.
Best for: longer square or coffin nails where the tip has room for three or four visible layers.
Difficulty: medium to hard.
Tools: striping tape or a flat brush, three coordinated colors, top coat.
Striping tape is your best friend here. Freehand stripes that thin need a steadier hand than most of us have after one coffee.
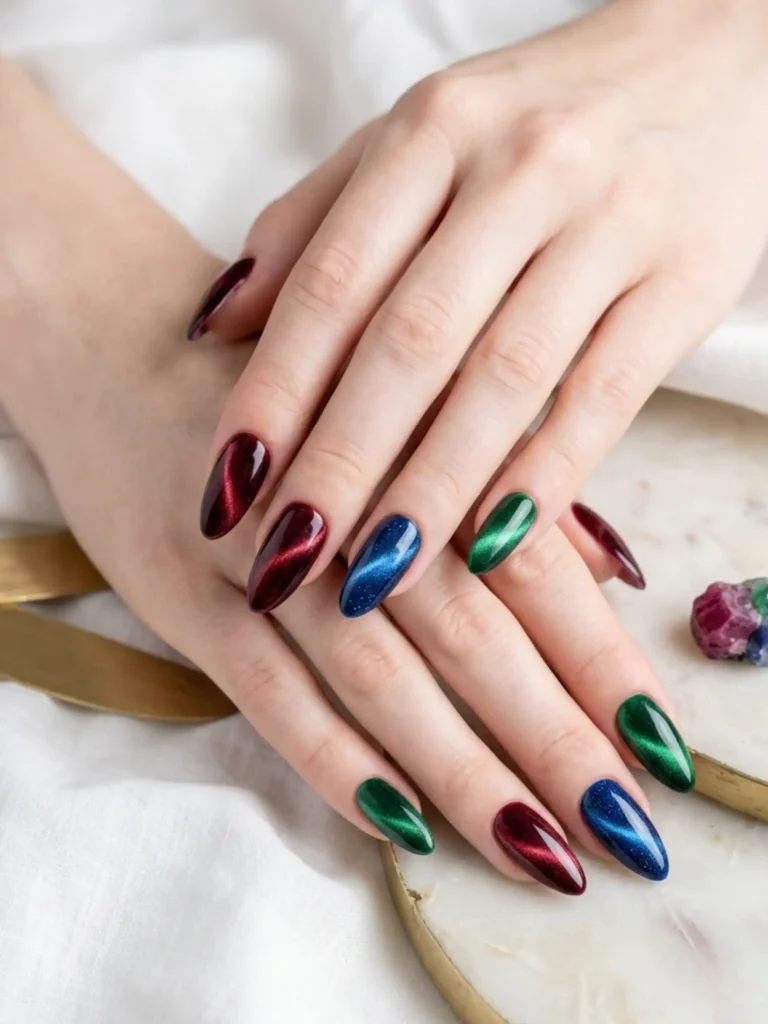
12. Birthstone Velvet Cat-Eye Nails
Birthstone cat-eye nails use magnetic velvet gel in your birth month’s stone color – garnet red, emerald green, sapphire blue — with a shifting band of light.
Best for: elegant dinner birthdays; the velvet shift looks expensive in candlelight.
Difficulty: easy at a salon, medium at home.
Tools: magnetic cat-eye gel polish in your birthstone shade, the magnet wand, LED lamp.
Hold the magnet a few millimeters above the wet gel, never touching. The first time I let it touch, it dragged the polish into a smudged stripe.
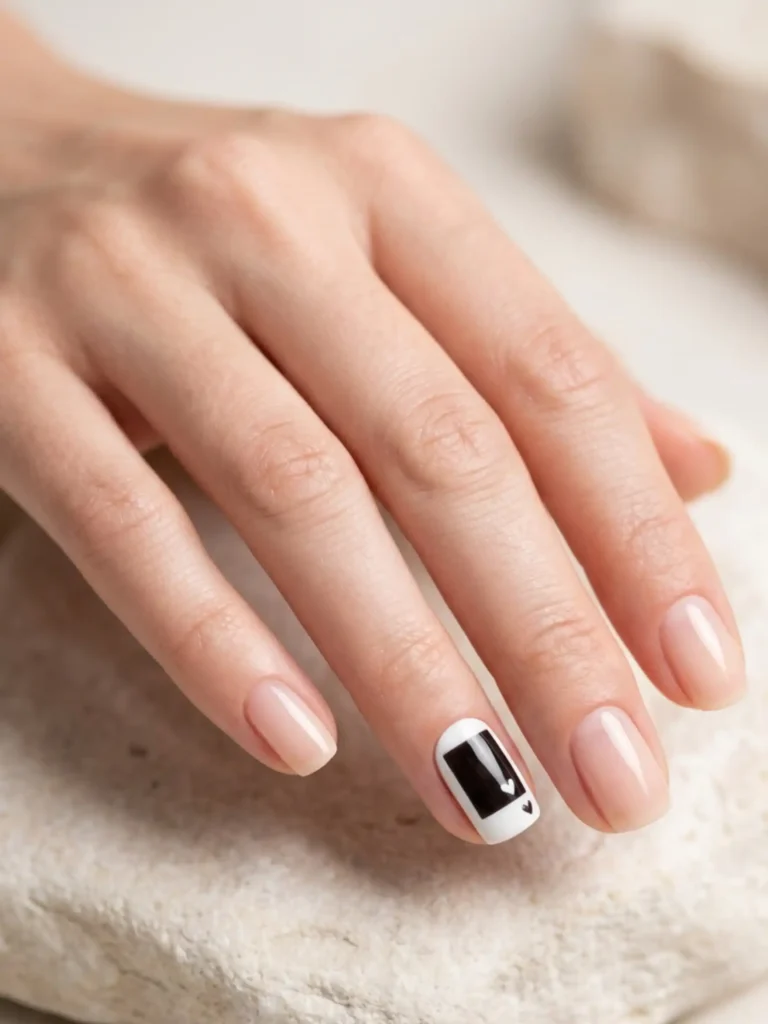
13. Polaroid Frame Accent Nail
The Polaroid nail paints one accent nail as a tiny instant-photo frame – white border, dark “photo” center, sometimes a mini heart or date inside.
Best for: the “most photogenic celebration” brief, literally – a photo on your nail, in your photos.
Difficulty: medium.
Tools: white and one dark polish, a flat detail brush, optional micro lettering sticker for the date.
Put your birthday in the white bottom border. It’s the kind of detail people only notice when they zoom in, which is exactly why they love it.
14. Midnight Countdown Nails
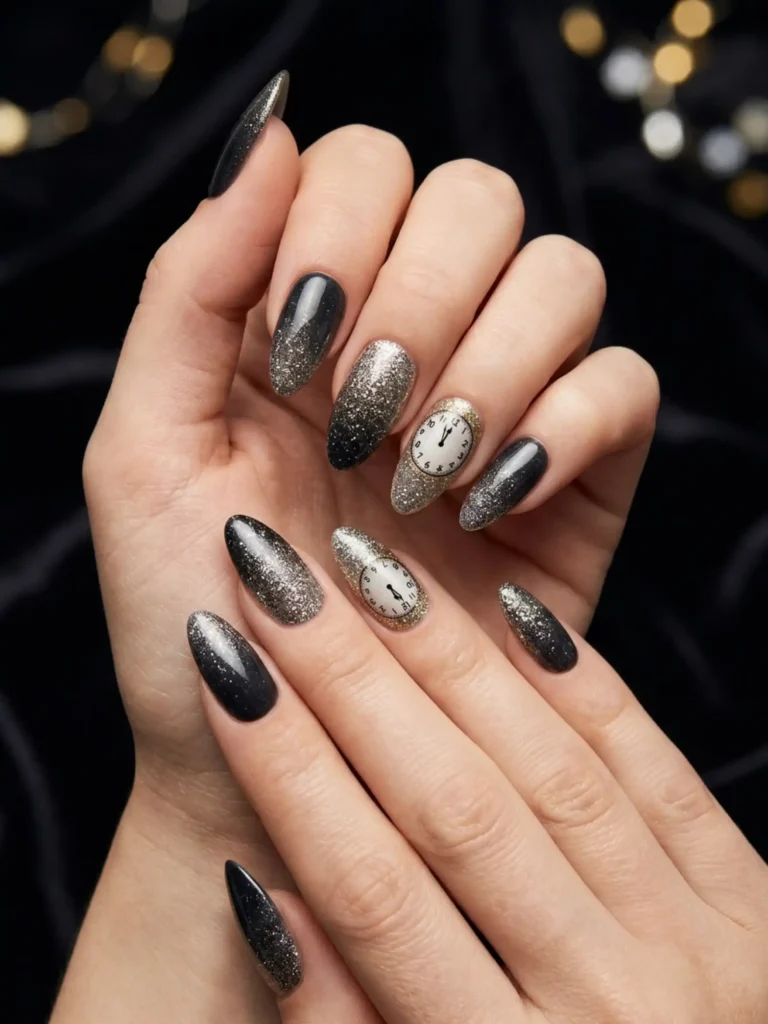
Countdown nails run a dark-to-glitter fade across the hand, ending in one accent nail with a tiny clock face set at midnight.
Best for: birthdays that start at 12:00 a.m. sharp – the design tells the story of the night.
Difficulty: medium.
Tools: deep navy or black polish, fine silver glitter, a detail brush for the clock.
Make the glitter density increase nail by nail toward the clock nail. The progression is the design; even fading across all five loses the countdown effect.
How to Make Your Birthday Manicure Last Through the Party (and the Week After)
- Prep your nails a day early – push back cuticles and buff gently so polish has a clean surface, but skip cutting cuticles right before, in case of redness.
- Dehydrate the nail plate with alcohol or a dehydrator before base coat; oil is the number one reason party manicures chip by cake time.
- Cap the free edge with every layer – base, color, and top coat swiped along the tip seals out water.
- Cure or dry fully between layers. Smudged birthday nails almost always come from rushing the second coat.
- Apply cuticle oil daily after the manicure sets; flexible nails chip less than dry ones.
- Wear gloves for dishes and cleaning in the days before the party – one hot-water session can lift gel edges.
How to Remove Glitter and Chrome Without Wrecking Your Nails
Glitter, chrome, and encapsulated confetti are the stubborn ones. Don’t peel them – peeling takes layers of your actual nail with it, and you’ll feel it for weeks. For regular polish, soak a cotton pad in acetone, press it on the nail, wrap with foil, and wait ten minutes before wiping.
For gel-based designs, file off the shiny top coat first so acetone can penetrate, then do the same foil soak. Anything 3D – frosting texture, encapsulated pieces – should really go back to the salon for an e-file removal.
Whatever you do, follow removal with cuticle oil and a few polish-free days if you can spare them.
Common Mistakes to Avoid with Birthday Nails
- Booking too close to the party. Book two to four days out – fresh enough to be perfect, with a buffer to fix a chipped nail.
- Putting statement art on every nail. Two accent nails per hand photograph better than ten competing designs.
- Ignoring your outfit colors. Screenshot your dress and bring it to the appointment; clashing tones are painfully obvious in photos.
- Choosing length you can’t live with. If you’ve never worn long coffin nails, your birthday week is a rough time to learn.
- Skipping top coat touch-ups. A thin fresh layer of top coat the morning of the party revives shine instantly.