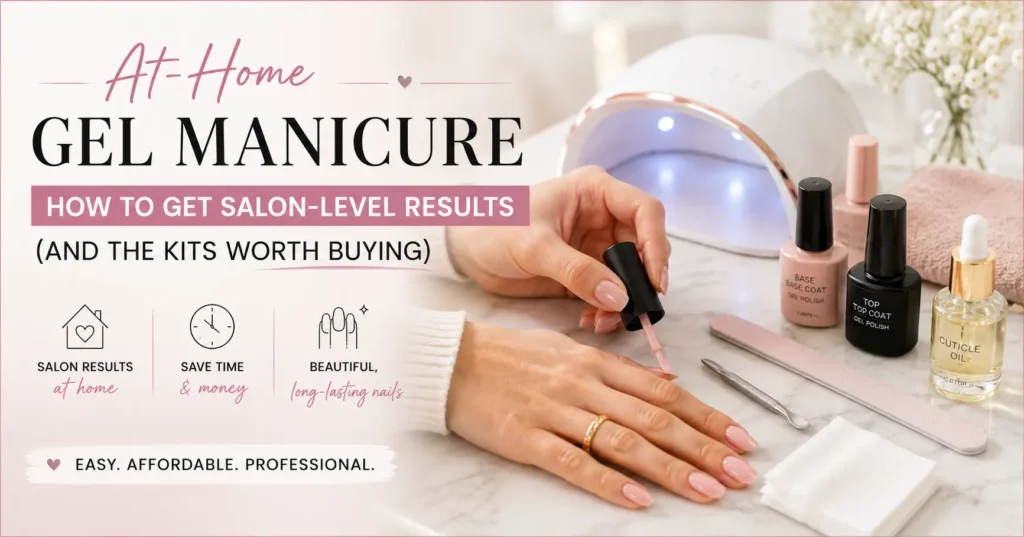
My first at-home gel set lasted four days. I’d bought a kit with eighty pieces in the box, followed the instructions on the back, and watched the whole thing peel off in the shower by Thursday.
The kit wasn’t the problem. I’d skipped two minutes of prep and I hadn’t capped a single free edge.
That’s the pattern with home gels. People blame the polish, buy a more expensive one, and get the same result – because the two things that actually decide how long a gel manicure lasts are your lamp and your prep, and neither of them is the part you’re excited about.
Quick Answer: How Long Should an At-Home Gel Manicure Last?
A well-applied at-home gel manicure typically lasts two to three weeks. If yours is failing in under a week, the cause is almost always one of three things:
- Skipped prep – the nail plate wasn’t buffed and dehydrated, so nothing bonded properly.
- An underpowered or mismatched lamp – layers cured on the surface but stayed soft underneath.
- Uncapped free edges – water crept under the gel from the tip.
Fix those three and the kit you already own will almost certainly perform better than a more expensive one applied carelessly.
What Separates a Good Gel Kit From a Cheap One
The lamp matters more than the polish
No amount of good polish compensates for a lamp that doesn’t cure properly. The lamp decides whether each layer hardens all the way through and bonds to the layer beneath it, or stays slightly soft underneath a hard-looking surface.
Wattage is the number every listing advertises, but on its own it tells you very little. What actually matters is the combination of wattage, wavelength, and whether your polish is formulated for that wavelength. A 48W lamp emitting the wrong wavelength for your polish will under-cure it just as surely as a weak one.
The practical rule: buy the lamp and the polish as a matched system, or buy a dual-wavelength lamp that covers both ranges. Then follow the cure time printed on the polish bottle rather than a generic number from a blog.
Red flag when shopping: a listing that leads with the colour count (“80 pieces!”) and doesn’t state the lamp’s wattage or wavelength anywhere in the specification. If that information isn’t disclosed, assume it isn’t a selling point.
What a complete starter kit should include
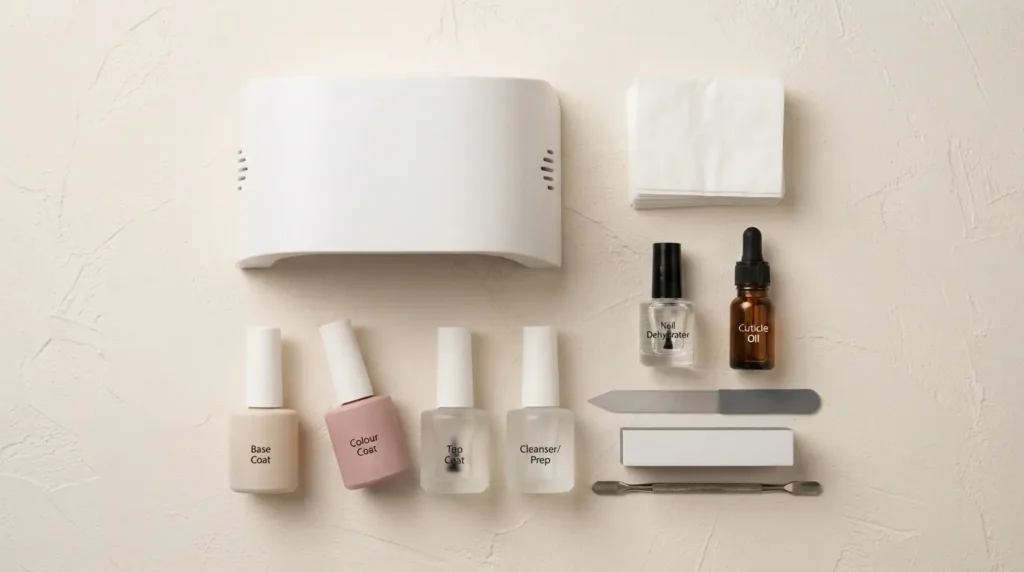
| Component | Why it matters | Often missing from budget kits |
|---|---|---|
| Lamp (LED, UV or dual) | Cures every layer | No — but specs may be vague |
| Base coat | Bonds gel to the nail plate | No |
| Colour gel | The actual polish | No |
| Top coat | Seals and adds gloss | No |
| Nail file + buffer | Shapes and removes surface shine | Sometimes |
| Dehydrator or prep cleanser | The single biggest adhesion factor | Frequently |
| Lint-free wipes | Removes the tacky layer without leaving fibres | Frequently |
| Cuticle pusher | Clears the cuticle line so gel doesn’t lift | Sometimes |
The two bolded rows are the tell. Prep products and lint-free wipes are cheap to include and enormously important, so a brand that leaves them out is optimising for the headline price rather than your result. Cotton balls in place of lint-free wipes leave fibres in the surface that dull the finish on day one.
Soak-off gel vs. hard gel
Almost every at-home kit uses soak-off gel polish: flexible, bonds well to the natural nail, and dissolves in acetone when you’re done with it. That’s what you want.
Hard gel is stronger and used for extensions, but it doesn’t dissolve – it has to be filed off entirely. Filing gel off a natural nail without taking the nail plate with it is a genuine skill, and it isn’t one worth learning on yourself. Check the label says “soak-off” before you buy.
LED vs. UV Lamps: Which One You Actually Need
Speed and lifespan
| LED lamp | UV lamp | |
|---|---|---|
| Cure time per coat | 30–60 seconds | 2–3 minutes |
| Full manicure time | Roughly 10 min faster | Slower |
| Bulb life | Diodes last years | Bulbs dim and need replacing |
| Heat during cure | Lower | Higher |
| Upfront cost | Higher | Lower |
| Formula compatibility | LED-compatible and dual-cure only | Broader, including older UV-only gels |
Across a base coat, two colour coats and a top coat, LED saves roughly ten minutes per manicure. It also avoids most of the sharp “heat spike” sensation some people feel mid-cure, because LED runs cooler.
Compatibility is the part people get wrong
LED lamps are not universal. They cure LED-compatible and dual-cure formulas only. Put a traditional UV-only gel under an LED lamp and it will look cured while remaining soft underneath – which is both a durability problem and, as the safety section below explains, a skin problem.
UV lamps cure a wider range of formulas, including older salon lines. That flexibility is their main advantage.
If you plan to buy polishes from multiple brands, a dual-wavelength lamp covering roughly 365nm and 405nm is the setup that removes the guesswork. If you plan to stay within one brand’s system, buy that brand’s lamp and stop thinking about it.
So which should you buy?
- Buy LED if you’ll do your nails regularly, value speed, and are happy staying within one brand’s polish ecosystem.
- Buy UV if you’re cost-conscious upfront and want to experiment across brands.
- Buy dual-wavelength if you already own polishes from different brands, or expect to.
Pick your lamp strategy first. Choose polish to match it second. Doing it the other way around is how people end up with a drawer of bottles that don’t cure.
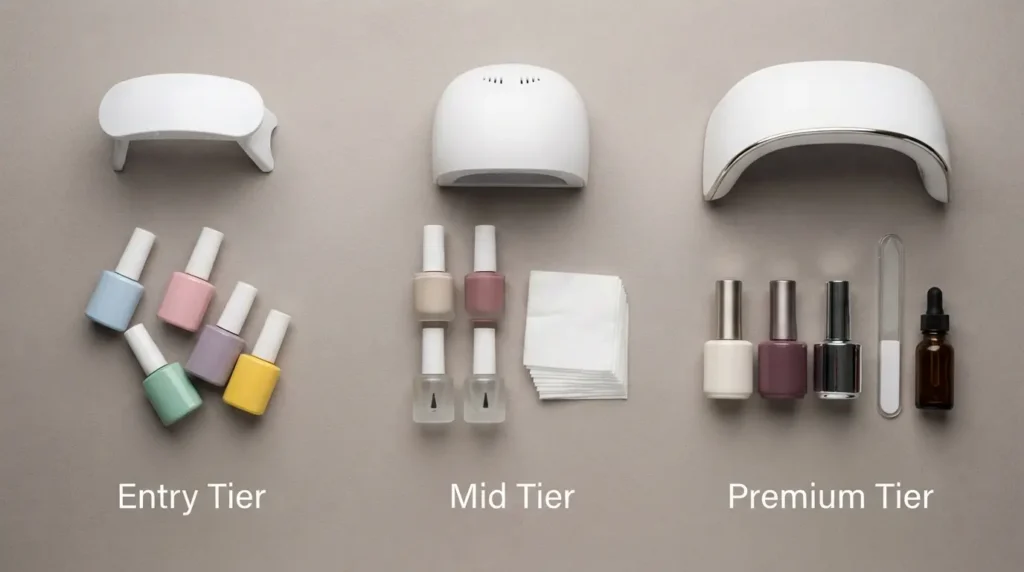
Gel Kits by Budget: What Each Tier Actually Gets You
Prices shift constantly and vary by retailer and region, so treat these as bands rather than fixed figures – check current pricing before you buy.
Entry level (roughly under $25)
Brands like Beetles and modelones dominate this tier, usually bundling a dual UV/LED lamp with several colours, base and top coat, and basic tools.
What you get: a genuinely functional system and a lot of colour variety for the money. The honest trade-off: lamps at this price are often lower-powered, and prep products are the first thing cut. That means your technique has to be better, not worse, than it would be with a pricier kit. Follow every prep step and never shorten a cure time. Best for: finding out whether you enjoy doing gels at all before spending more.
Mid range (roughly $25–$60)
This is where most people should land. Le Mini Macaron is built around simplicity and is the most forgiving system for a genuine first-timer. OPI and Gelish bring professional-line formulas into home kits at accessible prices, with lamps and polishes designed together.
What you get: properly matched lamp-and-polish systems, better pigment load (fewer coats needed), and more consistent curing. Best for: anyone who already knows they’ll do this monthly or more.
Premium (roughly $60 and up)
Olive & June builds an all-in-one system where every component is designed to work together, which removes compatibility research entirely. Manucurist sits at the top of the range and positions itself around cleaner formulation alongside a higher-powered lamp.
What you get: better lamps, better formulas, and less troubleshooting.
Best for: weekly users, and anyone who cares specifically about ingredient transparency.
On cost: a salon gel manicure typically runs $35–$65 plus tip. Even a premium home system pays for itself within a few sets – but only if you actually use it. Buy the tier that matches how often you’ll realistically sit down and do this.
Step-by-Step: The Application Method
Prep – the part that decides everything
- Wash and dry your hands completely. Any residual moisture or skin oil undermines adhesion before the first layer goes on.
- Push back the cuticles and clear the cuticle line. Gel that touches skin lifts within days — and, as below, is the main route to a gel allergy.
- Shape the free edge with a file, working in one direction.
- Lightly buff the nail surface to remove the natural shine. You’re creating microscopic texture for the base coat to grip, not thinning the nail. A few light passes is enough.
- Wipe each nail with a dehydrator or isopropyl alcohol on a lint-free wipe, and don’t touch the nail afterwards.
This takes four minutes and is the difference between a manicure that lasts five days and one that lasts three weeks. It is also the step almost everyone rushes.
Base coat, colour and curing
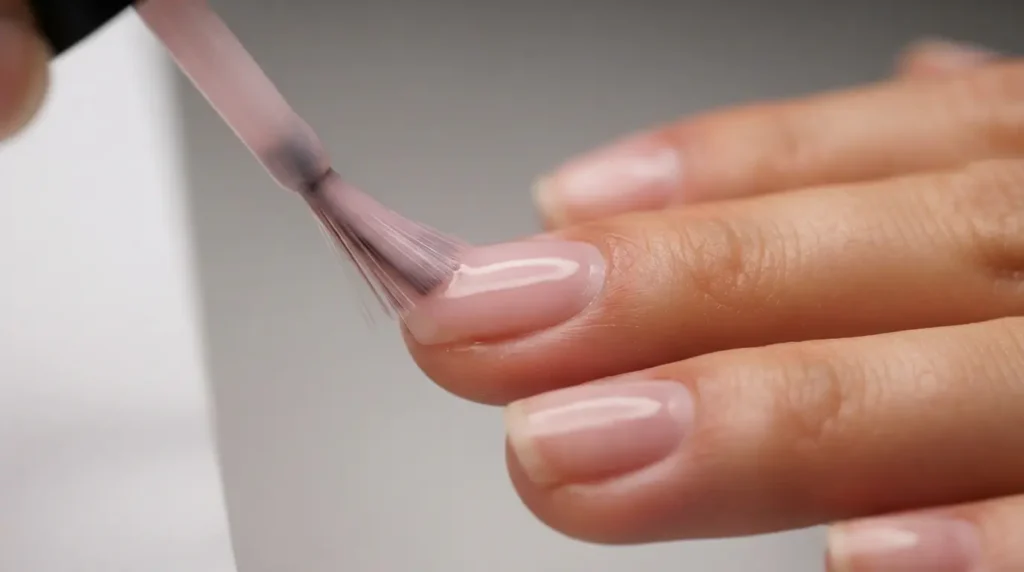
Apply a thin base coat, keeping it clear of the skin and cuticle by a hair’s width. Cap the free edge – drag the brush lightly across the very tip of the nail. Cure for the time on the bottle.
Apply the first colour coat thinly, cap the edge, cure. Then a second thin coat, cap, cure. If it’s still sheer, do a third thin coat rather than one thick one.
Thick layers are the second-most-common failure after bad prep. They wrinkle, they lift, and critically they don’t cure all the way through — the surface hardens and traps uncured product underneath.
Cure times: LED is usually 30–60 seconds per layer, UV usually 60–120 seconds. Always follow the bottle over any general range, and never shorten a cure to save time.
Top coat and finish
Apply a thin top coat, cap the free edge again, and cure fully. If your top coat leaves a tacky inhibition layer, wipe it off with a lint-free pad and isopropyl alcohol.
Finish with cuticle oil on the skin around each nail. It won’t affect the cured gel, and it stops the dry, tight-looking cuticle line that makes an otherwise good manicure look homemade.
Protecting Your Skin Under the Lamp
Both UV and LED nail lamps emit ultraviolet light, mostly UVA. This is the part most kit guides skip entirely, and it shouldn’t be.
The current consensus among dermatologists is that the risk from nail lamps is low but not zero, and that it scales with how often you cure. Someone doing gels twice a year is in a very different position from someone curing every week. Laboratory research has shown DNA damage in isolated cells after prolonged exposure, which is why professional bodies including the Skin Cancer Foundation recommend precautions rather than dismissing the question.
What to actually do – it takes fifteen seconds:
- Apply a broad-spectrum SPF 30+ to the backs of your hands about 15–20 minutes before you start curing. Keep it off the nail plate itself.
- Or wear fingerless UV-protective manicure gloves, which expose only the nails and are the more reliable option for frequent users.
- Prefer LED over UV where you have the choice – shorter cure times mean less total exposure.
- Don’t linger. Take your hands out as soon as the cure finishes rather than leaving them under the lamp while you tidy up.
None of this is a reason to avoid gels. It’s a reason to spend fifteen seconds on sunscreen, the same way you would before an hour outside.
Gel Allergy: The Risk Home Users Face Most
This is the other omission in most at-home gel content, and it matters more for DIY than salon users.
Gel polishes contain acrylates – most commonly HEMA (2-hydroxyethyl methacrylate). When gel is fully cured, these chemicals lock into a stable solid and are inert. The problem is uncured product touching skin: either gel that flooded the cuticle during application, or a layer that never cured properly because the lamp was underpowered or the cure was cut short.
Repeated exposure can sensitise you, and acrylate sensitisation is permanent. Dermatology bodies including the British Association of Dermatologists have specifically flagged at-home kits as a growing source of cases, because home users are more likely to get product on skin and more likely to under-cure.
Signs worth taking seriously: itching, redness or small blisters around the cuticles and fingertips, peeling skin at the nail folds, or the nail plate loosening. Reactions typically appear 24–72 hours after application, not immediately.
How to reduce the risk:
- Keep gel off your skin, full stop. Leave a visible hairline margin at the cuticle and sidewalls. Clean up any flooding with an orangewood stick before curing.
- Never shorten a cure time, and replace UV bulbs when they dim.
- Use a lamp matched to your polish, for the compatibility reasons above.
- Don’t file or pick at under-cured product, which spreads it onto skin.
- Consider HEMA-free or low-HEMA formulas if you have sensitive skin or a history of contact dermatitis. They exist across several brands now.
- Stop using the product and see a doctor if you develop symptoms. Pushing through a reaction makes it worse, and a dermatologist can patch test for acrylates specifically.
This isn’t a scare section. Most people wear gels for years with no issue. But it’s genuinely the risk worth knowing about, and it’s almost entirely preventable with technique.
How to Remove Gel Polish Without Damaging Your Nails
The damage people blame on gel manicures overwhelmingly comes from removal, not wear.
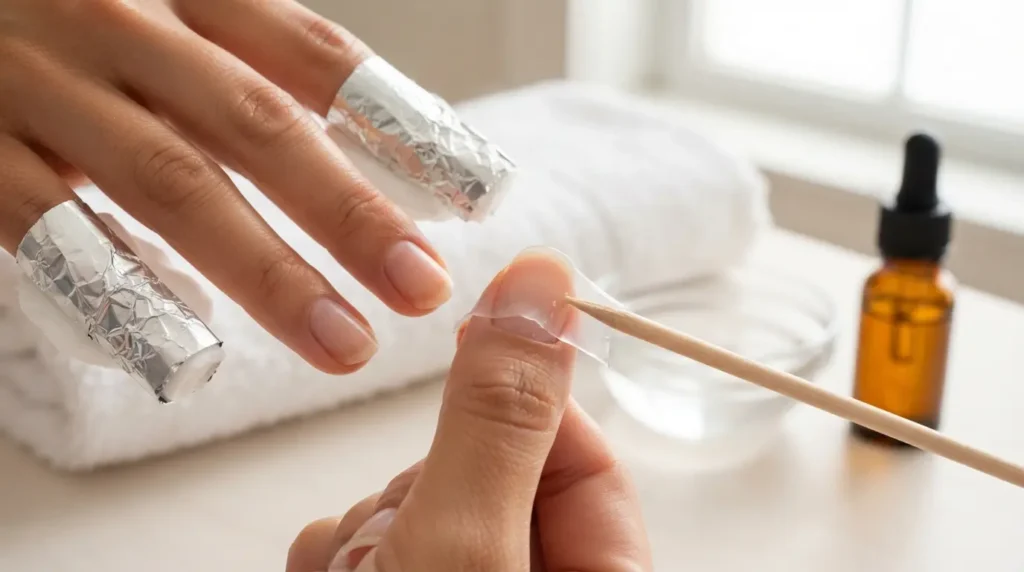
The soak-off foil method
- Break the seal. Lightly file across the shiny top coat on every nail until the surface goes matte. You’re breaking the seal, not filing down to the nail plate.
- Protect the skin. A thin layer of petroleum jelly on the skin around each nail limits acetone drying.
- Soak and wrap. Saturate a small cotton pad in pure acetone, press it onto the nail, and wrap the fingertip in a small square of foil.
- Wait 10–15 minutes. Then unwrap one nail and check.
- Nudge, don’t scrape. The gel should look lifted and soft. Ease it off with an orangewood stick. If it resists, re-wrap for another five minutes.
- Rehydrate immediately. Wash your hands, then apply cuticle oil and a rich hand cream.
The single rule: if it doesn’t come off easily, it isn’t ready. Forcing it takes layers of nail plate with it, and that damage shows in every manicure you do afterwards.
How to Push Wear Time From One Week to Three
- Cap the free edge on every single layer. Base, colour, top. No exceptions. This is the highest-return habit on the list.
- Keep every layer thin. Three thin coats beat two thick ones every time.
- Avoid long soaks for the first 24 hours. The gel is cured but the bond is still settling; prolonged hot water is what starts edge lifting.
- Wear gloves for washing up and cleaning. Detergent and hot water together are the main cause of mid-set lifting.
- Oil your cuticles daily. Hydrated nails flex instead of cracking at the gel-to-nail bond.
- Don’t use your nails as tools. Opening cans and scraping labels puts force exactly where the gel meets the free edge.
Common Mistakes to Avoid
- Skipping the dehydrator. The most common cause of week-one lifting, and the cheapest to fix.
- Flooding the cuticle. Causes lifting and is the main route to acrylate sensitisation. Leave a visible margin.
- Guessing cure times. Under-curing leaves soft product under a hard surface. Follow the bottle.
- Buying polish that doesn’t match your lamp. Check LED-compatible, UV, or dual-cure before adding to cart.
- Using cotton balls instead of lint-free wipes. Fibres embed in the tacky layer and dull the finish permanently.
- Filing aggressively during prep. You want the shine gone, not the nail thinned.
- Peeling or scraping at removal. The single most damaging thing you can do to your nails.
- Attempting complex art on your first set. Get a clean single colour to last three weeks first. Layered designs multiply every error.
DIY vs. Salon: The Real Comparison
| Salon gel manicure | At-home gel manicure | |
|---|---|---|
| Cost per set | $35–$65 plus tip | Under $3 in product once you own the kit |
| Upfront cost | None | $20–$135 depending on tier |
| Time | 45–75 min including travel | 30–45 min at home |
| First-attempt result | Consistently good | Usually imperfect; improves quickly |
| Break-even | — | Typically 1–3 sets |
| Control over technique | Depends on the tech | Entirely yours |
The financial case for home gels is strong. The realistic case depends on whether you’ll do the prep properly – a rushed home set costs less than a salon visit but also lasts a fraction as long.