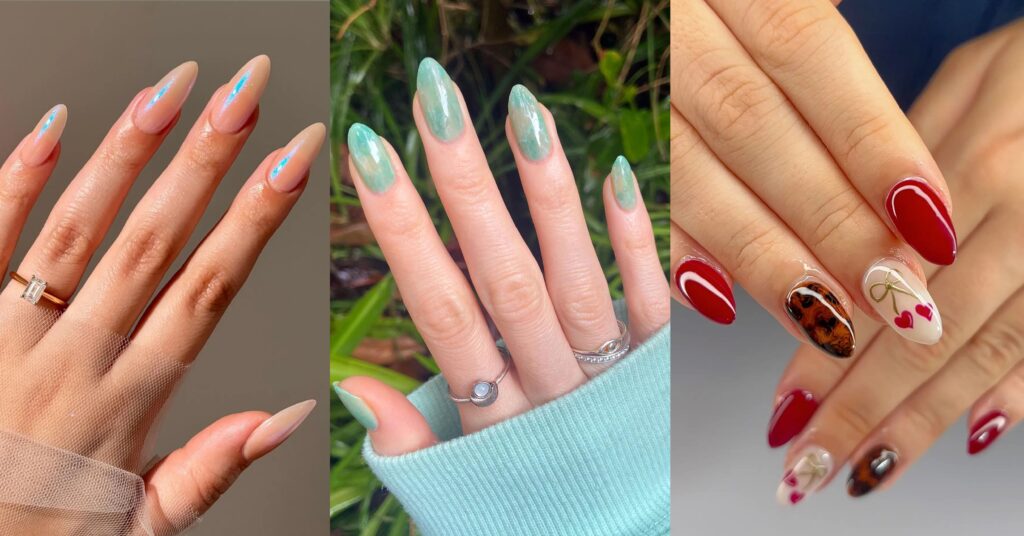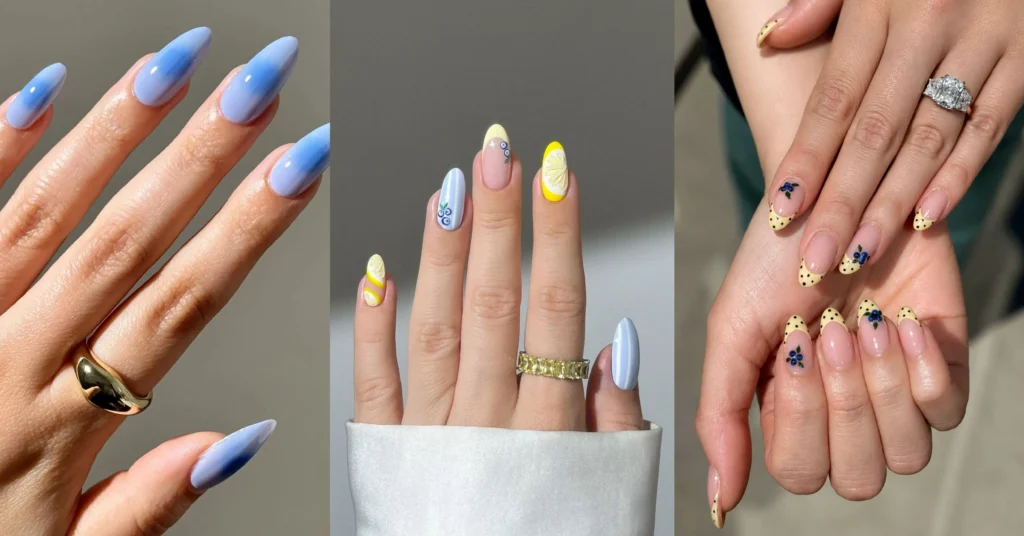
The first time I tried a “beachy” manicure, I picked the brightest turquoise on the shelf and ended up with nails that looked like a swimming pool tile. Pretty, sure. Beachy? Not even close.
What I eventually figured out is that surfside nails aren’t about one loud blue. They’re about the whole shoreline – the wet sand, the foam, the way the water goes pale in the shallows and deep near the break. Once you start thinking in those layers instead of one color, the whole look clicks.
Below are twelve surfside nail ideas, from a five-minute sandy neutral you can do on a weeknight to a chrome finish that stops people mid-conversation. Each one lists who it suits, how tricky it actually is, and what you’ll need. Skip around – you don’t have to read them in order.
What Are Surfside Nails?
Surfside nails are ocean-inspired manicures built from the colors and textures of a coastline: sandy beiges, seafoam greens, milky whites, tidal blues, and finishes that mimic wet sand, sea glass, or foam.
What separates them from generic “blue nails” is the sense of place. A surfside set usually mixes at least two shoreline elements – a sand tone with a water tone, or a translucent base with a foam-white detail. That contrast is what reads as beach rather than just blue.
They also lean soft. Most surf-inspired sets use sheer, jelly, or milky formulas rather than flat opaque polish, because real water is translucent and light passes through it. Keeping that translucency is the single biggest thing that makes a set look expensive instead of costume-y.
1. Sandy Beige Ombré Nails
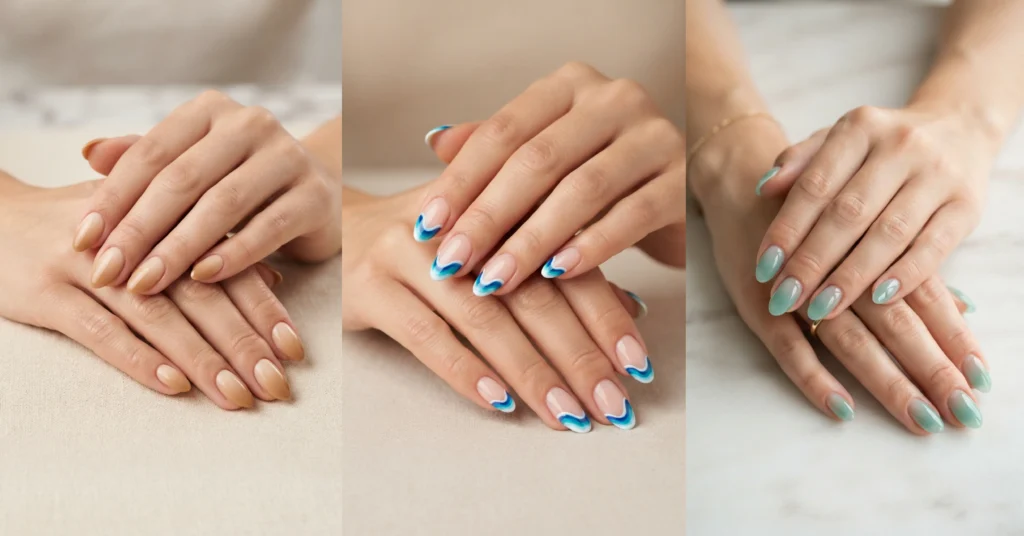
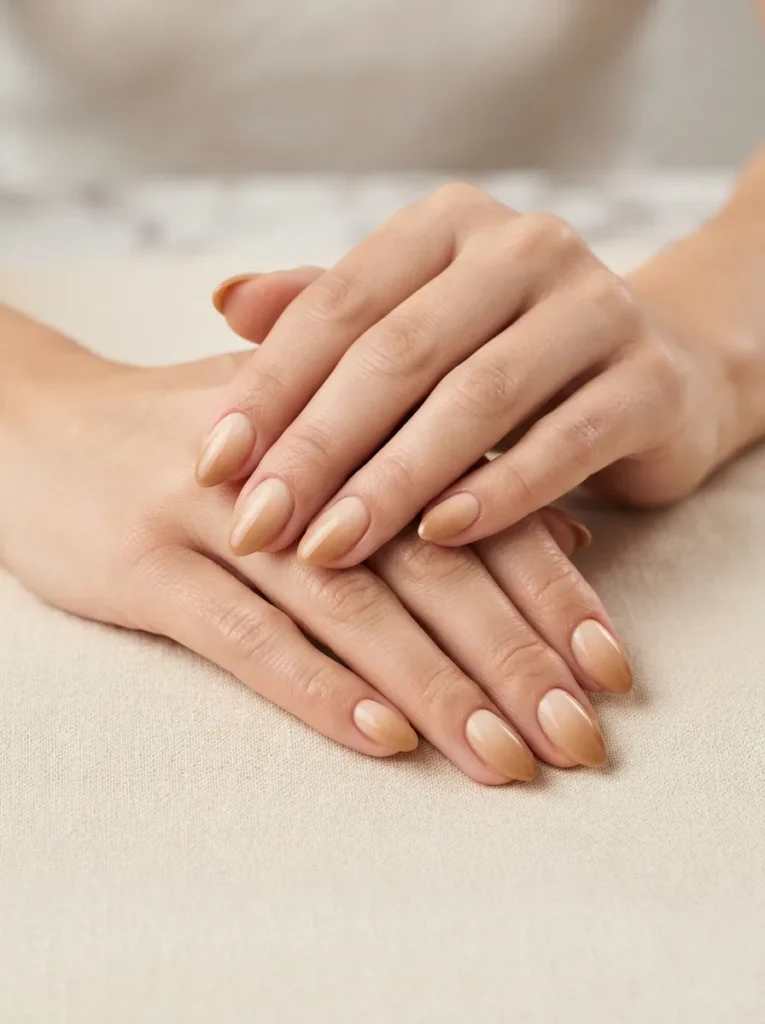
Sandy beige ombré is a soft gradient that fades from a pale, warm sand color at the cuticle to a slightly deeper tan at the free edge, imitating dry sand meeting wet sand.
Best for: short nails, work environments, and anyone who wants beachy without color.
Difficulty: easy.
Tools: two beige polishes one to two shades apart, a makeup sponge, a glossy top coat.
The mistake most people make is choosing beiges that are too far apart, which gives you a visible stripe instead of a fade. Pick shades that look almost identical in the bottle – the difference always shows up more on the nail than you expect. Dab the sponge in light layers and let each one dry slightly before the next.
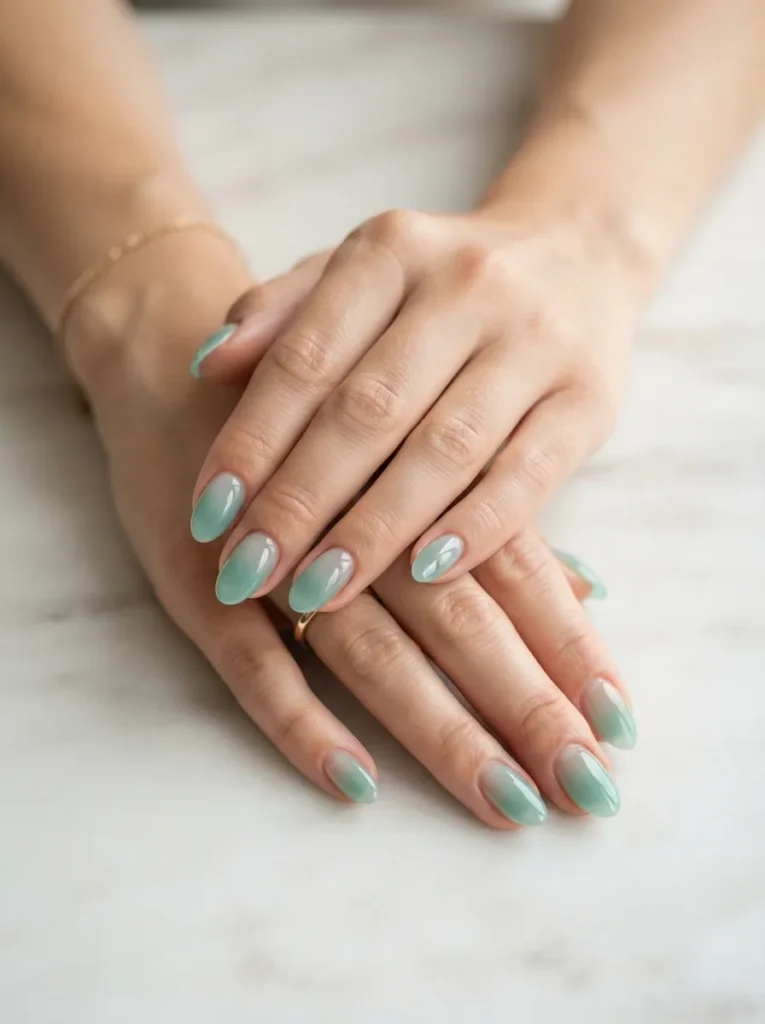
2. Seafoam Green Jelly Nails
Seafoam jelly nails use a sheer, pale green-blue base applied in thin translucent layers so light passes through, like shallow water over pale sand.
Best for: medium-length nails and summer trips.
Difficulty: easy.
Tools: a jelly-finish seafoam polish, a glossy top coat, no base color.
Resist the urge to build it to full opacity. Two thin coats is usually the sweet spot – a third turns it flat and kills the glow. If your natural nail has staining or ridges, a single sheer milky base coat underneath evens things out without blocking the light.
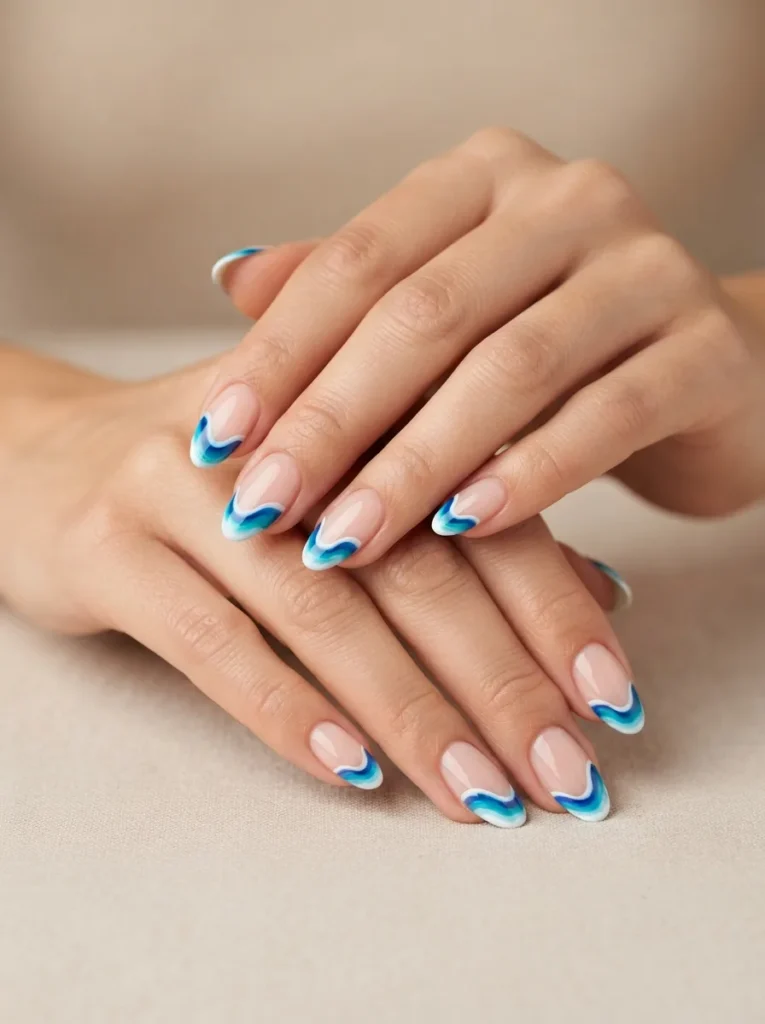
3. Ocean Wave French Tips Nails
Ocean wave French tips replace the straight smile line of a classic French manicure with a curved, wavy edge in blue or teal, so the tip looks like a small breaking wave.
Best for: medium to long nails with enough length to show the curve.
Difficulty: medium.
Tools: a nude or milky base, a thin striping brush, a blue-teal polish, top coat.
Draw the wave in one continuous motion rather than short strokes – hesitation marks are what make hand-painted lines look shaky. If your hand isn’t steady, curved French tip guide stickers exist and nobody will ever know. Seal with a slightly thicker top coat to smooth the ridge where the two colors meet.
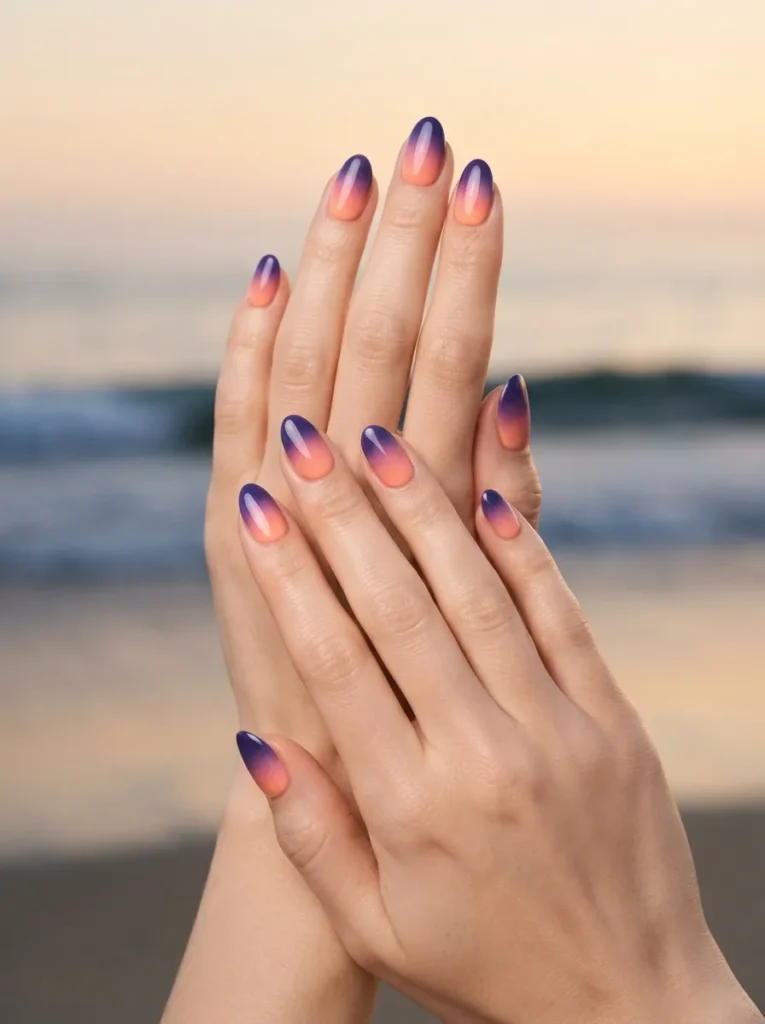
4. Sunset Surf Gradient Nails
A sunset surf gradient blends warm peach and coral at the base into a deep blue or violet at the tip, recreating the color band of the sky right after the sun drops behind the water.
Best for: longer nails and evening or vacation looks.
Difficulty: medium.
Tools: three polishes (peach, coral, deep blue), a makeup sponge, a white base, top coat.
Always lay a white or very pale base first. Gradients over bare nails go muddy because each color mixes with the one underneath instead of sitting on it. Work in five or six light sponge passes rather than two heavy ones – patience here is genuinely the whole technique.
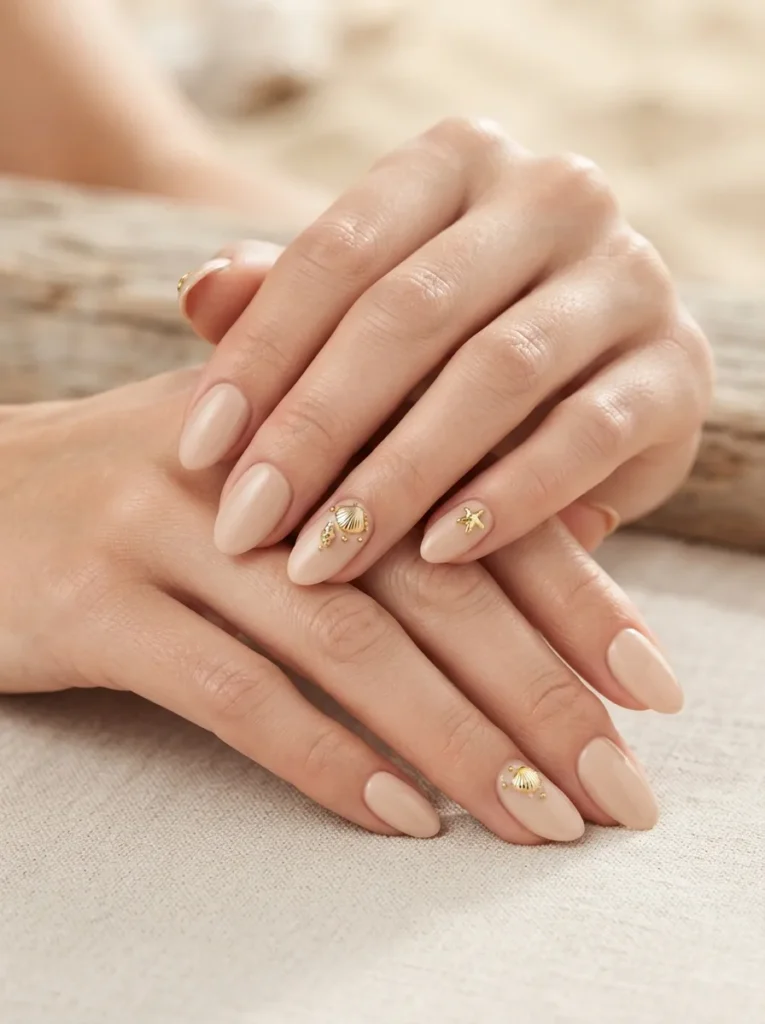
5. Tiny Shell Charm Accent Nails
Shell charm accent nails place one or two small 3D charms – a shell, a starfish, a pearl – on a single nail, usually the ring finger, over a plain beach-toned base.
Best for: anyone who wants a statement without doing artwork on all ten nails.
Difficulty: easy, if you use gel; harder with regular polish.
Tools: small nail charms, gel top coat and a UV/LED lamp (or nail glue), tweezers.
Charms need gel to actually stay on. Stuck down with regular polish, they’ll catch on a sleeve and vanish within a day. Place them toward the center or base of the nail rather than the free edge, where they take the most impact.
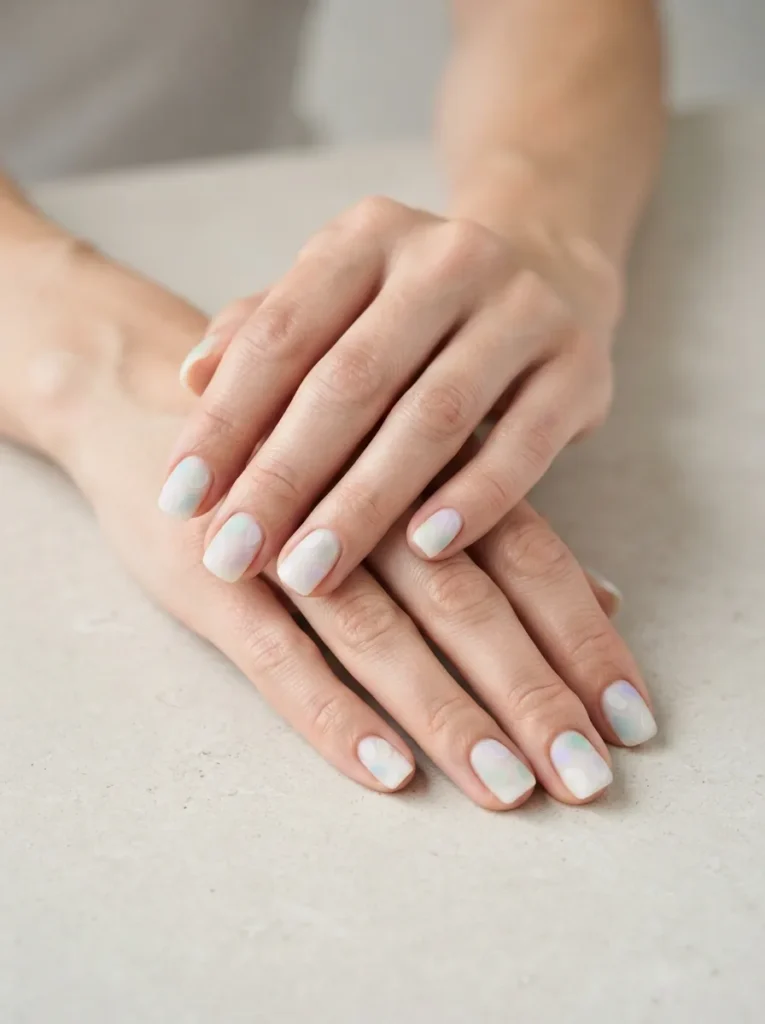
6. Milky White Sea Glass Nails
Milky sea glass nails combine a semi-sheer white base with faint pastel patches – mint, pale blue, soft lilac – that look like tumbled glass washed up on the shore.
Best for: short and medium nails; extremely flattering on most skin tones.
Difficulty: medium.
Tools: a milky white polish, two or three sheer pastel polishes, a small sponge or brush, matte or glossy top coat.
Keep the pastel patches soft-edged and irregular. Anything with a crisp border stops looking like sea glass and starts looking like a mistake. A matte top coat over this one is worth trying – it mimics the frosted texture of real beach glass better than gloss does.
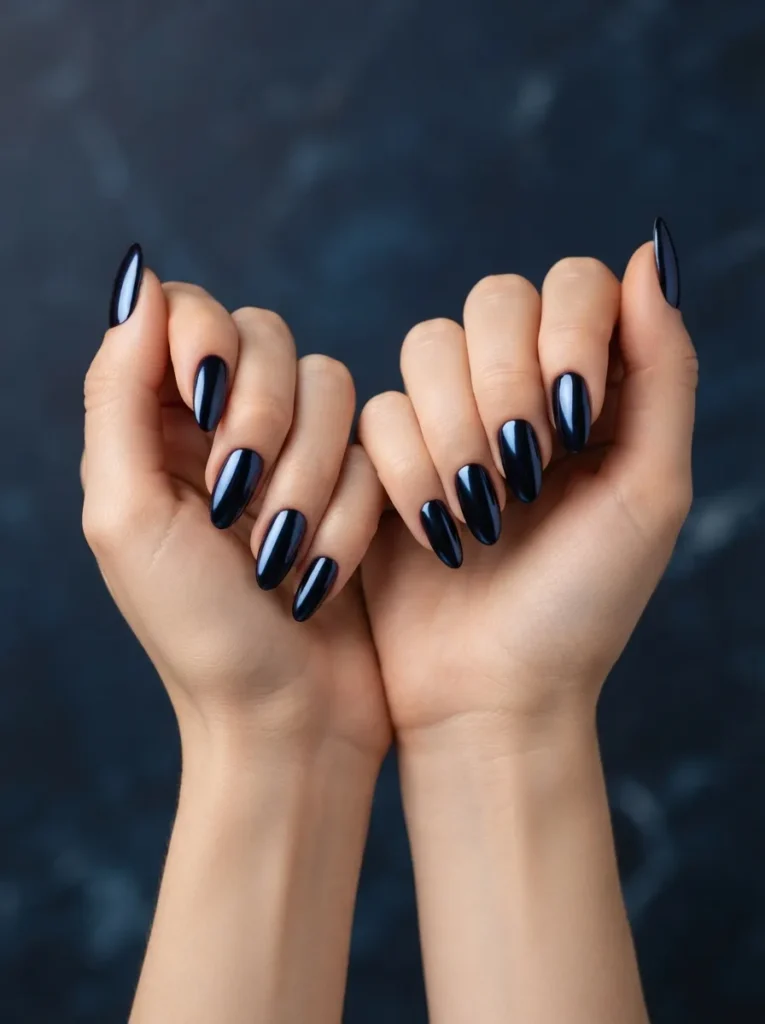
7. Deep Tide Navy Chrome Nails
Deep tide navy chrome is a dark blue base finished with chrome or mirror powder, giving a reflective surface like the ocean at night.
Best for: short nails, autumn beach trips, and anyone tired of pastels.
Difficulty: medium – chrome powder requires gel.
Tools: navy gel polish, chrome or mirror powder, a no-wipe gel top coat, a silicone applicator, a UV/LED lamp.
Chrome powder only bonds to a no-wipe top coat, cured and not cleansed. If you wipe the tacky layer off first, the powder won’t stick and you’ll waste a lot of it learning that. Rub it in with firm, small circles until the surface goes glassy, then seal with one more top coat.
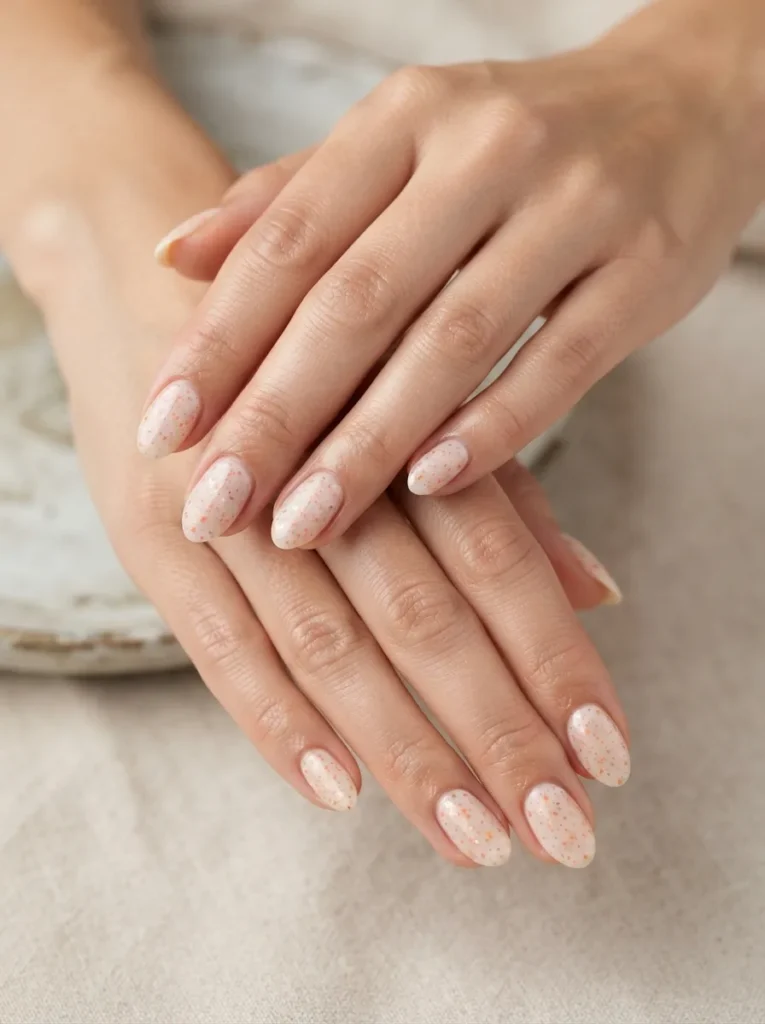
8. Coral Reef Speckle Nails
Coral reef speckle nails scatter fine flecks of coral, orange, and cream across a pale base, imitating the mottled surface of reef rock and crushed shell.
Best for: short nails and low-maintenance wear – speckle hides growth beautifully.
Difficulty: easy.
Tools: a cream or pale blue base, two or three polishes for speckling, an old toothbrush or a thin brush, top coat.
Flick the speckles from a distance and do it over a sink or newspaper, because it goes everywhere. Fewer, smaller flecks look more natural than dense spatter. Two coats of top coat will bury the texture so it feels smooth instead of gritty.
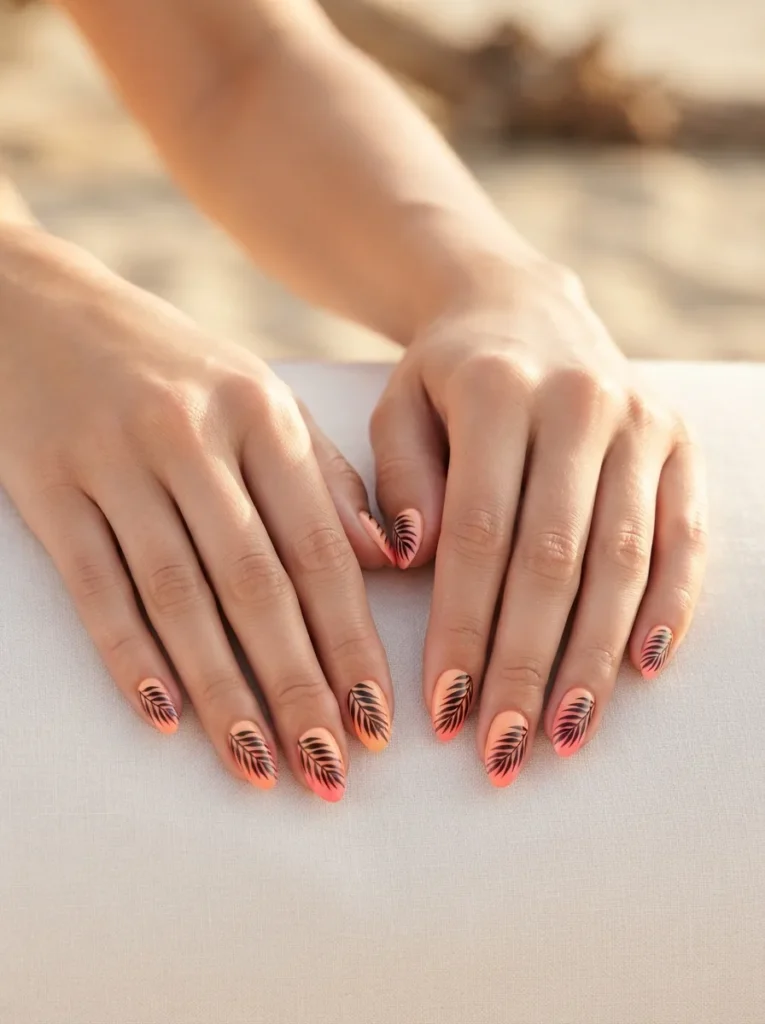
9. Palm Shadow Silhouettes Nails
Palm shadow nails paint a thin black or deep-brown palm frond silhouette across a warm gradient base, like a tree throwing shade against a bright sky.
Best for: long or medium nails, and holiday sets.
Difficulty: hard.
Tools: a warm peach or gold base, a fine detail brush, black or espresso polish, top coat.
Paint the trunk first as a slightly curved line, then add fronds outward from the top in quick, tapering flicks. Real palm leaves aren’t symmetrical, so don’t aim for even – uneven actually reads more realistic. Do this on one or two accent nails; ten palm trees is a lot.
10. Surfboard Stripe Nails
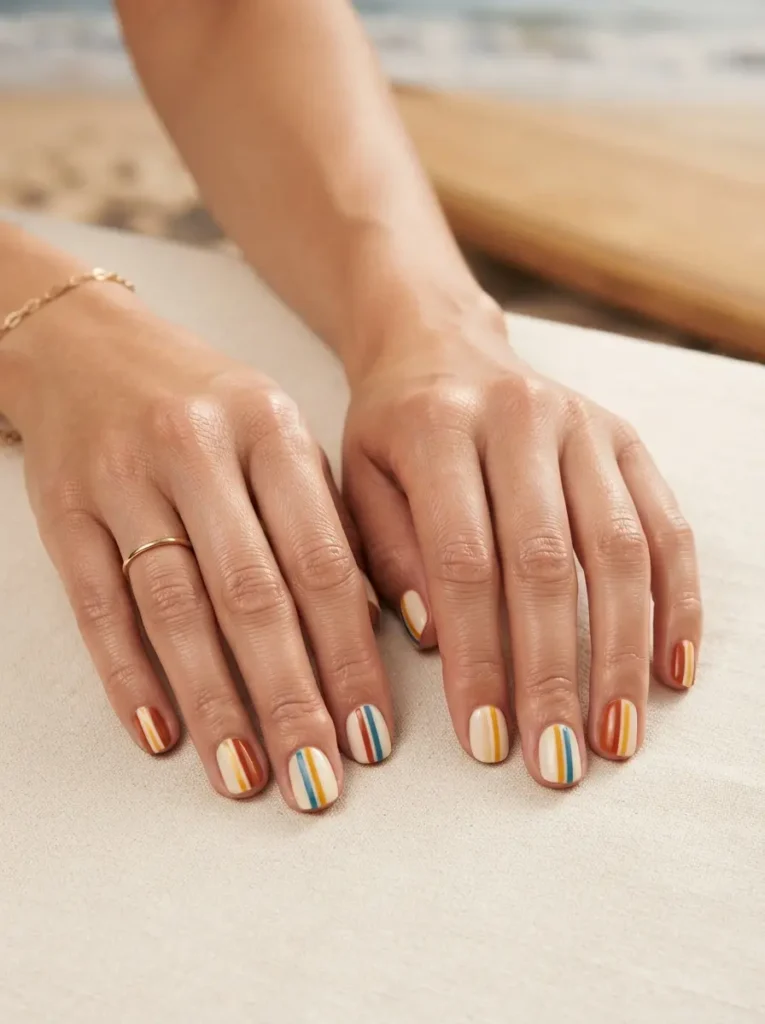
Surfboard stripe nails run two or three clean parallel stripes down the nail in retro surf colors – cream, mustard, rust, ocean blue – echoing a classic longboard.
Best for: medium nails and anyone who likes a graphic, non-floral look.
Difficulty: medium.
Tools: a cream base, striping tape or a striping brush, two accent polishes, top coat.
Striping tape is the shortcut here, but pull it off while the polish is still slightly wet, not fully dry, or it lifts the color with it. Uneven stripe widths look intentional and retro; wobbly edges just look rushed. Cap the free edge to stop the stripes chipping at the tip.
11. Wet Sand Matte with Gold Fleck Nails
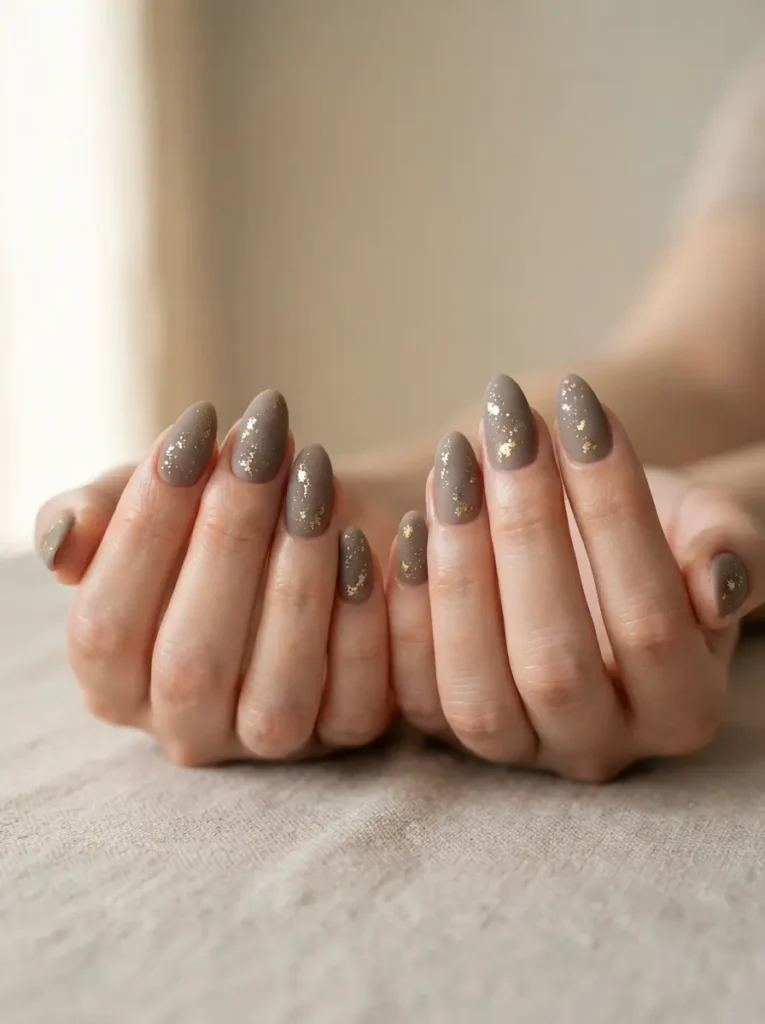
Wet sand nails use a greige-taupe base finished matte, with a scattering of gold flakes to catch light like mica in damp sand.
Best for: short nails and anyone who wants texture over color.
Difficulty: easy.
Tools: a taupe or greige polish, gold flake polish or loose flakes, tweezers, matte top coat.
Place the flakes deliberately rather than shaking them on – three or four per nail, clustered slightly toward the base, looks far more intentional than a full sprinkle. Matte top coat is what sells this one; in gloss, it just reads as brown polish with glitter.
12. Aqua Aura Chrome Nails
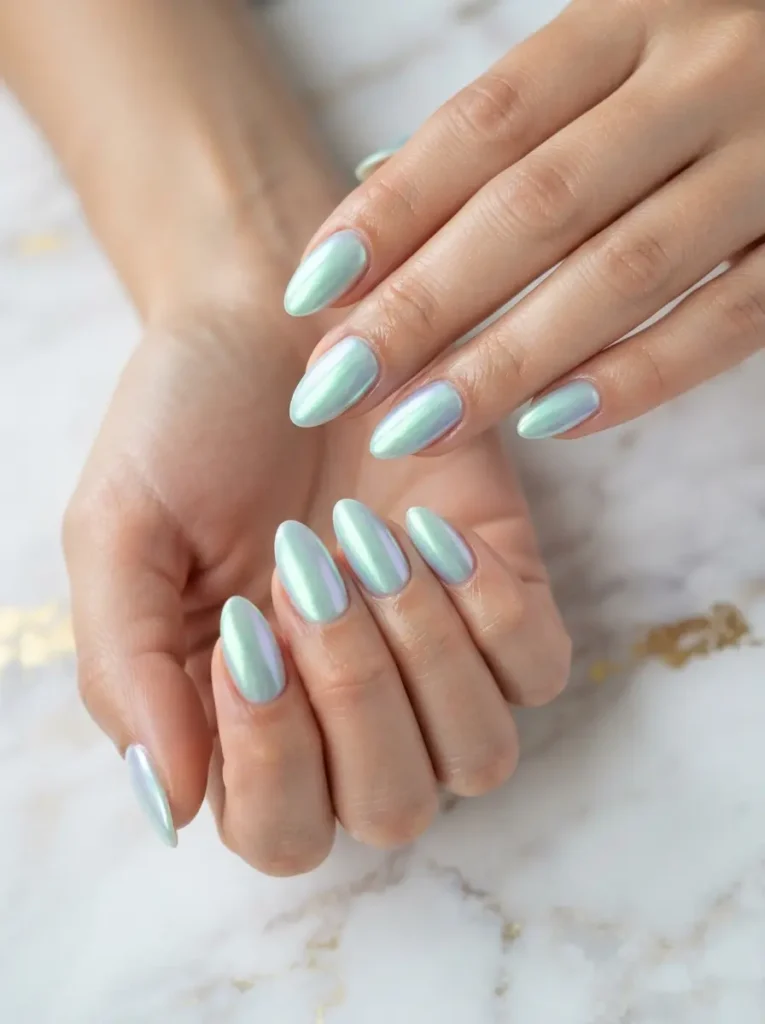
Aqua aura chrome is a pearly blue-green shift finish over a milky base that moves between mint, aqua, and lilac as your hand turns, like sunlight refracting on shallow water.
Best for: short and medium nails; genuinely eye-catching in photos.
Difficulty: medium – needs gel and a lamp.
Tools: a milky white or pale blue gel base, aurora or mermaid chrome powder, no-wipe gel top coat, applicator, UV/LED lamp.
The base color underneath completely changes the result: over white it goes soft and iridescent, over pale blue it goes cooler and more metallic. Test one nail before committing to all ten. Build the powder thinly – over-applying flattens the color shift into a plain silver.
How to Make Surfside Nails Last Longer
A good beach manicure lives a hard life – salt water, sunscreen, sand. This routine is what actually extends it.
- Prep dry. Push back cuticles, lightly buff the surface, and wipe with alcohol or a lint-free pad. Polish grips a clean, dry, slightly matte nail far better than a freshly moisturized one.
- Skip cuticle oil until the end. Oil before painting is the most common reason manicures peel off in two days.
- Apply thin coats. Two or three thin layers cure and dry harder than one thick layer, which stays soft underneath and dents.
- Cap the free edge every single time. Run the brush along the tip of the nail with each coat, including top coat. This one habit prevents most chipping.
- Re-top-coat every three days. A fresh layer of top coat restores shine and adds a new protective surface — this alone can add a week.
- Wear gloves for dishes, and rinse after swimming. Hot water and chlorine both break down polish faster than anything you’ll do with your hands.
How to Remove Surfside Nails Without Wrecking Your Nails
How you remove them depends on what you used. Regular polish comes off with acetone or an acetone-free remover and a cotton pad – nothing complicated, though dark blues and chromes will stain a bare nail, so a base coat underneath is worth the extra minute.
Gel and chrome sets are where damage usually happens. Never peel them. Peeling takes layers of your natural nail with it, and it takes months to grow back out. Instead, buff off the shiny top layer, soak a cotton pad in pure acetone, press it to the nail, wrap in foil, and wait ten to fifteen minutes. The gel should lift and scrape away with gentle pressure from a wooden stick. If it resists, re-wrap for five more minutes rather than forcing it.
After any removal, wash your hands, apply cuticle oil, and give the nail a night off before repainting. Dehydrated nails are the reason people think polish “ruined” their nails when removal technique was the real culprit.
Common Mistakes to Avoid with Surfside Nails
- Going too opaque. Beach colors depend on translucency. Building a jelly or milky shade to full coverage flattens it into ordinary polish.
- Picking one blue and calling it beachy. A single flat turquoise reads as pool, not ocean. Pair a water tone with a sand or foam tone.
- Skipping base coat under blues and greens. Deep marine shades stain badly, and yellowed nails will undermine your next three manicures.
- Adding charms with regular polish. They won’t survive the day. Charms need gel and a lamp.
- Doing artwork on all ten nails. Palm fronds, waves, and shells land harder on one or two accent nails than repeated ten times.
- Painting over freshly oiled or lotioned hands. It’s the fastest way to guarantee peeling.