
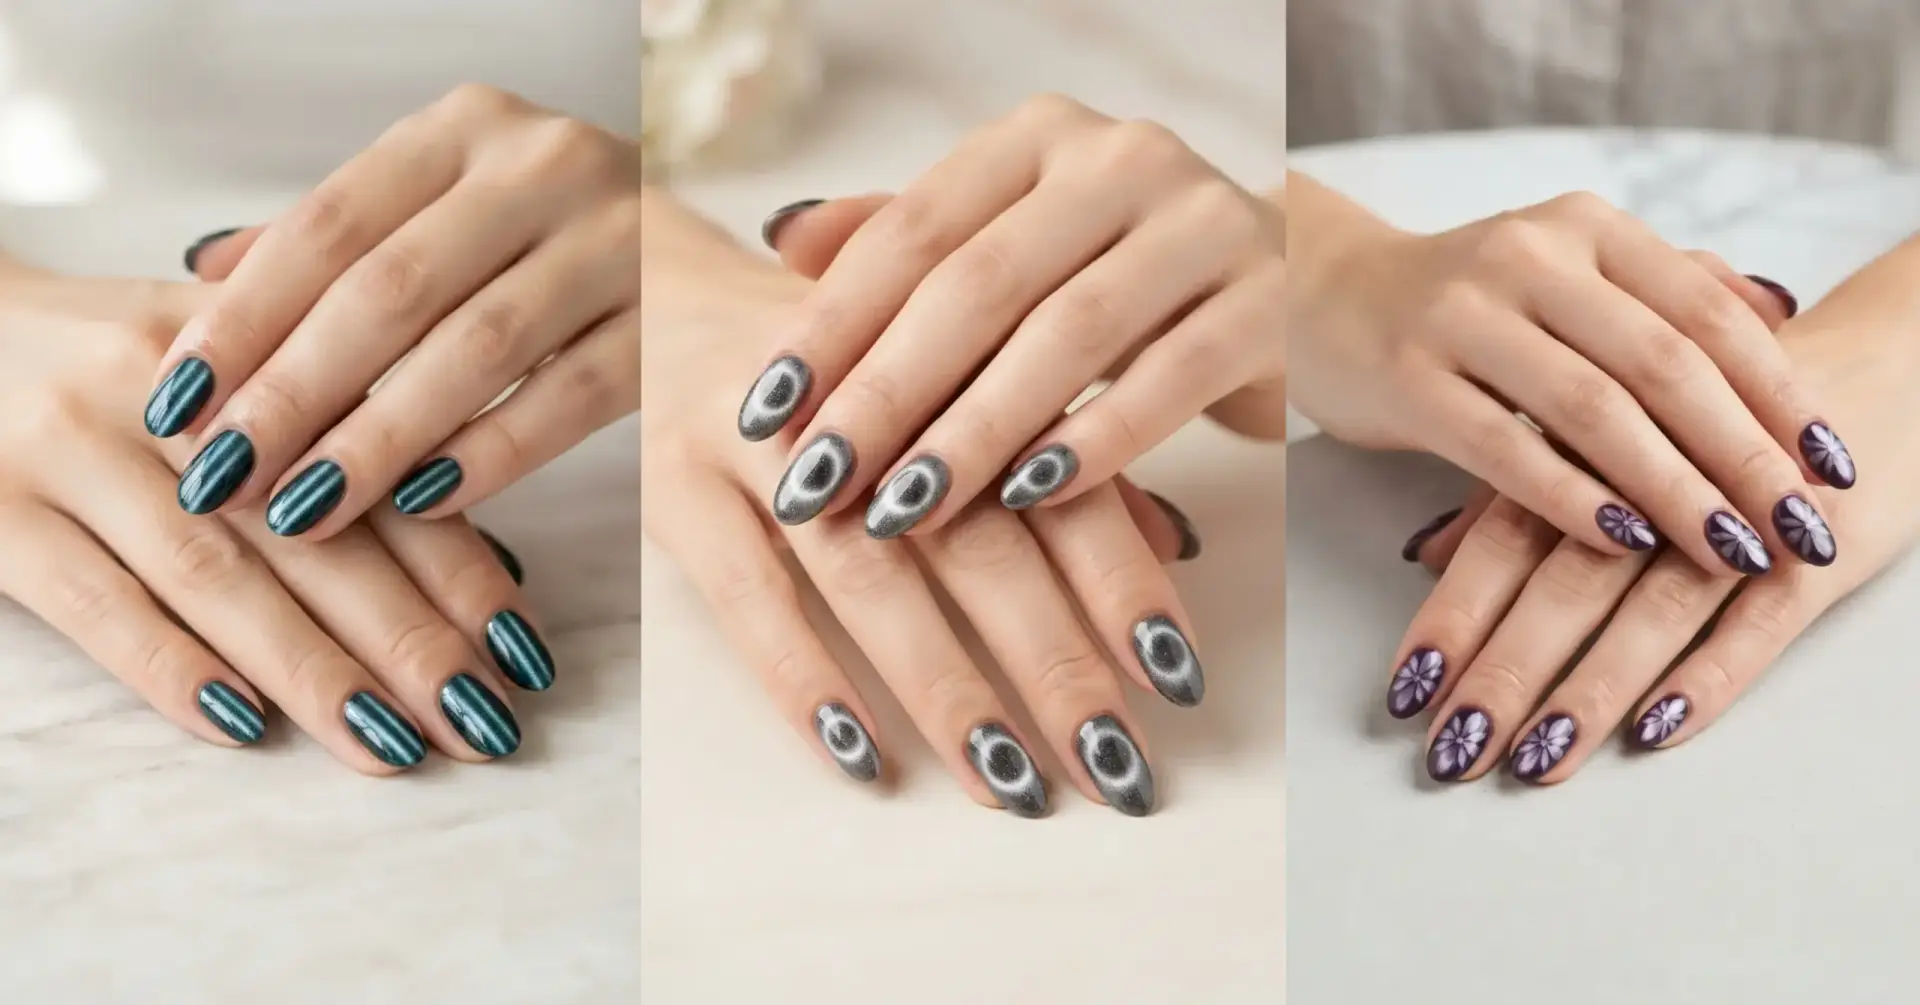
The first time I tried cat eye gel at home, I did everything wrong and it still looked incredible. I painted all five nails, then went hunting for the magnet, and by the time I found it under a sofa cushion the gel had started to settle. I got one crooked stripe on my thumb, nothing on my index, and a beautiful accidental halo on my ring finger that people complimented for two weeks.
That’s the thing about cat eye nails. The effect looks like it took a nail artist three hours and a steady hand, and it actually takes one coat of gel, a magnet, and about ten seconds per finger. No painting. No dotting tools. Just physics doing the work for you.
This guide covers 17 cat eye designs worth saving, plus the colors that flatter different skin tones, the shapes that show off the stripe best, a step-by-step method that fixes the mistake I made, and how to remove the gel without shredding your nails. Skip to whatever you need – the numbered ideas start below the basics.
What Are Cat Eye Nails?
Cat eye nails are manicures made with magnetic gel polish, where tiny metallic particles inside the gel are pulled into a glowing stripe or shape using a magnet before the polish is cured. The result is a band of light that appears to float inside the nail and shift as your hand moves.
The name comes from chatoyancy – the same optical effect you see in gemstones like tiger’s eye and cat’s eye chrysoberyl, where a single bright line seems to travel across a polished stone. Nail brands borrowed the term because the effect is nearly identical.
Three things make it work:
- Magnetic gel polish, which contains ferromagnetic pigment particles suspended in the gel base
- A nail magnet – usually a neodymium bar, wand, or shaped magnet designed for this purpose
- A UV/LED lamp, which cures the gel and locks the particles permanently in place
Once cured, the pattern is frozen. You can’t shift it afterward, which is why the magnet step happens while the gel is still wet.
Important to know: true cat eye requires gel, not regular polish. Some brands make magnetic lacquers, but the effect is softer and less defined because there’s no curing step to freeze the particles.
Why Cat Eye Nails Are Trending Right Now
Magnetic gels have been around for years, but they’ve had a serious revival – and the reason is mostly about payoff versus effort.
The effect photographs unusually well. A flat cream polish looks the same in every photo. A cat eye stripe changes with every angle, which is exactly what performs on Pinterest, TikTok, and Reels. Nail techs post the “tilt” video, and it does the marketing for them.
Softer colorways changed who wears them. For years magnetic gels only came in dark, dramatic shades, which limited them to going-out nails. The current wave includes nude, champagne, dusty rose, and milky grey magnetics – versions you can wear to an office or a wedding.
Silver and chrome cat eye became the breakout look. Cool-toned metallic magnetics over grey or charcoal bases give a liquid-mercury effect that reads futuristic rather than glittery. It’s one of the most-saved variations right now.
It’s genuinely beginner-friendly. Most nail art requires a steady hand. This one requires holding a magnet still. That’s a rare combination of “looks difficult” and “isn’t.”
Who Cat Eye Nails Suit Best
Cat eye works on almost everyone, but a few things make it work better.
- Anyone with short nails. The stripe adds visual depth, so short nails don’t look plain. This is one of the few “statement” looks that doesn’t need length.
- People who want low-maintenance drama. There’s no fine detail to chip. Grow-out on a dark cat eye is more noticeable than on a nude, but the design itself holds up.
- Anyone bored of solid gel. If you always book the same burgundy, a magnetic burgundy is the same commitment with far more movement.
- People who work with their hands. Because the interest comes from inside the gel rather than from surface art, there’s nothing sitting on top to scratch off.
It suits you less if you want a completely matte finish (matte top coat mutes the effect significantly) or if you need the look to survive being done in five minutes on ten nails at once – this technique rewards working one finger at a time.
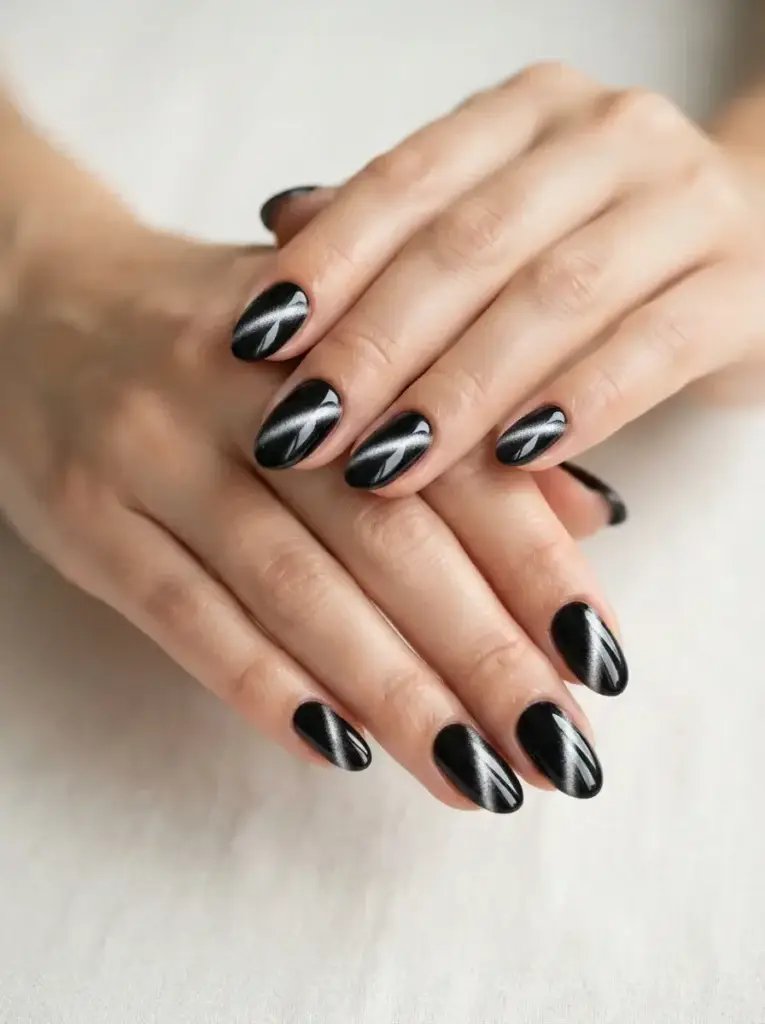
1. Classic Black Cat Eye Nails
A single bright stripe of light running diagonally across a black or near-black magnetic base, with the highest possible contrast between base and shimmer.
Best for: first-timers and anyone who wants maximum drama with minimum skill.
Difficulty: easy.
Tools: black magnetic gel polish, bar magnet, base coat, no-wipe glossy top coat.
Black is the most forgiving base because contrast hides imperfection. If your stripe lands slightly off-center, nobody notices – the eye reads “shimmer on black” first. Hold the magnet diagonally from the cuticle corner toward the opposite tip for the most flattering line.
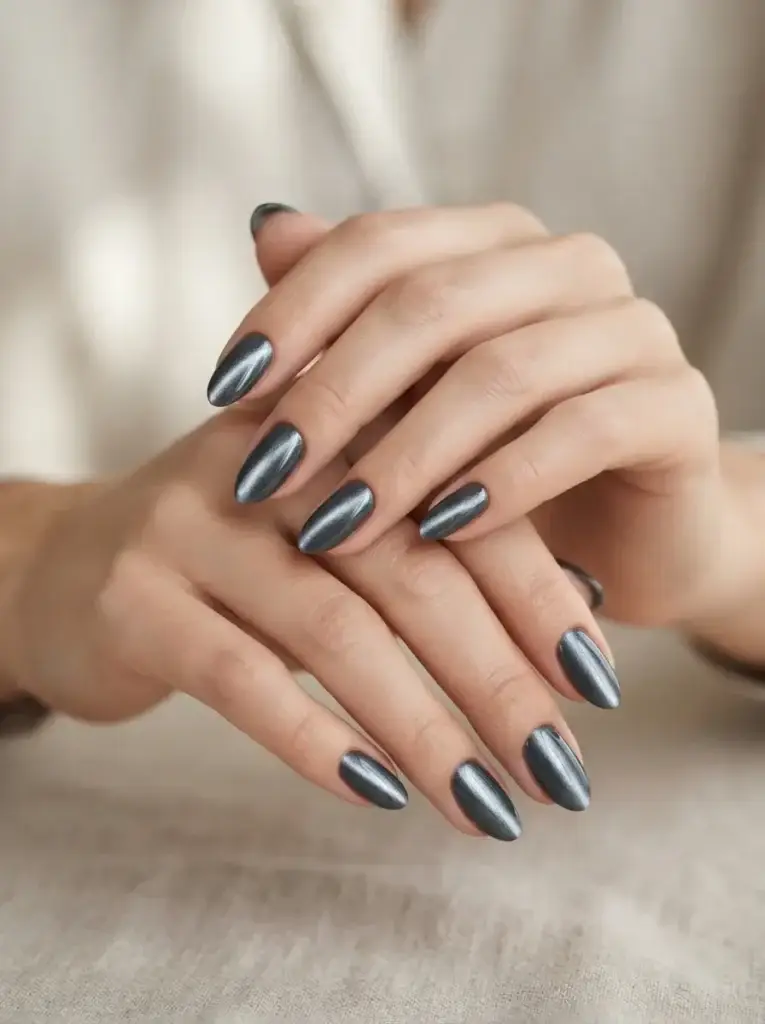
2. Silver Chrome Cat Eye
A cool-toned metallic magnetic over a grey or charcoal base, giving a liquid-mercury stripe rather than a colored one.
Best for: anyone who wants a modern, non-girly statement nail.
Difficulty: easy to medium.
Tools: silver or grey magnetic gel, bar magnet, matte-free glossy top coat.
The silver version needs a clean, well-buffed nail surface underneath because cool metallics show every ridge. Ridge-filling base coat is the difference between “liquid metal” and “foil sticker.”
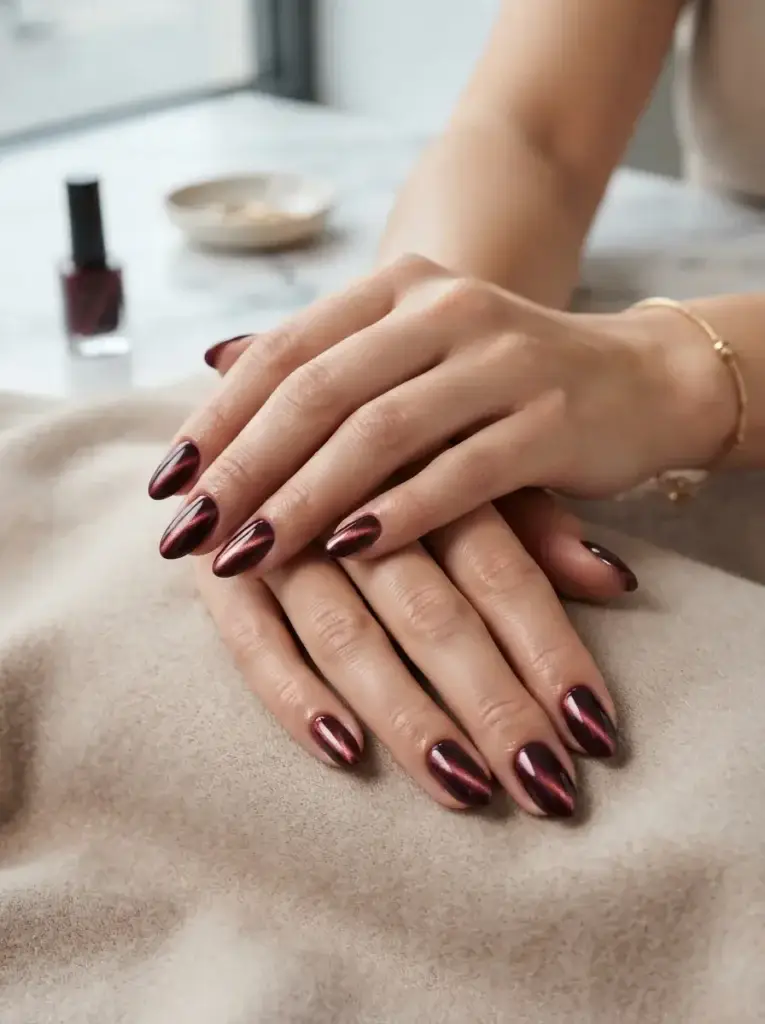
3. Burgundy Wine Cat Eye Nails
A deep red-purple magnetic base with a warm shimmer band, sitting somewhere between cherry and oxblood.
Best for: autumn and winter, and anyone who defaults to red.
Difficulty: easy.
Tools: burgundy magnetic gel, bar or double-ended magnet, glossy top coat.
Burgundy magnetics tend to have gold or bronze particles rather than silver ones, which is why they look warmer and more expensive than a flat wine polish. Two coats give richer depth than one – magnetic gels are usually semi-sheer on the first pass.
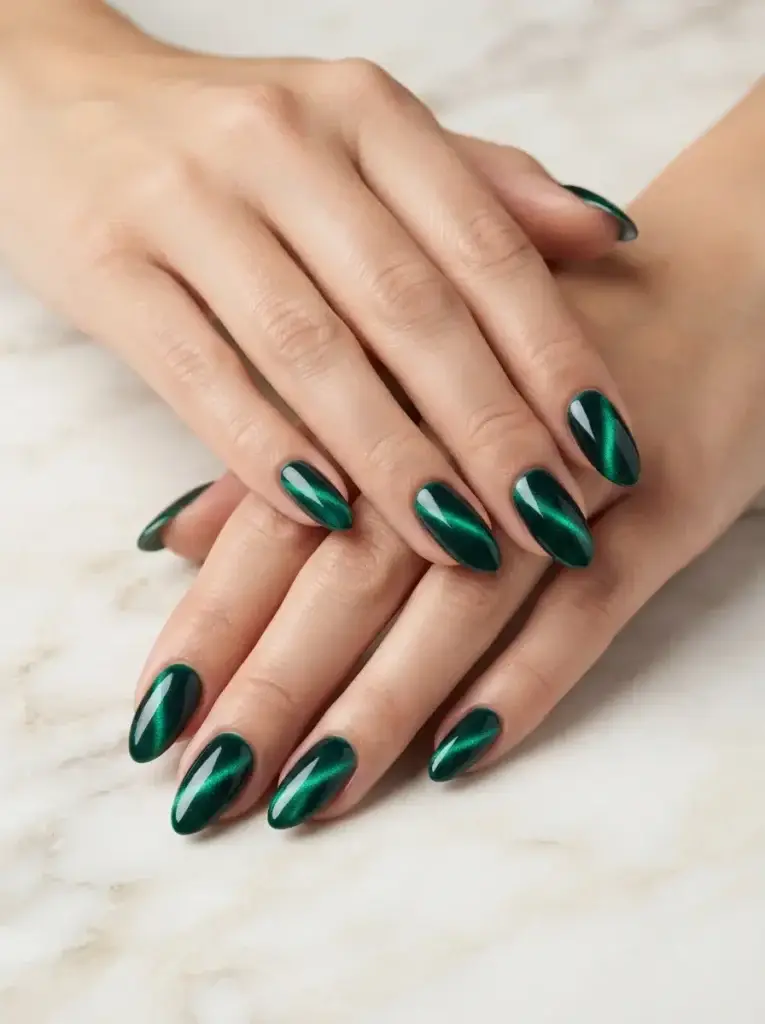
4. Emerald Green Cat Eye Nails
A saturated jewel-green base where the magnetic band reads almost like the flash inside a real gemstone.
Best for: holiday season, and green-eyed people who want a matching moment.
Difficulty: easy.
Tools: emerald or forest green magnetic gel, bar magnet, glossy top coat.
Green is one of the most underrated magnetic shades because the pigment contrast is so high. It looks especially good on almond and stiletto shapes where the stripe has length to travel.
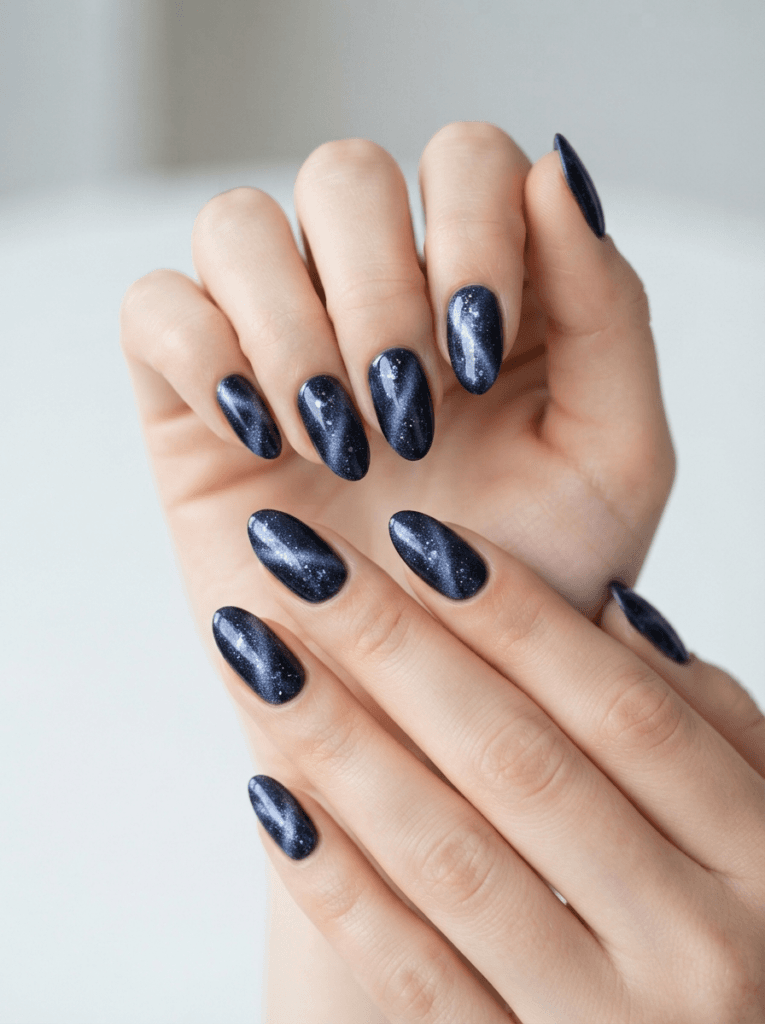
5. Midnight Blue Galaxy Cat Eye Nails
A deep navy or indigo base worked with a swirling or starburst magnet motion so the shimmer scatters instead of forming one clean line.
Best for: anyone who wants cosmic rather than sleek.
Difficulty: medium.
Tools: navy magnetic gel, star or swirl magnet (or a bar magnet moved in a slow circle), glossy top coat.
The galaxy version breaks the normal rule – instead of holding the magnet still, you move it slowly in a spiral. Movement scatters the particles, which is what makes it look like a nebula. Practice on one nail first; the effect is hard to predict.
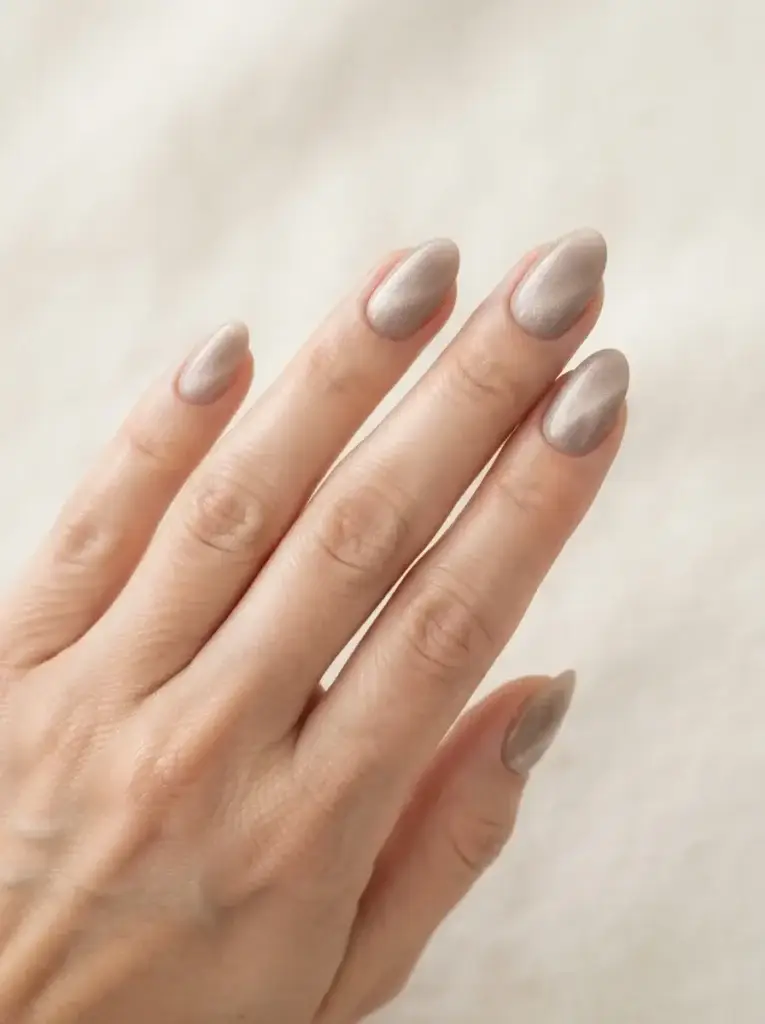
6. Nude Velvet Cat Eye Nails
A soft beige, greige, or milky magnetic that produces a diffused glow rather than a hard stripe – often called velvet or suede cat eye.
Best for: offices, weddings, and anyone with a conservative dress code.
Difficulty: easy.
Tools: nude or champagne magnetic gel, bar magnet held further from the nail, glossy top coat.
The trick here is distance. Holding the magnet further away (around 10mm instead of 4mm) softens the line into a haze. This is the version I recommend to people who think cat eye is “too much” — it just looks like your nails catch light unusually well.
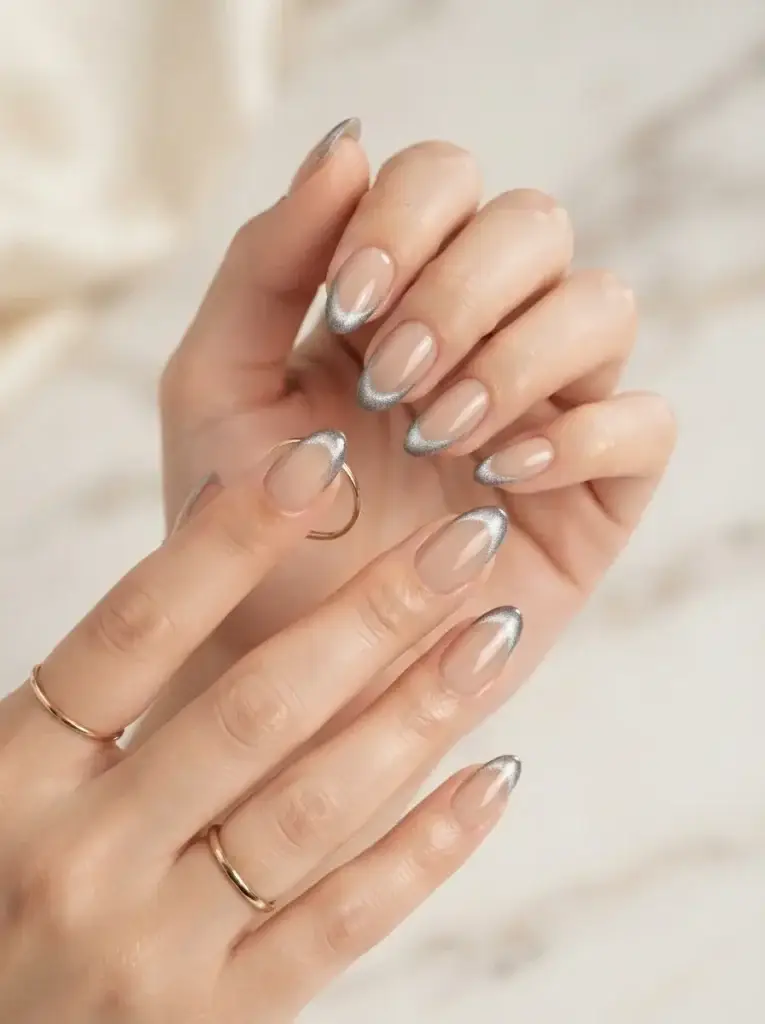
7. Cat Eye French Tips Nails
A sheer or nude base with the magnetic effect applied only to the tip, replacing the traditional white French line.
Best for: anyone who wants a trend twist on a classic manicure.
Difficulty: medium.
Tools: sheer nude gel base, magnetic gel in a contrast shade, thin liner brush, bar magnet.
Paint the tip first, magnetize while it’s wet, then flash cure before it can bleed into the base. A curved smile line is more forgiving than a sharp one because the shimmer softens the edge anyway.
8. Double-Line Cat Eye Nails
Two parallel bands of light on the same nail, created by using two magnets or a magnet with poles at both ends.
Best for: people who already tried the classic version and want a step up.
Difficulty: medium.
Tools: dark magnetic gel, two bar magnets or a double-ended magnet, tweezers for positioning.
Hold one magnet near the cuticle and one near the free edge and bring them slowly toward each other. The particles part in the middle, leaving a dark channel between two glowing lines. The gap is the whole point – don’t close it completely.
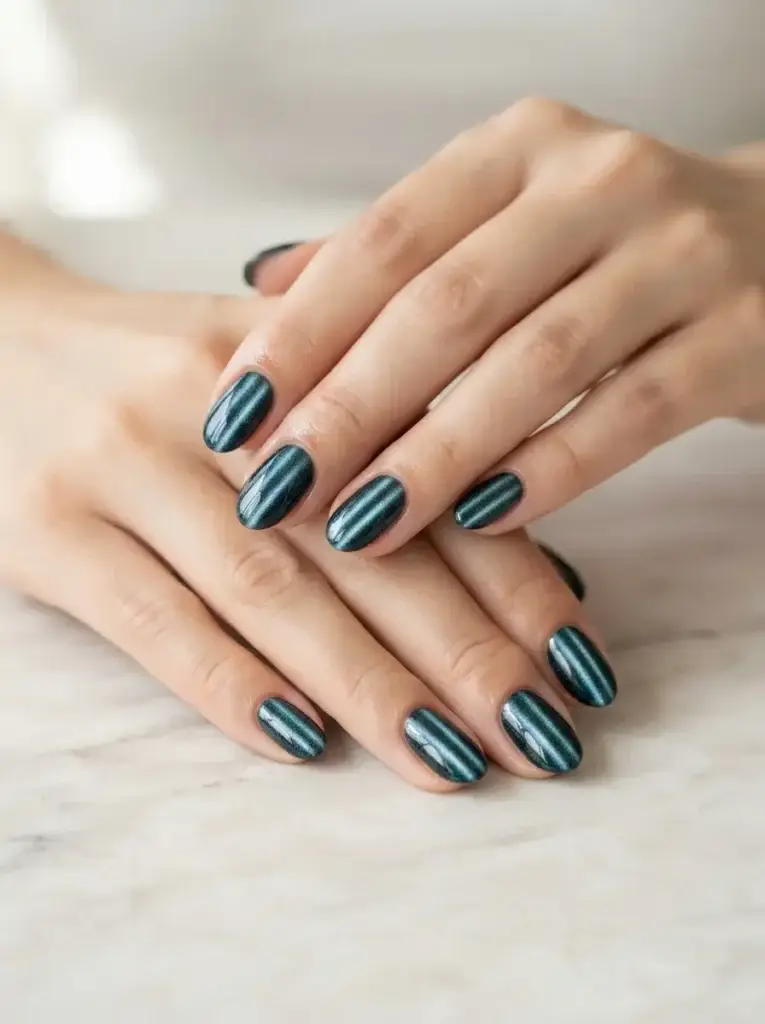
9. Halo Cat Eye Nails
A ring or “donut” of light around a darker center, made by holding a circular or ring magnet flat over the nail.
Best for: short and round nails, where a straight stripe can look cramped.
Difficulty: easy to medium.
Tools: magnetic gel in any mid-to-dark shade, ring or round magnet, glossy top coat.
Round nails benefit enormously from this one. A diagonal stripe on a very short round nail can look like a smudge, but a halo follows the shape of the nail and looks deliberate.
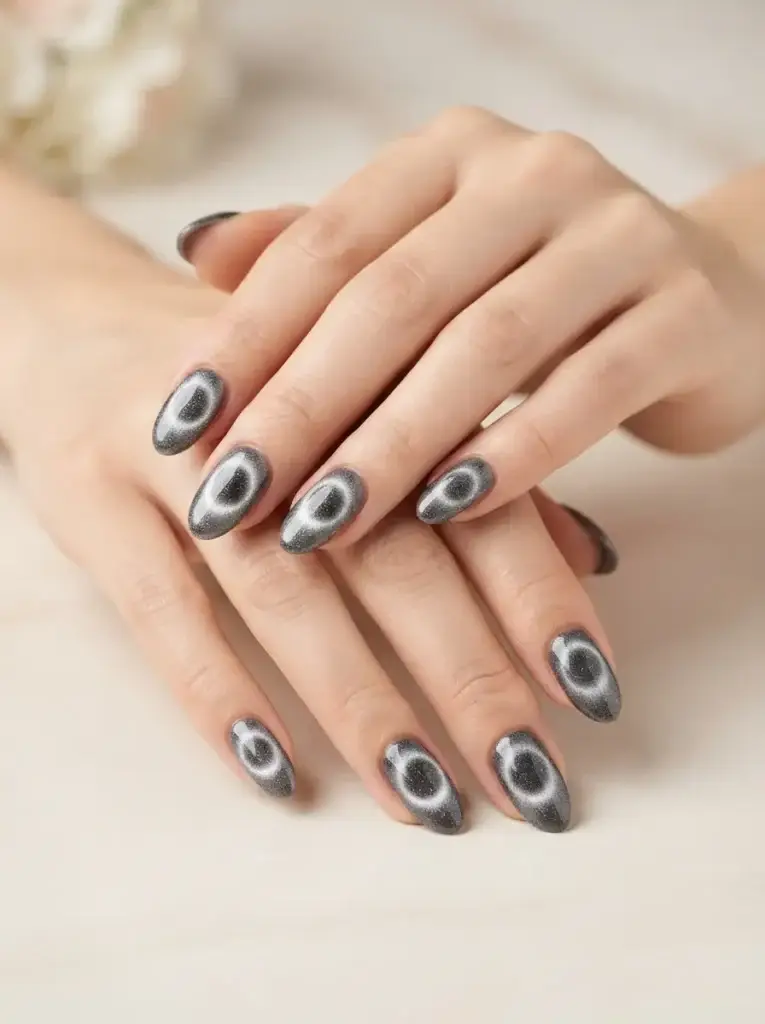
10. Flower Magnet Cat Eye Nails
A petal or starburst pattern produced by a shaped magnet held flat over the center of the nail for a few seconds.
Best for: people who want nail art without any painting.
Difficulty: easy.
Tools: magnetic gel, flower-shaped or patterned magnet, glossy top coat.
Shaped magnets are the closest thing to cheating in nail art. Hover the flower end directly over the nail center, hold completely still for five seconds, and the petals appear on their own. Any wobble blurs the shape, so brace your elbow on the table.
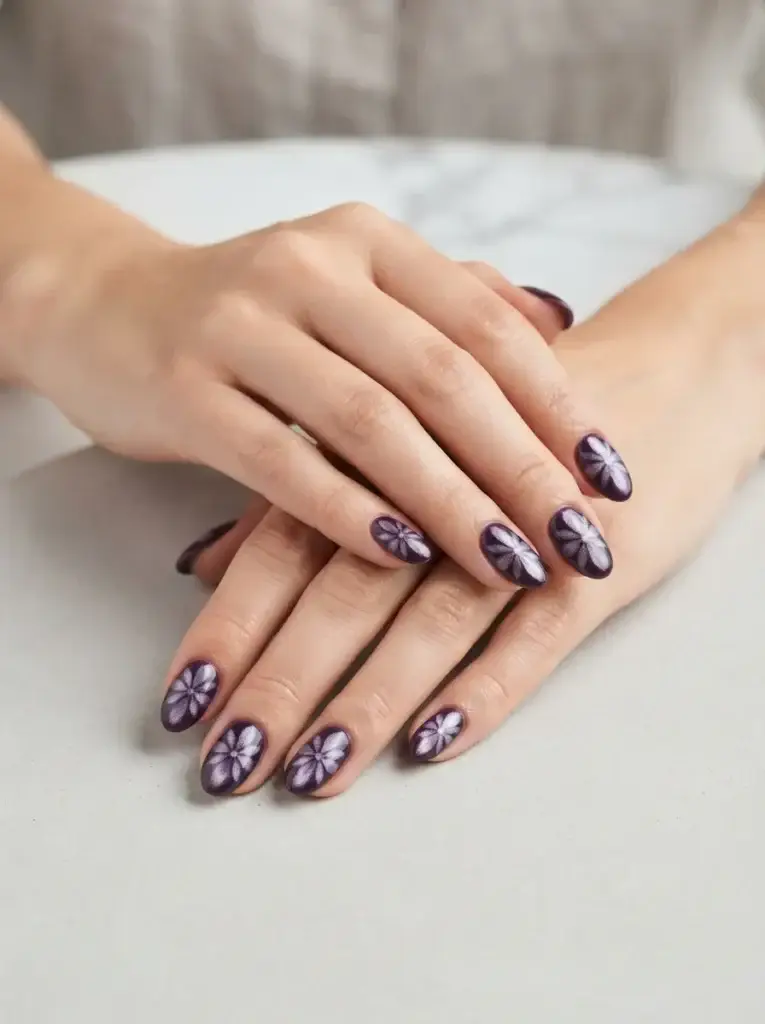
11. Cat Eye Ombré Nails
Two magnetic shades blended along the nail, magnetized in the same direction so a single continuous band travels through both colors.
Best for: medium to long nails with room for the gradient.
Difficulty: medium to hard.
Tools: two magnetic gels in related tones, makeup sponge or blending brush, bar magnet.
Pick colors from the same temperature family – a warm plum into a warm burgundy works, plum into teal fights itself. Blend while both are wet, then magnetize the whole nail in one pass.
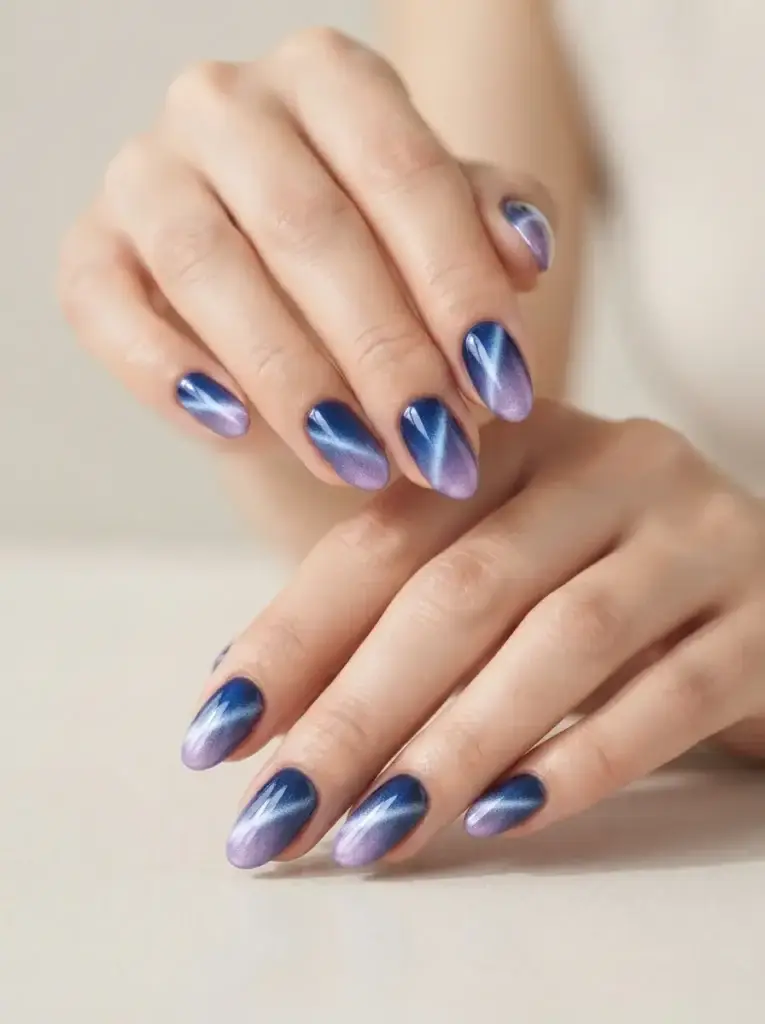
12. Cat Eye Accent Nail
Nine nails in a solid gel color with one or two magnetic accent nails, usually the ring finger.
Best for: anyone testing the trend before committing, or nervous about it looking loud.
Difficulty: easy.
Tools: your usual gel color, one magnetic gel in a matching shade, bar magnet.
Match the accent to your base color rather than contrasting it – a magnetic mauve beside a cream mauve looks intentional and expensive. A magnetic silver beside a cream mauve looks like you ran out of polish.
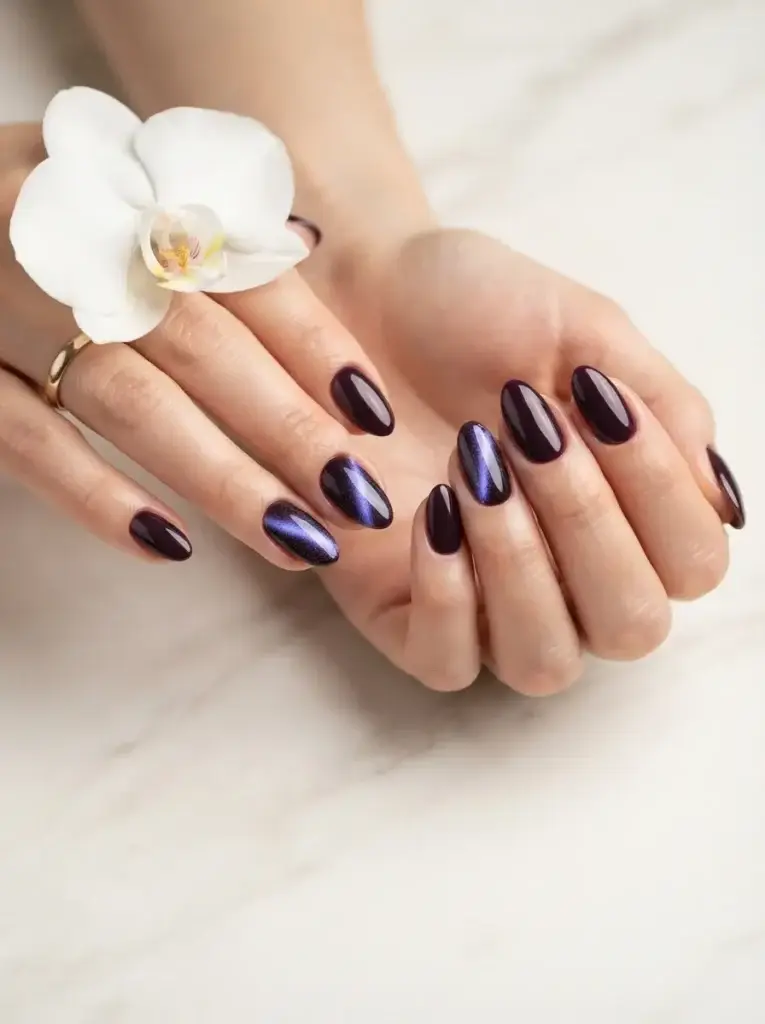
13. Aurora Chrome Cat Eye Nails
A light magnetic base – soft pink, champagne, or pearl – with aurora or unicorn chrome powder buffed over the top, layering a rainbow shift on top of the magnetic stripe.
Best for: photos, events, and the most “how did you do that” reactions.
Difficulty: medium.
Tools: light magnetic gel, bar magnet, aurora chrome powder, applicator sponge, no-wipe top coat, final sealing top coat.
Order matters: magnetize, cure, apply no-wipe top coat, cure, buff the chrome powder into the cured tacky-free surface, then seal. Chrome applied before curing just disappears into the gel.
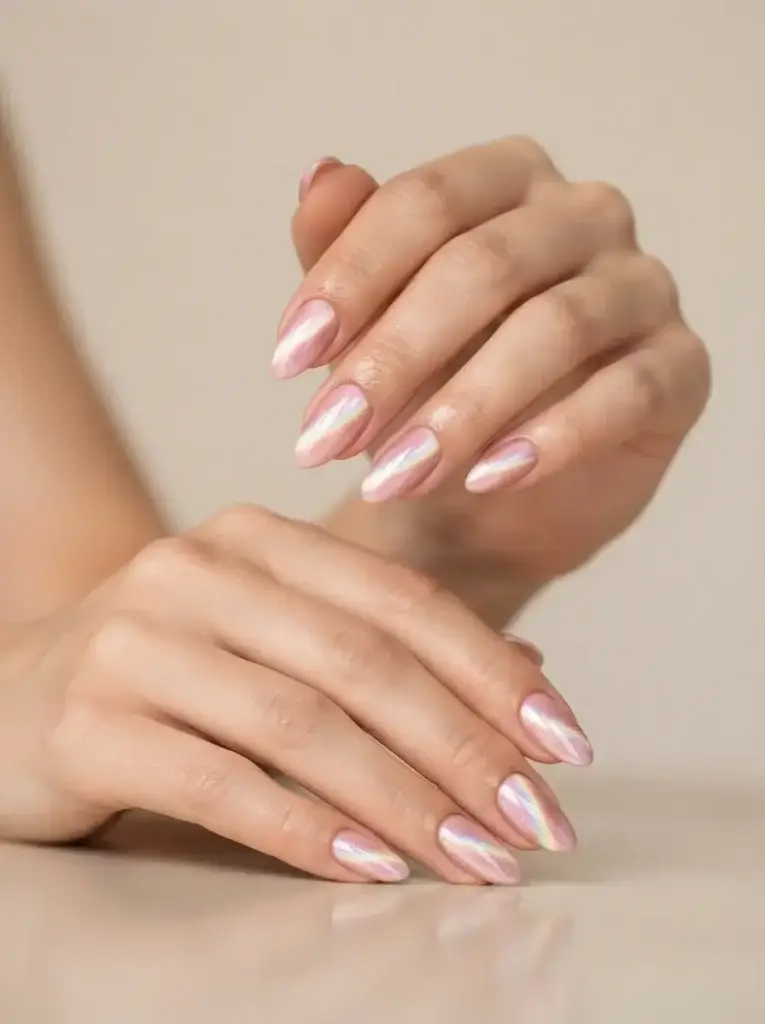
14. Amethyst Purple Cat Eye Nails
A deep violet base where the magnetic band picks up pink and blue flashes depending on the light.
Best for: anyone who finds black too harsh but wants the same drama.
Difficulty: easy.
Tools: purple magnetic gel, bar magnet, glossy top coat.
Purple magnetics are often duochrome, meaning the shimmer itself shifts color. It’s the shade I’d hand someone who says “I don’t wear dark nails” – it reads as jewel-toned rather than gothic.
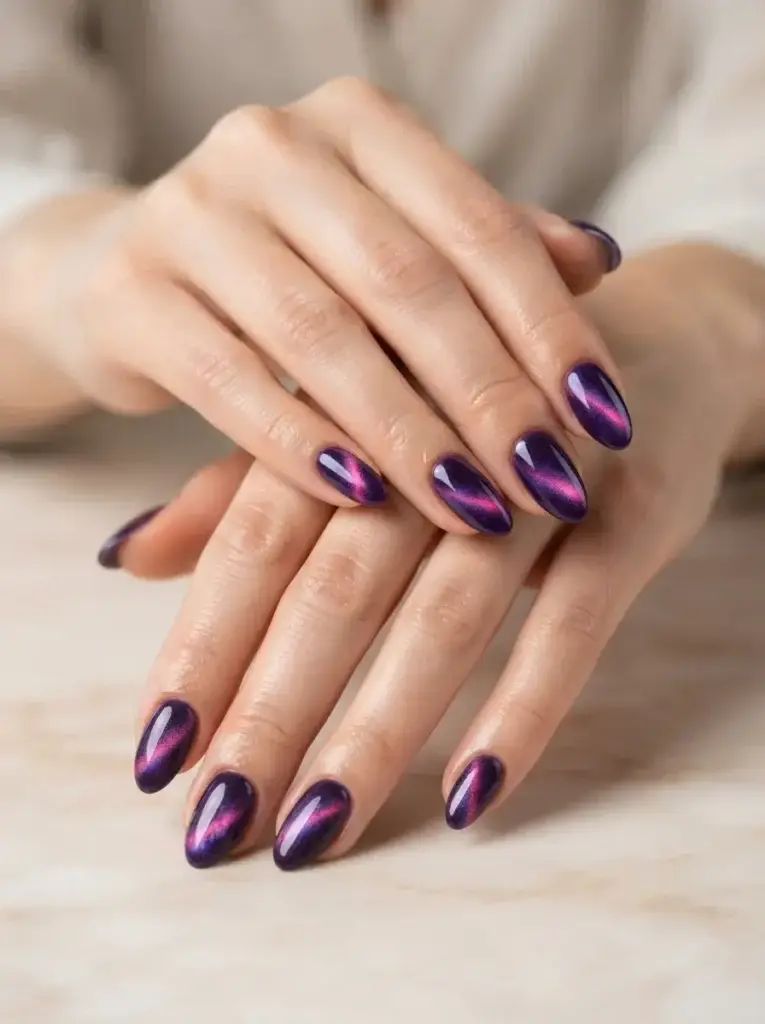
15. Rose Gold Bridal Cat Eye Nails
A pale pink or champagne magnetic with a warm rose-gold shimmer, kept soft and centered rather than sharply diagonal.
Best for: brides, bridesmaids, and formal events.
Difficulty: easy.
Tools: rose gold or champagne magnetic gel, bar magnet held 8–10mm away, glossy top coat.
Center the stripe vertically rather than diagonally for weddings. A vertical line down the middle of the nail is the most symmetrical, most classic placement, and it photographs beautifully in the hand-on-bouquet shot.
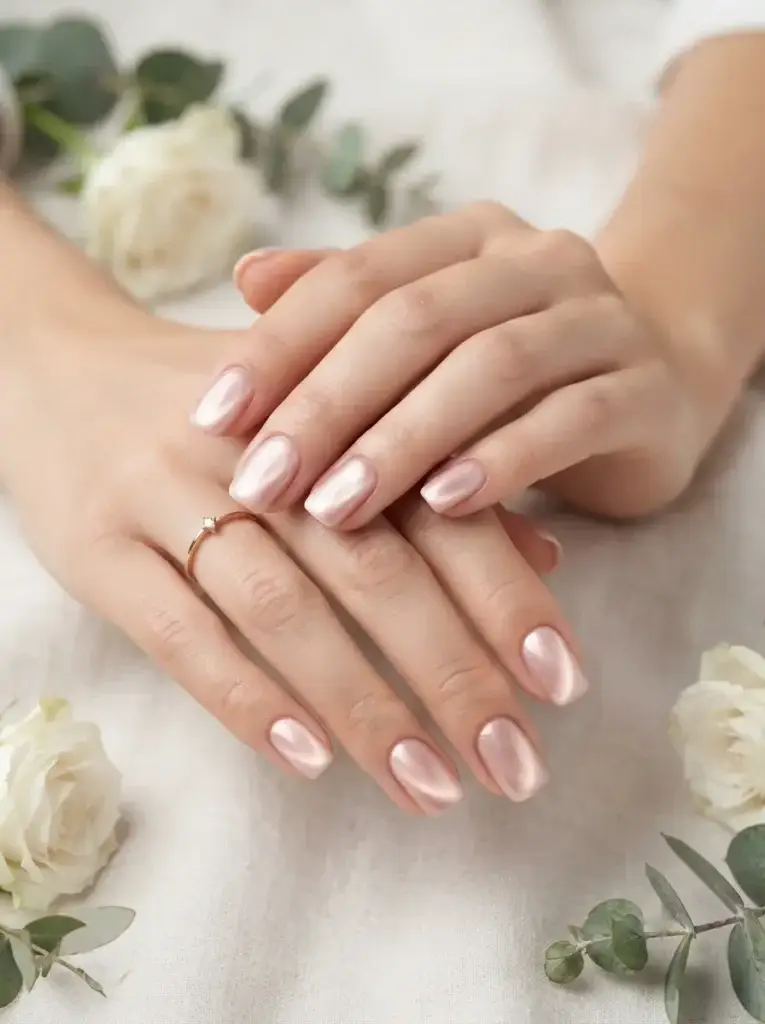
16. Jelly Base Cat Eye Nails
A translucent jelly gel underneath with a sheer magnetic layer on top, so light passes through the whole nail instead of bouncing off a solid base.
Best for: summer, and anyone who likes glass or jelly nail finishes.
Difficulty: medium.
Tools: jelly gel in your color, sheer magnetic gel, bar magnet, high-gloss top coat.
This is the version that looks most like actual gemstone. Because the base is translucent, the stripe seems to sit deeper inside the nail. It needs three thin layers rather than two thick ones to keep the transparency.
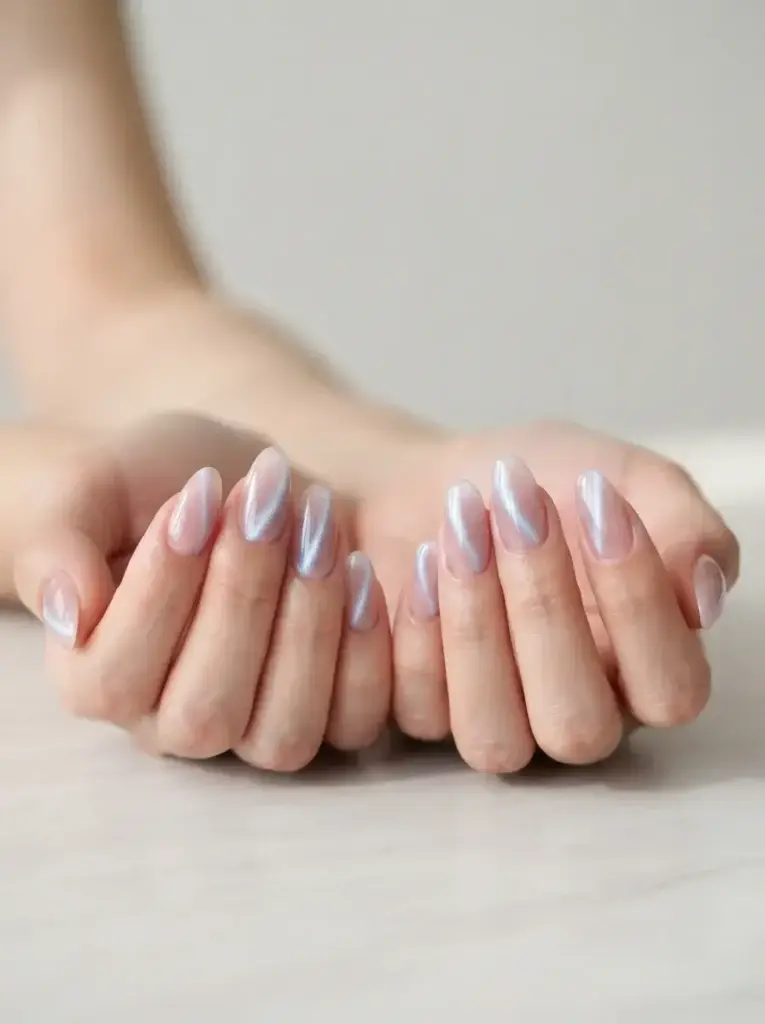
17. Marble Swirl Cat Eye Nails
A magnetic gel manipulated with a swirl or wave magnet motion so the light forms curving ribbons instead of straight lines.
Best for: longer nails and anyone who likes abstract nail art.
Difficulty: medium to hard.
Tools: magnetic gel, bar magnet, steady hand, glossy top coat.
Move the magnet in a slow S-curve across the nail, pausing at each turn. It won’t be identical on every finger and it isn’t supposed to be – mismatched swirls are what make it read as marble rather than a mistake.

Best Cat Eye Colors for Your Skin Tone
Magnetic shimmer sits on top of the base color, so undertone matters more than usual.
| Skin tone | Most flattering cat eye shades | Shades to approach carefully |
|---|---|---|
| Fair, cool undertone | Silver-grey, amethyst, midnight blue, icy pink | Warm orange-based bronzes |
| Fair, warm undertone | Champagne, rose gold, warm burgundy, copper | Very cool blue-greys |
| Medium / olive | Emerald, plum, bronze, deep teal | Pale pastels with low contrast |
| Tan / deep | Gold-shimmer black, deep red, emerald, electric blue | Muted greige (can read dull) |
Universal safe bets: burgundy, emerald, and black-with-silver flatter nearly every skin tone because the contrast between base and stripe does the work.
Best Nail Shapes and Lengths for Cat Eye
The stripe needs surface area to travel across, so shape genuinely changes the result.
- Almond – the best all-round shape. The taper gives the light a natural direction to follow.
- Coffin/ballerina – the widest canvas, and the best choice for double-line and ombré versions.
- Stiletto – dramatic, and makes a diagonal stripe look almost like a blade of light.
- Square and squoval – clean and modern; works best with vertical or horizontal stripes rather than diagonals.
- Round, very short – go for the halo or flower pattern instead of a straight line.
On length: cat eye is one of the few statement finishes that genuinely works short. If your nails are under 5mm past the fingertip, choose a halo, a flower, or a soft velvet haze rather than a hard diagonal stripe.
How to Do Cat Eye Nails at Home: Step by Step
- Prep properly. Push back cuticles, gently buff the shine off the nail plate, and wipe with isopropyl alcohol. Magnetic gel is unforgiving on oily nails – it lifts early.
- Base coat and cure. One thin layer, cured per your lamp’s instructions (usually 30–60 seconds).
- Apply the magnetic gel slightly thicker than normal. A thin coat has fewer particles to move, which is the number one reason a stripe looks weak. Cover one nail at a time.
- Magnetize immediately, one nail at a time. Hold the magnet 3–5mm above the wet gel – close enough for a sharp line, not touching. Keep it completely still for 5–10 seconds. Closer and slower gives a defined stripe; further and faster gives a soft haze.
- Flash cure that nail before moving on. Ten seconds under the lamp locks the particles. If you paint all ten nails first, the particles drift back and your effect fades – which is exactly what happened to me on the sofa-cushion attempt.
- Add a second coat if you want more depth, repeating the magnet step in the same direction and position.
- Top coat and full cure. Use a glossy no-wipe top coat. Matte top coat will flatten the effect almost completely.
- Cuticle oil. Not optional. Gel dehydrates the surrounding skin, and oiled cuticles are what make the whole set look salon-finished.
Total time: about 35–45 minutes for a full set once you’ve done it twice.
Salon vs DIY Cat Eye Nails
| At home | Salon | |
|---|---|---|
| Starting cost | $40–$70 for lamp, base, top, one magnetic gel and magnet | $0 upfront |
| Per set | Roughly $2–5 in product | $45–$85 depending on location and design |
| Time | 35–60 minutes | 45–75 minutes |
| Best for | Classic stripe, halo, flower magnet, accent nails | Ombré, French tips, aurora chrome layering, extensions |
| Main risk | Weak stripe from thin application, lifting from poor prep | Cost of repeat visits |
If you’re only ever going to do the classic version, at-home pays for itself in about two sets. If you want ombré or chrome layering, the first attempt is much easier with someone who’s done it a hundred times.
How to Make Cat Eye Nails Last
Magnetic gel lasts the same as any gel – realistically 2 to 3 weeks – but a few habits stretch it.
- Cap the free edge with both the color and the top coat. Unsealed tips are where chipping starts.
- Avoid thick single layers. Two thin coats cure fully; one thick coat cures only on the surface and peels as a sheet later.
- Wear gloves for dish washing and cleaning. Hot water and detergent are the fastest way to lift gel at the cuticle.
- Oil daily. Flexible nails bend with impact instead of cracking. It sounds unrelated to a magnetic finish, but flexible nails lift less.
- Don’t use your nails as tools. Boxes, staples, car doors. You know.
If you want more on this, our guide on making a manicure last longer without chipping goes deeper on the prep side.
How to Remove Cat Eye Gel Safely
Magnetic gel removes exactly like standard gel polish, with one extra consideration: the metallic particles make the surface slightly harder for acetone to penetrate, so buffing the top layer first matters more than usual.
Buff off the shiny top coat, soak cotton in pure acetone, wrap each nail in foil for 10–15 minutes, then gently push the softened gel off with a wooden or rubber-tipped pusher. If it resists, re-wrap for another five minutes. Never scrape, never peel – peeling takes layers of your natural nail with it.
Full method here: how to remove gel polish at home without damaging your nails. And if your nails feel thin afterward, these repair steps are the ones that actually work.
Common Mistakes to Avoid with Cat Eye Nails
- Painting all ten nails before magnetizing. The particles settle and disperse. Work one nail at a time and flash cure immediately.
- Applying the gel too thin. Fewer particles means a faint, disappointing stripe. Slightly thicker than your normal color coat is correct.
- Touching the magnet to the wet gel. You’ll leave a dent and have to redo the nail. Stay 3–5mm above.
- Using a fridge magnet or phone magnet. Ordinary magnets aren’t strong or shaped correctly. Nail magnets are neodymium and designed for even pull.
- Finishing with a matte top coat. Matte scatters light, and light is the entire effect. If you want matte nails, cat eye isn’t the finish to choose.
- Skipping alcohol wipe at prep. Oil on the nail plate causes lifting within days, no matter how good your gel is.
Cat Eye Nails by Season and Occasion
- Spring: dusty rose, lilac, and soft champagne magnetics; velvet haze rather than sharp stripes.
- Summer: jelly base cat eye, turquoise, and sheer magnetics that catch sunlight.
- Autumn: burgundy, bronze, chocolate brown, and deep plum.
- Winter and holidays: emerald, silver chrome, midnight blue, black with silver shimmer.
- Weddings: rose gold or champagne, vertical centered stripe, almond shape.
- Work-appropriate: nude velvet, greige, soft mauve – the effect is visible up close and invisible across a meeting room.
- Concerts and nights out: galaxy navy, aurora chrome layering, double-line black.
Pingback: 1 Winter Nail Ideas That Look Cozy, Expensive, and Nothing Like Last Year's - TheZelovo.com
Pingback: 18 New Year Nail Ideas That Outshine Every Sparkler at Midnight - TheZelovo.com