The first time I tried clown nails, I ended up with something that belonged at a kid’s birthday party. Ten fingers of screaming primary red, a lopsided smiley face on my thumb, and a top coat that smudged the whole thing into a bruise.
The second attempt was different, and the difference was not skill. It was restraint. One accent nail carried the character, the rest carried the palette, and suddenly the set read as fashion instead of fancy dress.
That gap is what this guide is about. Below are 12 clown nail ideas sorted from easiest to most ambitious, each with the tools you actually need and the one mistake that ruins it. Skip to whichever one catches your eye – nothing here has to be read in order.
What Are Clown Nails?
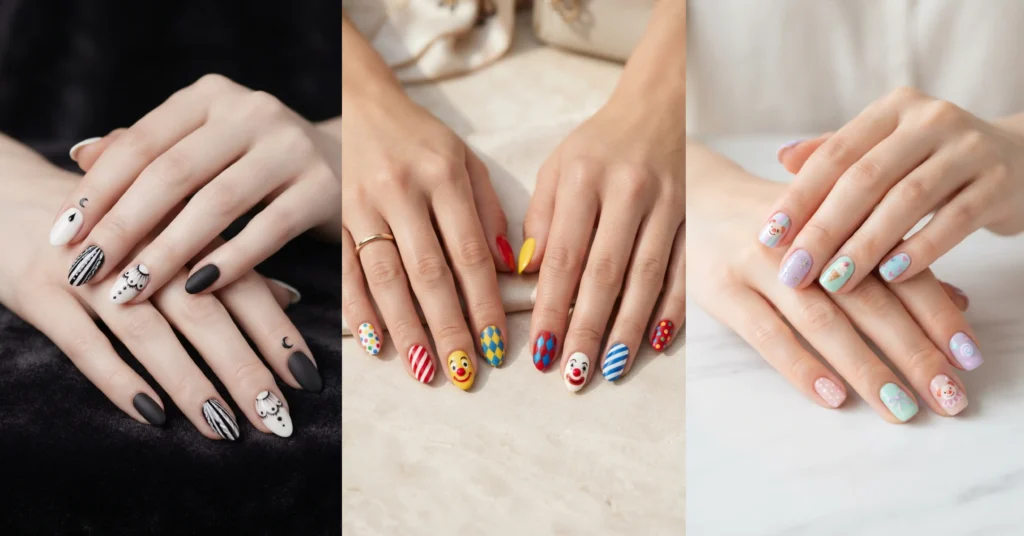
Clown nails are a nail art style built from circus and clowncore visual language: bright primary or pastel colors, polka dots, harlequin diamonds, big-top stripes, ruffled scallops, and sometimes a hand-painted clown face on a single accent nail. The style ranges from cute and kawaii to genuinely eerie, depending on the palette you choose.
The look sits inside a broader internet aesthetic called clowncore. According to the Aesthetics Wiki, clowncore covers clowns, mimes and jesters along with carnivals and fanfare in general, and it’s usually rooted in childhood nostalgia – bright and cheerful, though some versions lean into creepy or horror-clown territory. If you want the wider circus family of designs, our guide to carnival nail ideas maps the full spectrum.
The diamond pattern people call “harlequin” is older than the internet aesthetic by centuries. Harlequin comes from Italian commedia dell’arte, where the character was recognized by his brightly colored, diamond-patterned costume.
Why Clown Nails Are Everywhere in 2026
Clown nails stopped being a Halloween-only look because the circus aesthetic went mainstream. Pinterest’s 2026 trend report named a trend it calls FunHaus – circus-inspired design driven by Boomers and Millennials, described by Pinterest as bold stripes, sculptural silhouettes and a wink of clownish charm.
The search data underneath it is the useful part. Pinterest recorded interest in “circus interior” up 130%, “vintage circus aesthetic” up 70%, and “circus nursery” up 50% between September 2024 and August 2025, as reported by Axios and Elle Decor. Pinterest also states its trend predictions have proved 88% accurate over the past six years.
The fashion side got there first. Refinery29 documented clowncore elements across high-fashion runways for Fall 2021 at labels including Dior, Undercover, Rick Owens and Nanushka, with Givenchy’s Spring 2022 collection taking clown prints and colors quite literally.
Translation for your nails: this is a wearable style year-round now, not a costume you take off on November 1.
The three clown nail sub-styles (pick one before you start)
| Sub-style | Palette | Vibe | Best for |
|---|---|---|---|
| Pastel / kawaii clown | Blush, lilac, mint, baby blue | Soft, cute, dreamy | Everyday wear, office-adjacent |
| Primary maximalist | Red, yellow, cobalt, white | Bold, retro circus | Parties, festivals, content creation |
| Dark clowncore | Black, oxblood, grey, chrome | Eerie, theatrical | Halloween, concerts, editorial looks |
Choosing one first is the single biggest quality upgrade. Mixing all three is where sets start to look chaotic instead of intentional.
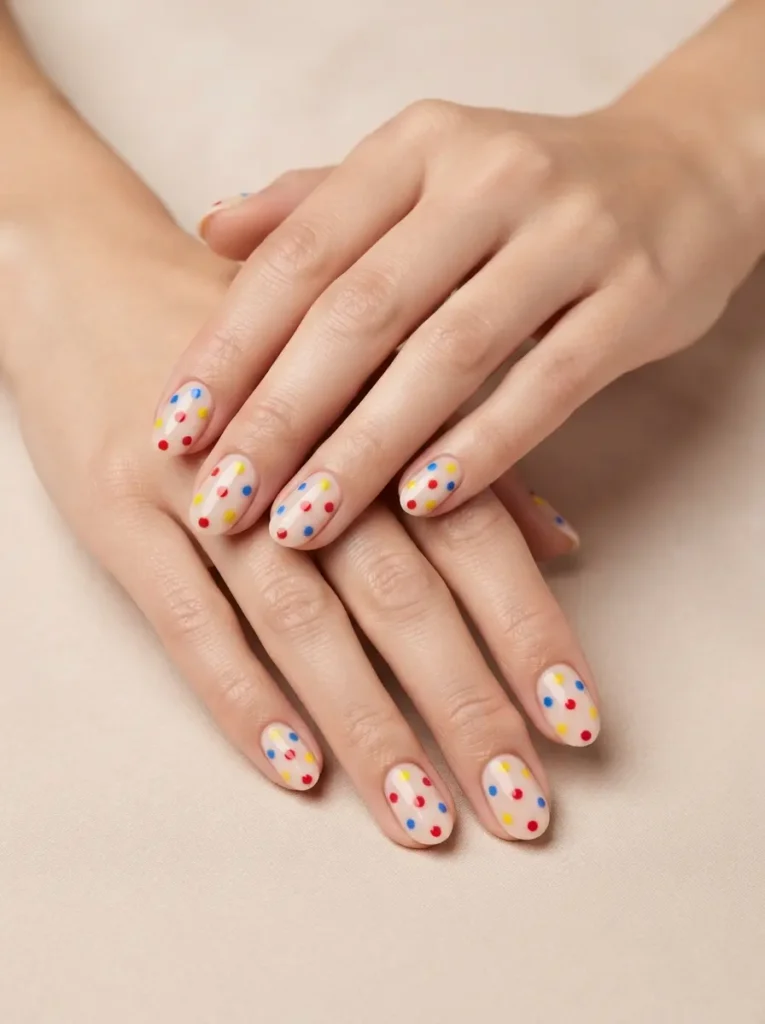
1. Classic Polka Dot Clown Nails
Classic polka dot clown nails place evenly spaced dots in red, yellow, and blue over a clean white or nude base, echoing a traditional clown costume without any face art.
Best for: total beginners and short nails.
Difficulty: easy.
Tools: white base polish, three cream polishes, a dotting tool (or a bobby pin head), glossy top coat.
Press the dotting tool straight down and lift – never drag. Dragging is what turns a circle into a comma. Re-dip between every single dot, because a half-loaded tool makes each dot smaller than the last and the spacing starts looking accidental.
2. Harlequin Diamond Nails
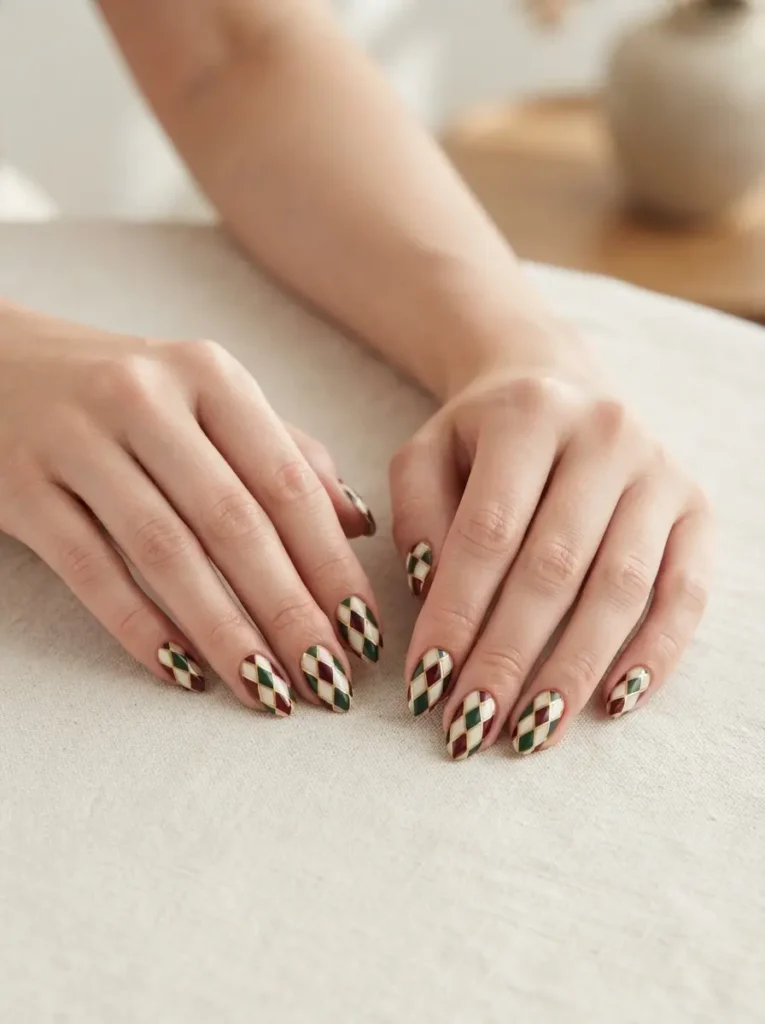
Harlequin diamond nails cover the nail in a two-tone diamond grid, the pattern lifted straight from a commedia dell’arte costume, usually in alternating warm and cool shades.
Best for: medium to long nails where the grid has room to read.
Difficulty: medium.
Tools: two contrasting polishes, thin striping tape or a striping brush, top coat.
Striping tape is the cheat code here. Lay the tape diagonally in both directions to mark your grid, fill the alternating cells, then pull the tape while the polish is still slightly tacky – waiting until it fully dries tears the edges.
3. Pastel Kawaii Clown Face Accent Nail
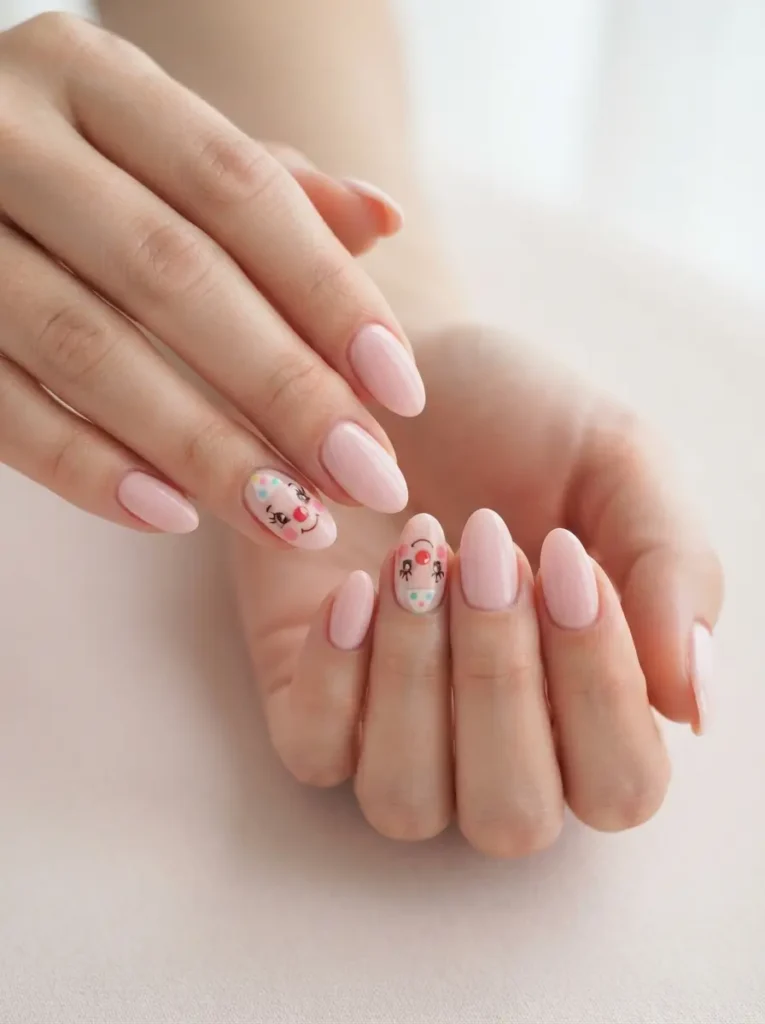
A pastel kawaii clown face uses one accent nail with a simple cartoon clown – pink cheeks, a small round nose, exaggerated lashes – on a soft blush or mint base while the other nails stay plain.
Best for: people who want the reference without the full commitment.
Difficulty: medium.
Tools: pastel base polishes, a fine liner brush, black and pink detail polish, top coat.
Draw the face smaller than feels right. Beginners always paint it too large, and a face that fills the whole nail reads as costume paint, while a small face tucked toward the cuticle reads as a charm. For more shades that work with this softer palette, see our pastel nail color guide.
4. Big Top Stripe Clown Nails
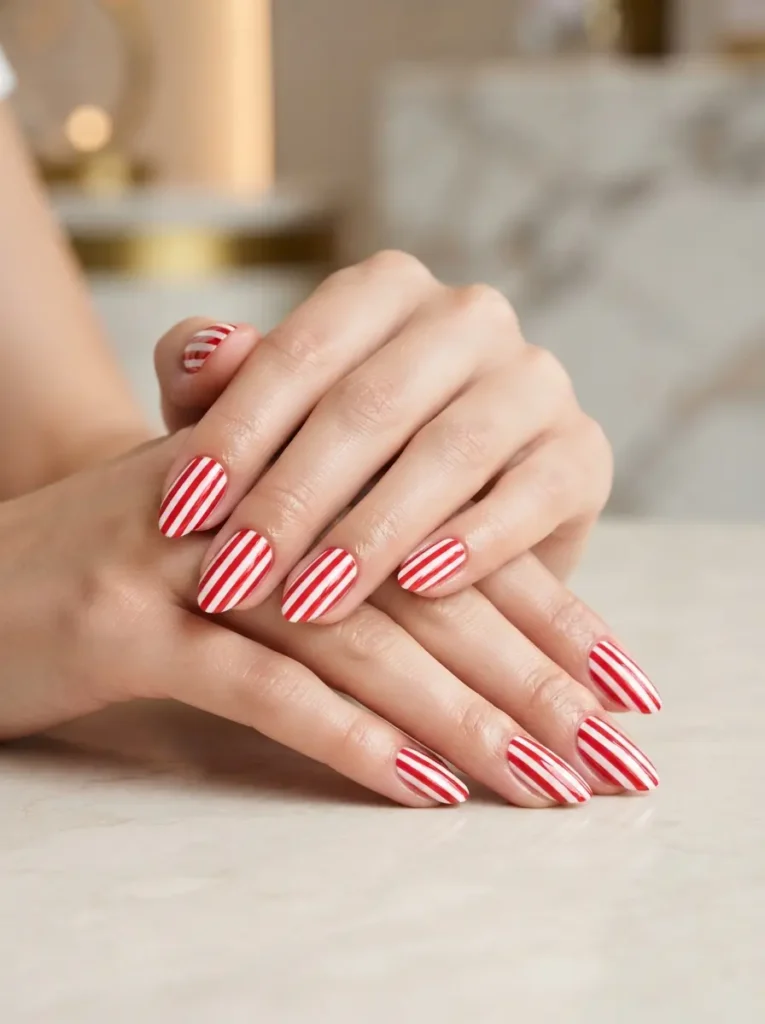
Big top stripe nails run bold red-and-white vertical stripes across every nail, mimicking a circus tent, sometimes with one gold or navy accent nail.
Best for: anyone who wants maximum impact with zero freehand skill.
Difficulty: easy to medium.
Tools: white base, one saturated cream polish, striping brush or tape, top coat.
Uneven stripe width is forgivable; uneven stripe angle is not. Line up all ten nails on a flat surface and check the angles together before you top-coat, because the eye catches a tilted stripe instantly.
5. Jelly Confetti Clown Nails
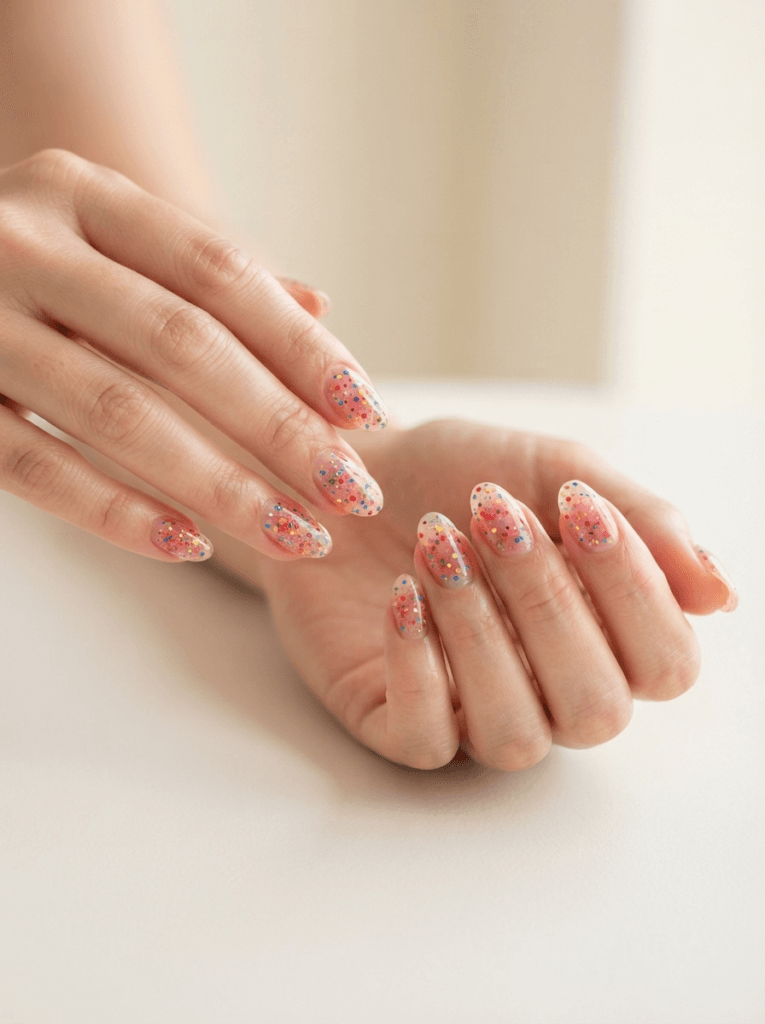
Jelly confetti nails layer tiny multicolor dots or glitter flecks under a sheer, translucent jelly base so the confetti looks suspended in candy-colored resin.
Best for: short nails and anyone who finds solid colors too heavy.
Difficulty: easy.
Tools: sheer jelly polish, confetti glitter or a dotting tool, top coat.
Thin layers are everything. The whole appeal is light passing through the color, so two sheer coats beat one thick coat every time — thick jelly polish goes cloudy and loses the depth. Our full jelly nails guide covers how to build that translucent finish without it turning muddy.
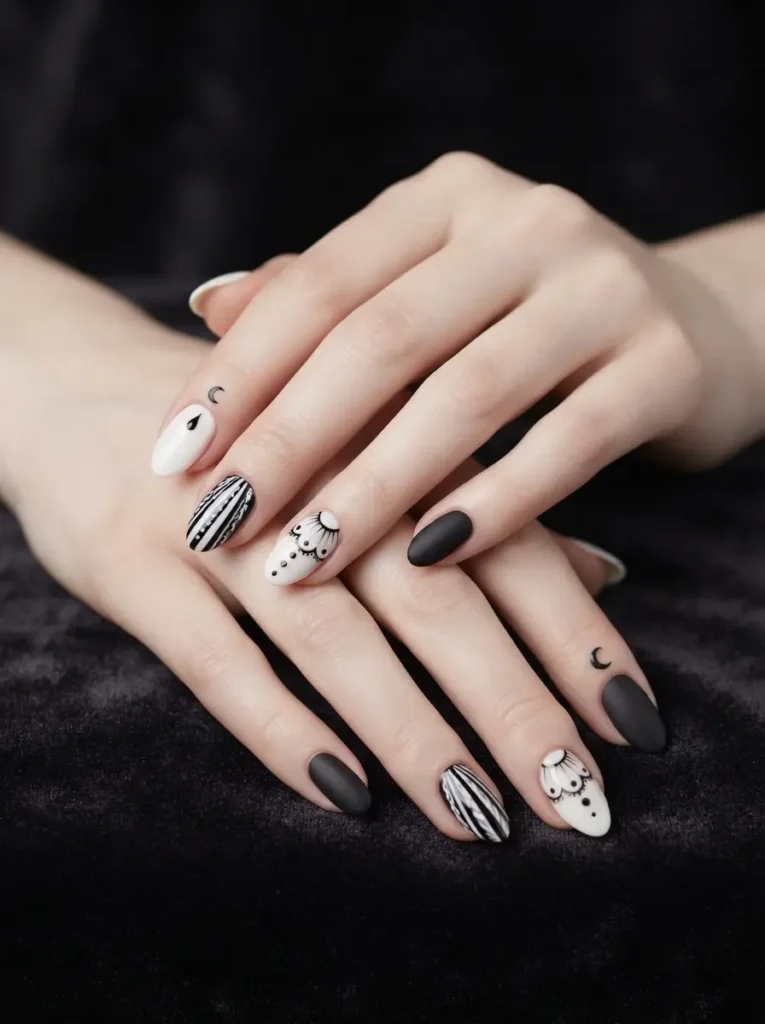
6. Pierrot Sad Clown Nails
Pierrot nails use a black-and-white palette with a single painted teardrop, a ruffled collar motif, or a small crescent, referencing the melancholy white-faced clown rather than the cheerful one.
Best for: dark clowncore fans and anyone who wants something quieter.
Difficulty: medium.
Tools: matte white base, black liner polish, matte top coat.
Finish this one matte. Gloss makes Pierrot look like a graphic tee; matte makes it look like theater makeup, which is the entire point of the reference.
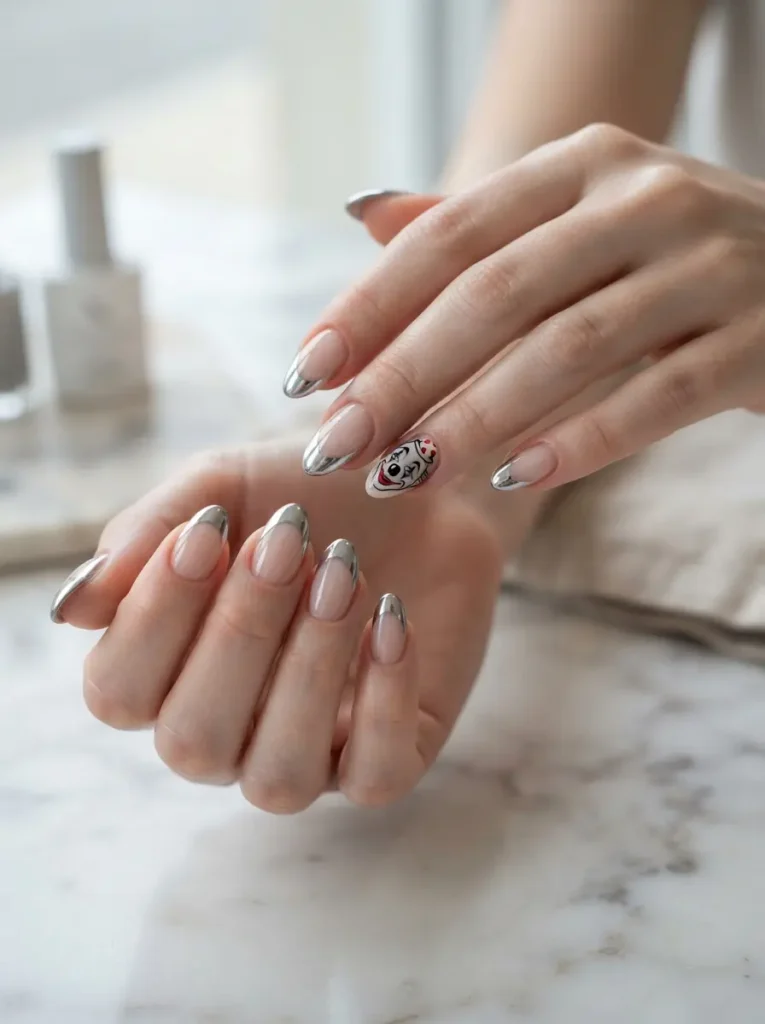
7. Chrome French Tips With One Clown Face
This design keeps nine nails as sleek chrome or metallic French tips and puts a single graphic clown face – black linework, one red accent – on the ring finger.
Best for: work-friendly wear and anyone testing the trend for the first time.
Difficulty: medium (the face needs a steady hand or a salon).
Tools: chrome powder or metallic polish, nude base, fine liner brush, glossy top coat.
Negative space is doing the work here. Leave the clown face on a bare or sheer nail rather than a colored one, so the linework stays the loudest thing on the hand. If the tip line itself is what trips you up, our French tip variations breakdown walks through the smile-line technique.
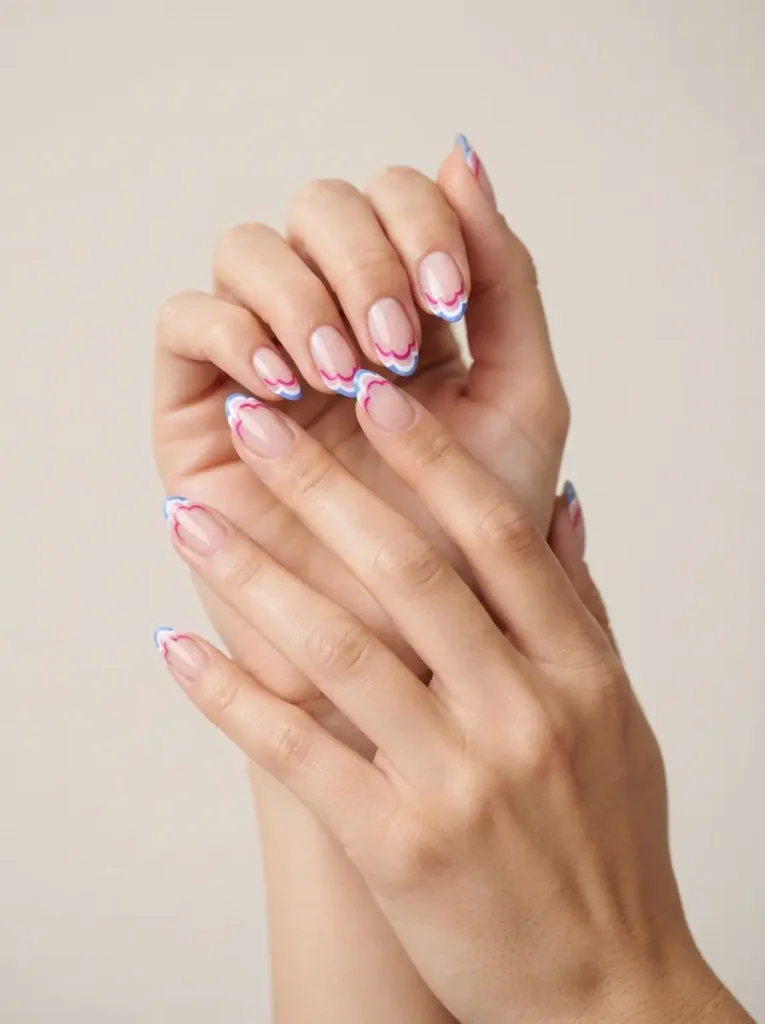
8. Ruffle Collar Scallop Tips Nails
Ruffle collar nails replace the straight French tip line with a scalloped, wavy edge in two or three colors, echoing a clown’s ruffled neckpiece.
Best for: medium-length nails, especially almond or squoval shapes.
Difficulty: medium.
Tools: two or three cream polishes, a short flat brush or a small dotting tool, top coat.
Build the scallops from overlapping dots instead of trying to paint a wave freehand. Place a row of dots along the tip line, then connect and smooth them with the brush – far cleaner than drawing the curve in one pass.
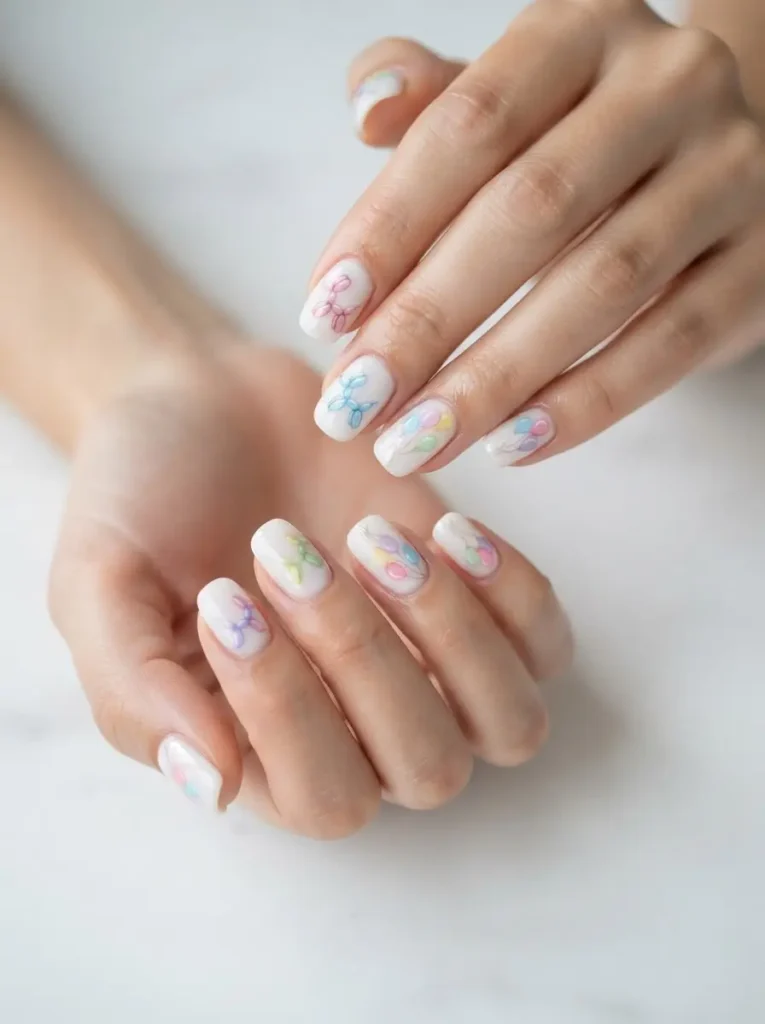
9. Balloon Animal Nails
Balloon animal nails feature simple, glossy balloon-dog silhouettes or floating balloon clusters with hair-thin string lines on a pastel or white base.
Best for: birthdays, and anyone who wants a design people ask about.
Difficulty: medium to hard.
Tools: fine liner brush, three glossy cream polishes, white for the highlight dot, thick glossy top coat.
The highlight is what sells it. One tiny off-center white dot on each balloon creates the illusion of shine and turns a flat blob into an inflated object skip it and the whole design falls flat.
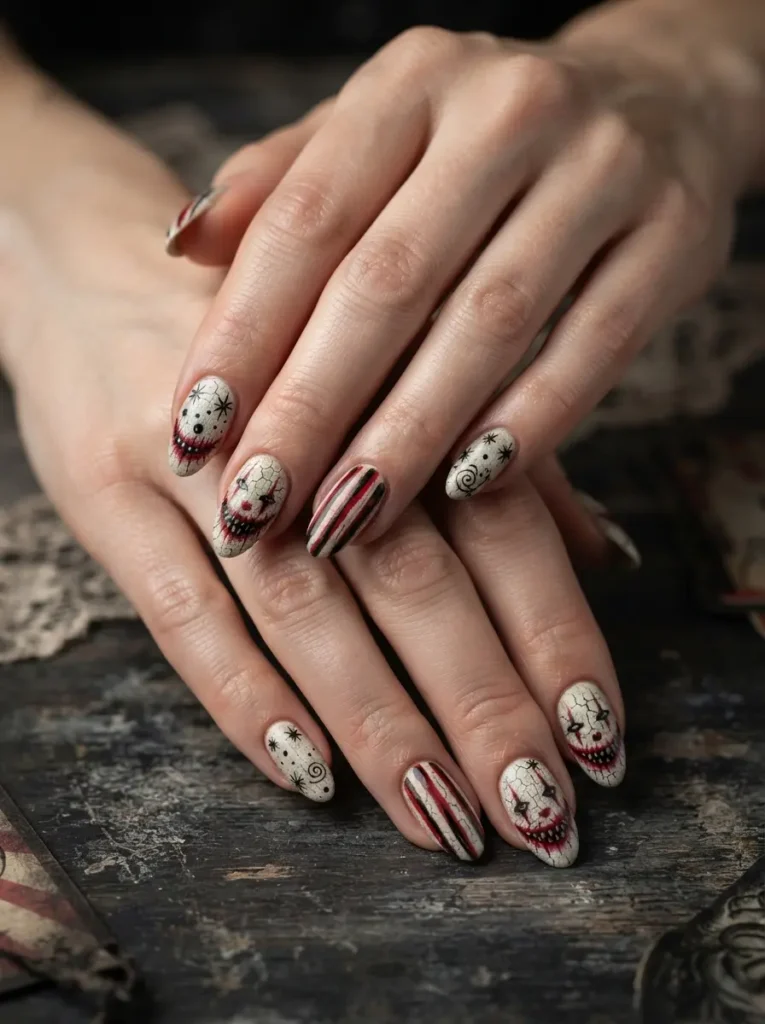
10. Creepy Carnival Nails
Creepy carnival nails combine a dark or faded-cream base with cracked-paint texture, smudged red grins, and off-kilter stripes for a horror-clown look.
Best for: Halloween, concerts, and dark clowncore lovers.
Difficulty: medium.
Tools: off-white or grey base, oxblood and black polish, a fine liner brush, matte top coat, optional crackle polish.
Deliberate imperfection is the technique. Smudge the red slightly with a clean brush and let the linework wobble, because too-neat horror art looks like a cartoon rather than something unsettling. This one pairs naturally with the rest of our Halloween nail designs if you’re building a full October set.
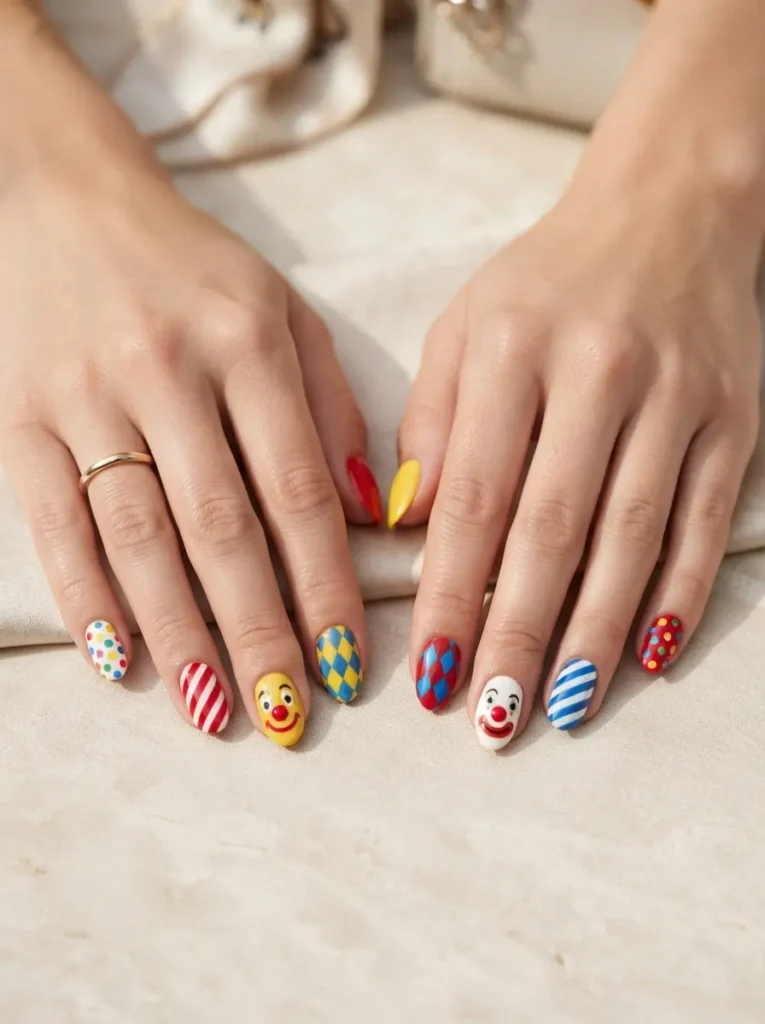
11. Mismatched Motley Nails
Mismatched motley nails give every finger a different clown motif – dots on one, diamonds on another, a stripe, a face, a solid – unified only by a shared color palette.
Best for: confident nail art fans and press-on sets.
Difficulty: hard (it’s ten mini designs).
Tools: everything above, plus patience and a nail art palette for mixing.
One rule holds this together: three colors, maximum, across all ten nails. Palette discipline is the only thing separating “motley” from “mess,” and it’s why this design works better with a limited kit than a large one.
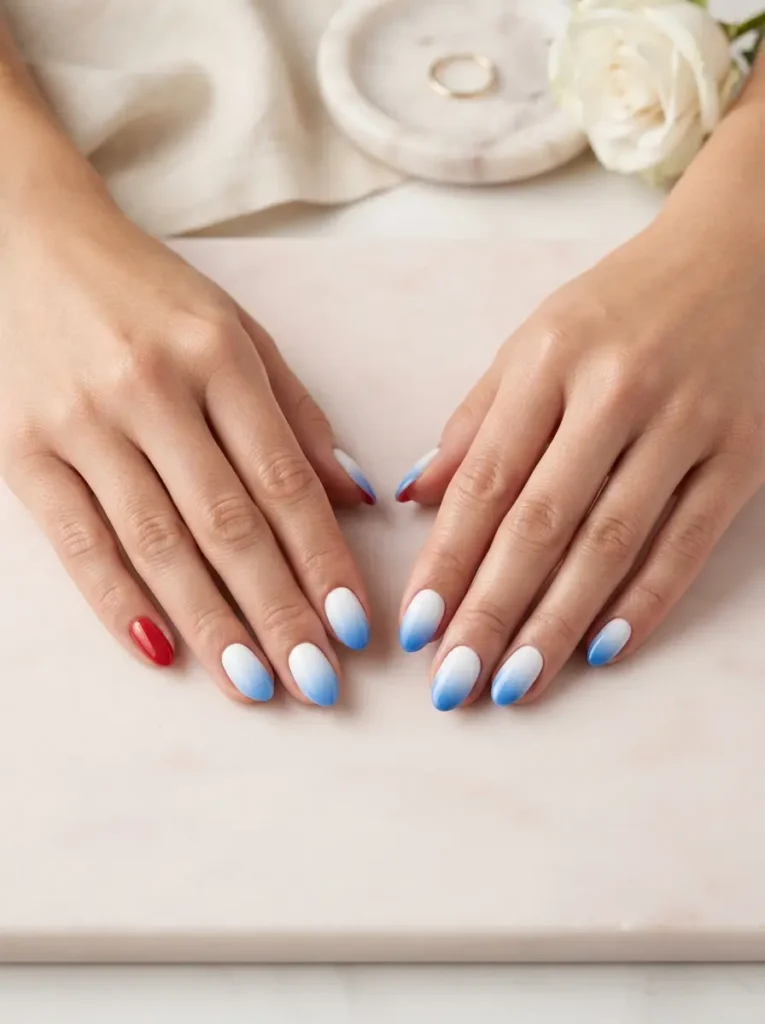
12. Grease-Paint Ombré With a Red Nose Accent
This design blends a soft ombré across each nail – white fading into red or blue – with one solid red accent nail standing in for the clown’s nose.
Best for: long nails and anyone who prefers texture over linework.
Difficulty: medium.
Tools: makeup sponge, two polishes, base coat, glossy top coat, cleanup brush with acetone.
Sponge the gradient in three light dabs rather than one heavy press, and keep the sponge slightly damp so it doesn’t drink all your polish. Clean the skin edges with an acetone-dipped brush afterward, since sponging always overshoots the nail.
How to Do Clown Nails at Home: Step by Step
- Prep properly. Push back cuticles, lightly buff the surface, and wipe each nail with alcohol so polish grips instead of lifting on day two.
- Base coat, always. Bright red and blue pigments stain natural nails badly, and a base coat is the difference between clean nails and yellow ones next week.
- Lay the color base. Two thin coats, fully dry between them. Rushing here is what causes smudged art later.
- Add the art on the dominant hand first, while your patience and hand are steadiest. Everyone does the easy hand first and then rushes the hard one.
- Let art dry longer than you think. Fine linework and dots sit on top of the base and stay soft far longer than a flat coat does. Give it a full ten minutes.
- Seal generously. Float a thick glossy top coat over the design without pressing – pressure drags the linework. Cap the free edge to slow chipping.
- Clean the edges. A small brush dipped in acetone around the cuticle line is what makes home nails look salon-done.
If you don’t own a dotting tool or striping brush, a bobby pin head and a toothpick genuinely work for dots, and thin nail striping tape substitutes for a steady hand on lines. Beginner kits are cheap and are the fastest upgrade to your results – our roundup of nail art tools for beginners covers what’s worth buying and what you can improvise.
How to Make Clown Nails Last Longer
Detailed nail art fails at the edges first, so the free edge is where your effort should go. Cap the tip with both your color and your top coat — dragging the brush horizontally across the very edge of the nail seals the layers and slows the chipping that starts there.
Re-apply top coat every two or three days. It sounds fussy, but a fresh glossy layer restores shine and buries the tiny scuffs that make multi-color art look worn much faster than a single-color manicure.
Wear gloves for dishes and cleaning. Hot water and detergent lift polish edges, and once one corner of a harlequin diamond lifts, the pattern reads as damaged immediately.
For removal, resist peeling. Peeling takes the top layer of your nail plate with it. Soak a cotton pad in acetone, hold it against the nail with foil for around ten minutes, and the design should slide off – glitter and jelly layers may need a second round. If you built the design in gel, follow our gel polish removal steps instead, since gel needs filing through the top layer first.
Common Mistakes to Avoid With Clown Nails
- Using more than three colors. This is the number one reason home clown nails look like a costume. Restrict the palette and the set instantly looks designed.
- Painting the clown face too big. A small face on one accent nail reads as chic; a large face on several nails reads as face paint.
- Skipping the base coat. Reds and blues stain, and stained nails are a much longer problem than a chipped design.
- Top-coating too early. The most common cause of dragged, smeared linework. Wait for detail work to fully set.
- Matching the finish to the wrong sub-style. Gloss suits primary and pastel clown nails; matte suits Pierrot and creepy carnival looks. The wrong finish undercuts an otherwise good design.