You know that feeling when the whole outfit is right – the baggy jeans, the clean sneakers, the oversized hoodie — and then you look down at plain, chipped nails? That’s the detail that breaks the look. Drip doesn’t stop at the wrist.
I’ve pulled together ten streetwear nail ideas that actually work in real life, not just in a two-second TikTok clip. For each one you’ll get who it suits, how hard it is, and what you need – so feel free to skip straight to whichever design catches your eye.
What Counts as Streetwear Nails?
Streetwear nails are bold, graphic nail designs inspired by urban fashion – think graffiti tags, drip effects, chrome finishes, checkerboards, and sneaker-inspired colorways. What separates them from regular nail art is attitude: high contrast, statement shapes, and details borrowed from skate, hip-hop, and sneaker culture rather than florals or French tips.
If a design would look at home next to a pair of chunky sneakers and a puffer jacket, it qualifies. And no – this isn’t just a girls’ trend anymore. Men’s streetwear manicures, from sneaker-matched sets to bold single-color statements, are all over nail tech feeds in 2026.
1. Graffiti Tag Nails
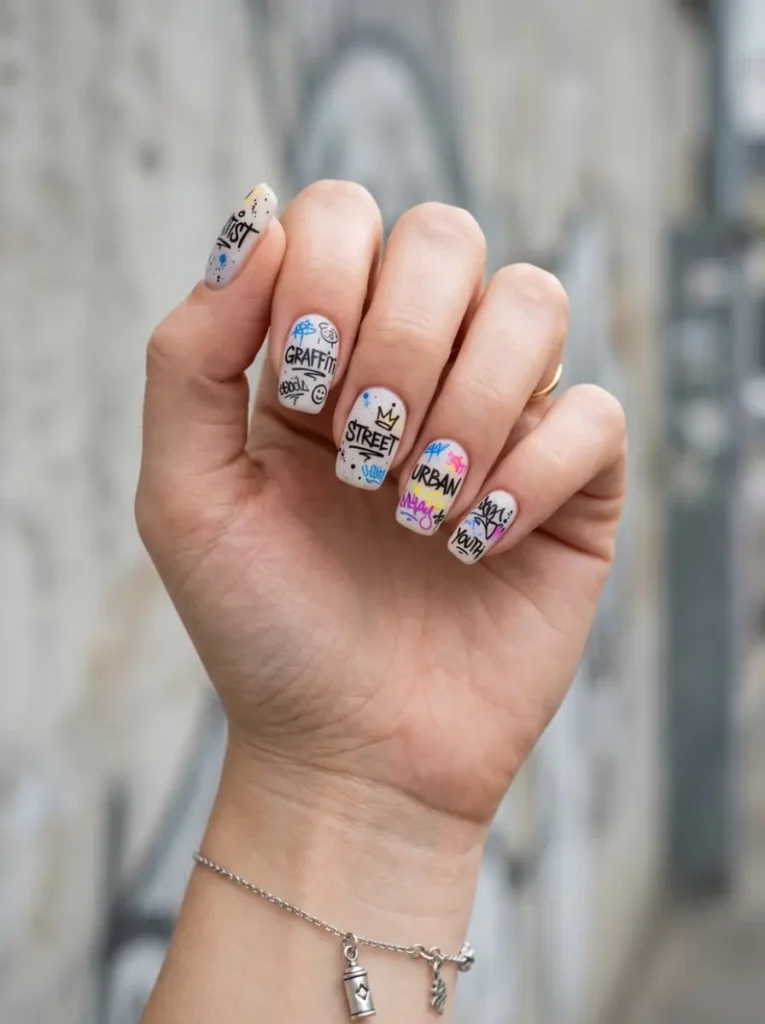
Graffiti tag nails turn each nail into a mini wall piece – scribbled tags, spray-paint splatter, and doodled letters over a light base.
Best for: anyone who wants the loudest, most “street” design on this list.
Difficulty: medium – freehand tags take a steady hand, but stickers make it beginner-easy.
Tools: a white or grey base polish, fine liner brushes or nail art pens, graffiti nail stickers if you’re shortcutting.
The trick is restraint on the base. Keep it pale and flat so the tags pop like paint on concrete. Cramming color into both the base and the doodles is where most people go wrong.
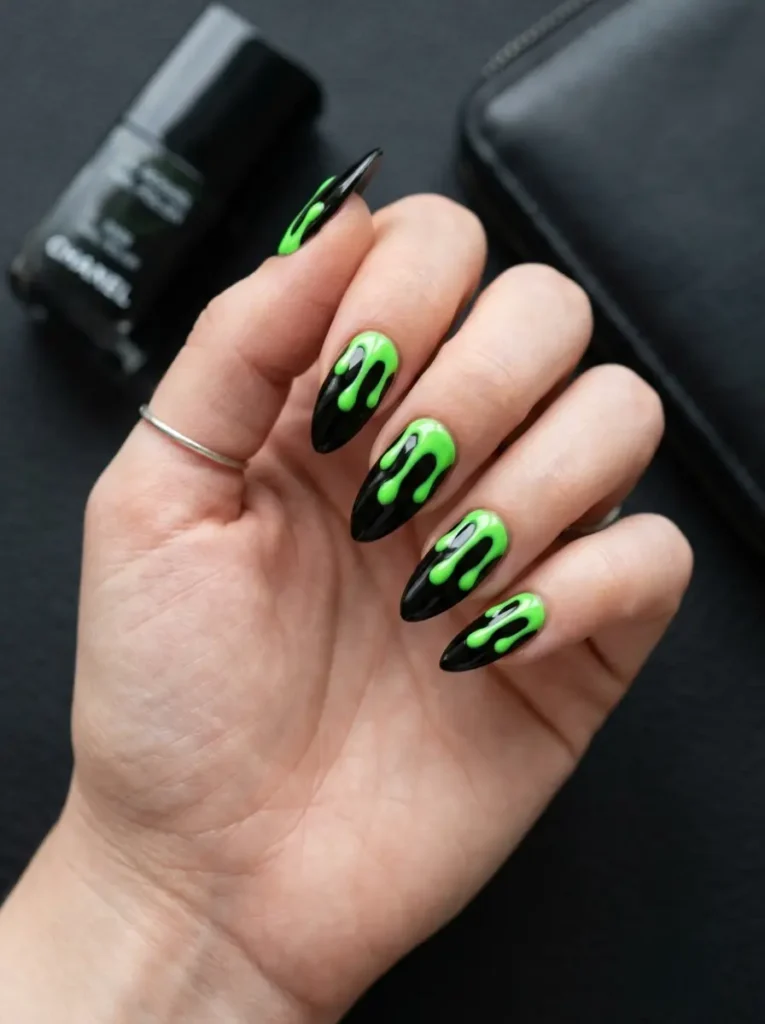
2. Neon Green and Black Drip Nails
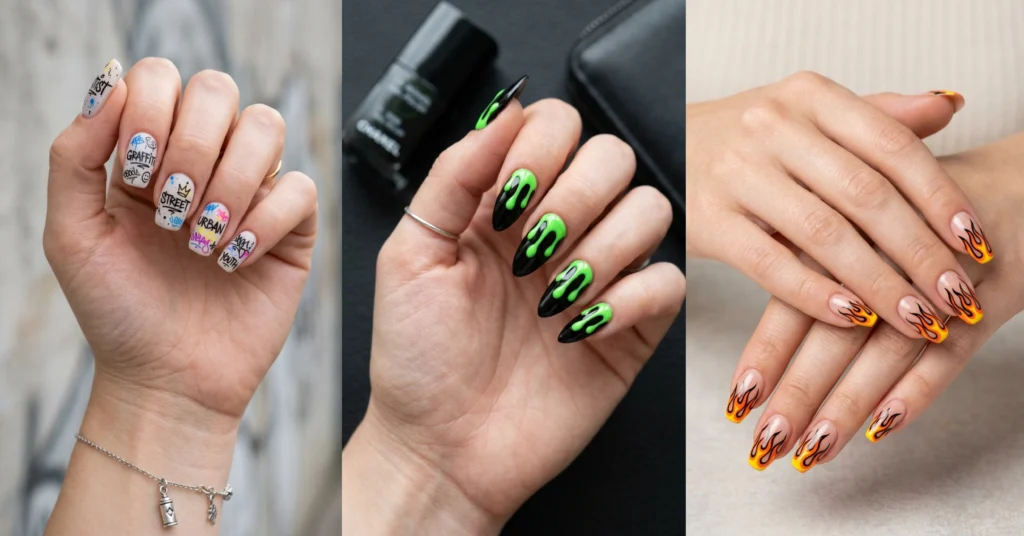
Drip nails use a runny, melting-paint effect – and the neon green on black version is the undisputed streetwear favorite.
Best for: night-out fits, festivals, anyone whose wardrobe leans dark.
Difficulty: easy to medium – drips are forgiving because uneven is the point.
Tools: black base polish, a neon green polish with a thin brush (or a dotting tool dragged downward), glossy top coat.
Pull each drip from the tip toward the cuticle in one slow stroke, then stop. Going back to “fix” a drip is how it turns into a blob.
3. Chrome Hardware Nails
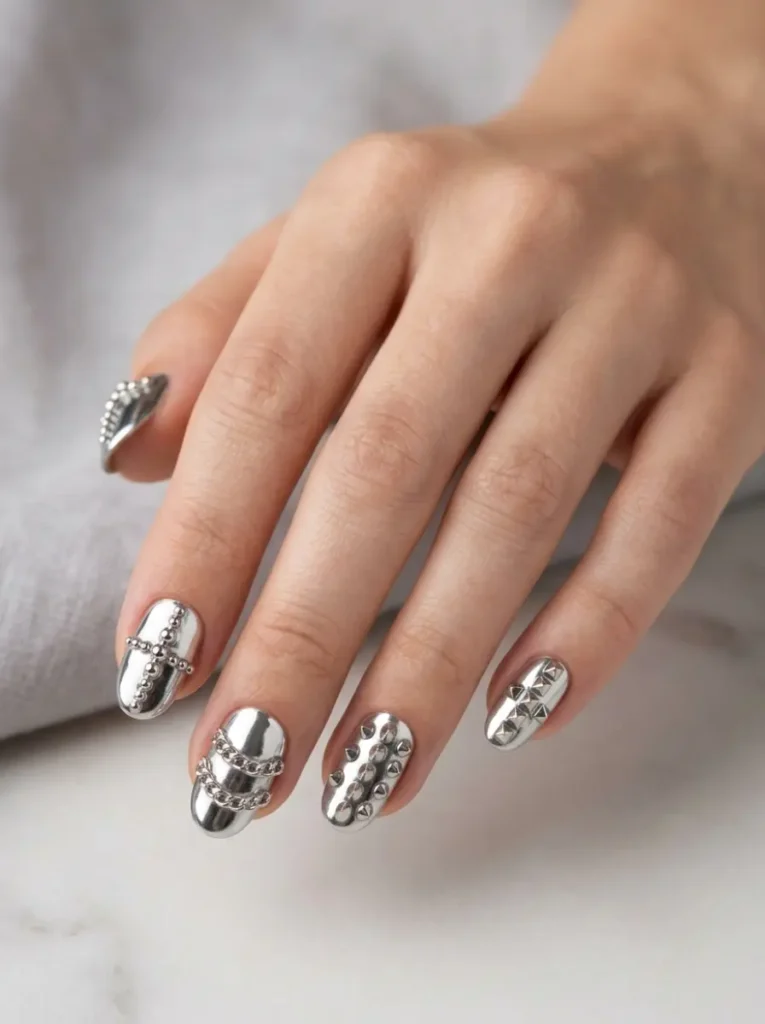
Chrome hardware nails pair a mirror-metal finish with 3D details like tiny chains, studs, or ball beads for an industrial, jewelry-like look.
Best for: medium to long nails and anyone who wears silver chains anyway.
Difficulty: hard at home, easy at the salon – chrome powder needs a gel base and a lamp.
Tools: gel polish, silver chrome powder, nail glue, small metal charms or studs, UV/LED lamp.
One 2026 shift worth stealing: chrome is now being used as the base layer under other effects, not just the final finish, which gives designs on top a backlit, liquid-metal glow.
4. Airbrushed Street Gradient Nails
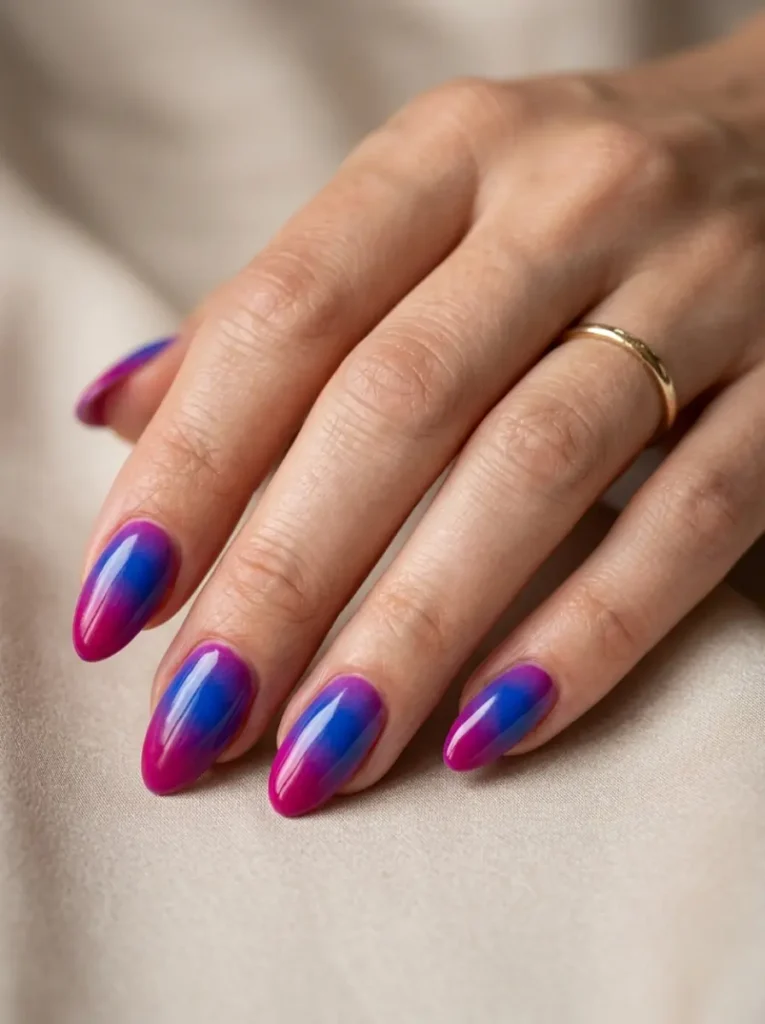
Airbrushed gradient nails fade one bold color into another with a soft, sprayed-on blur – the street cousin of the viral aura nail.
Best for: people who want something eye-catching but not busy.
Difficulty: easy with a makeup sponge, pro-level with an actual airbrush.
Tools: two gel polishes in punchy shades (blue to purple, red to orange), a makeup sponge, top coat.
Airbrush art is having a full-blown revival in 2026, so salons are better equipped for this than they’ve been in years. At home, stick to two colors max per nail – three gets muddy fast.
5. Checkerboard Skater Nails
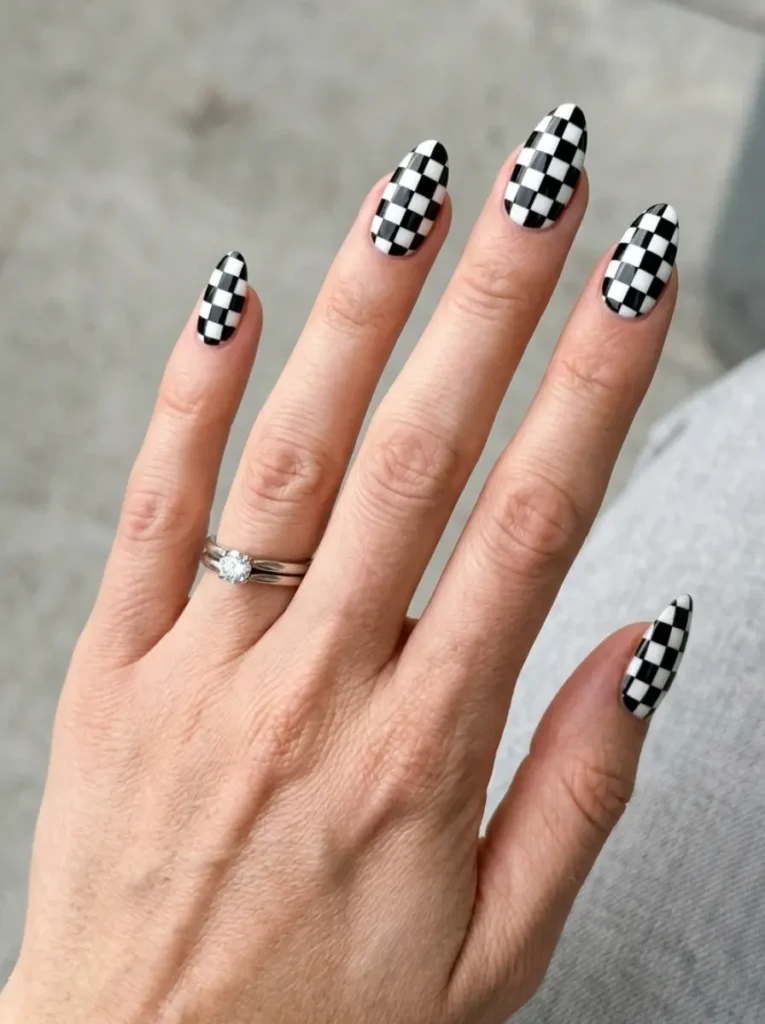
Checkerboard nails borrow the classic skate-shoe pattern: small alternating squares, usually black and white, sometimes swapped for loud color pairs.
Best for: short nails – the pattern reads clearly even on a small canvas.
Difficulty: medium – straight lines are the whole game.
Tools: two contrasting polishes, a thin square-tipped brush or striping tape, top coat.
Paint the lighter color as the full base first, then add the dark squares. Doing it square-by-square in both colors doubles your work and halves your neatness.
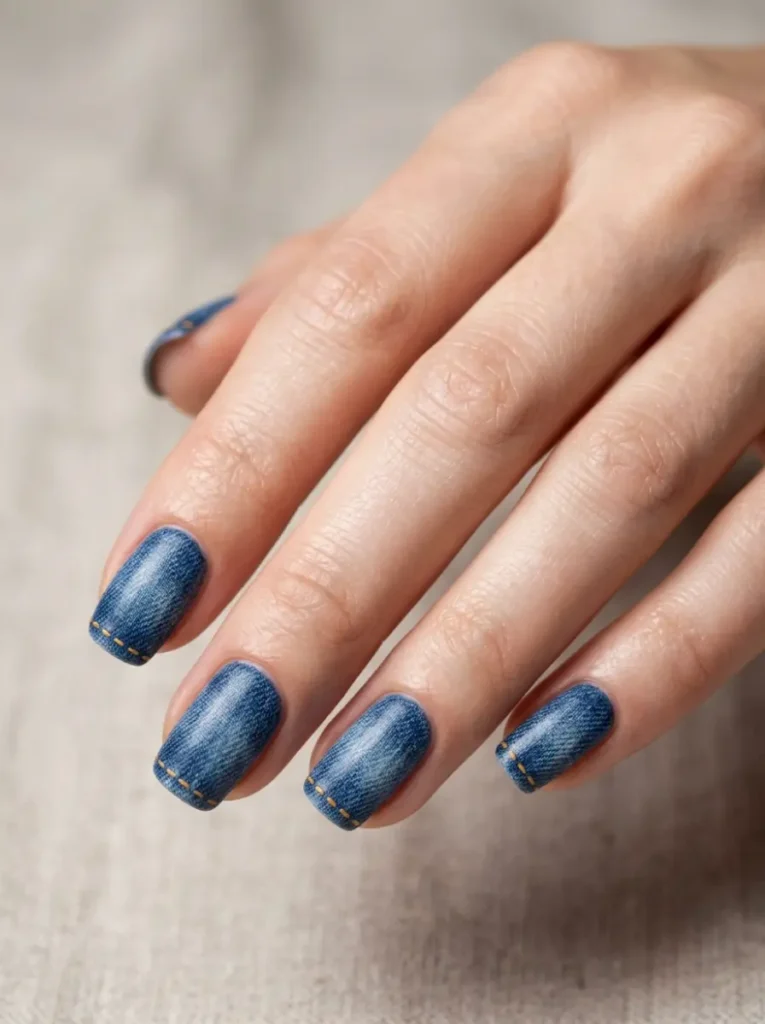
6. Denim-Effect Nails
Denim nails mimic the texture and washed-out blue of your favorite jeans, often finished with tiny painted stitching lines along the edges.
Best for: daytime fits, denim-on-denim outfits, anyone who finds neon too much.
Difficulty: easy – the “washed” look forgives imperfect blending.
Tools: two or three blue polishes (navy, mid-blue, pale blue), a dry sponge for dabbing texture, a white or orange liner for stitches.
The orange stitch detail is what sells it. It’s the same contrast stitching real jeans use, and people notice it up close — which is exactly where nails get seen.
7. Sneakerhead Colorway Nails
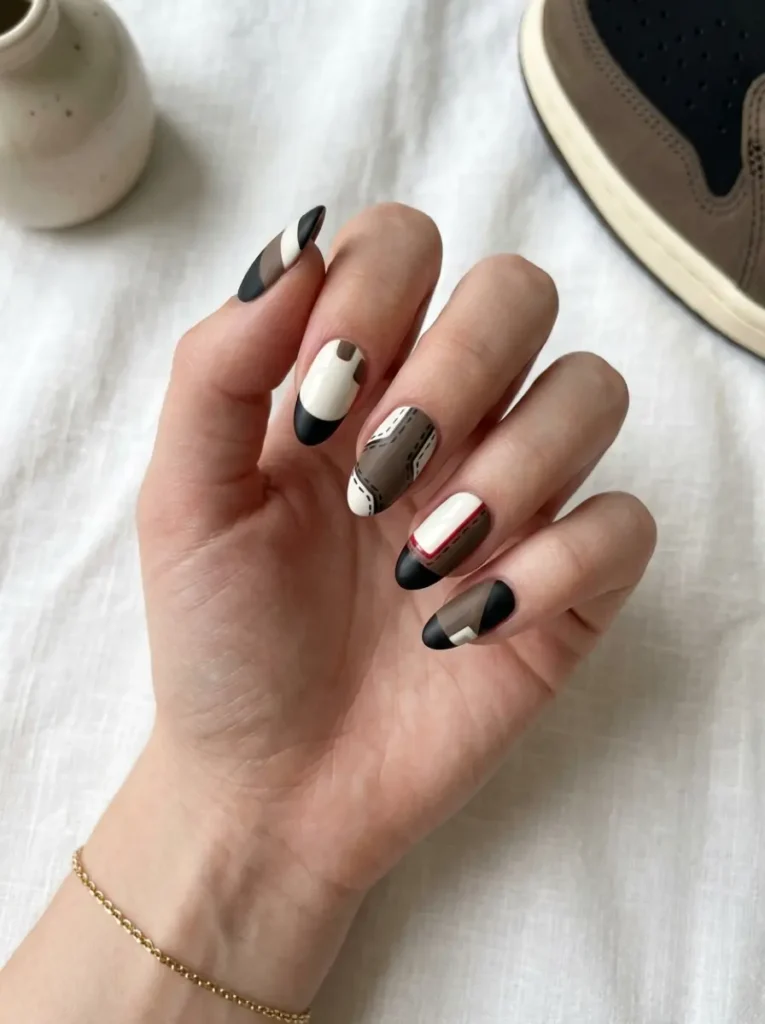
Sneakerhead nails copy the color-blocking of a favorite sneaker – panel by panel – without copying any logos.
Best for: collectors who plan outfits around their rotation.
Difficulty: medium – it’s just color-blocking, but clean edges matter.
Tools: three to five polishes matched to the shoe’s palette, striping tape, a photo of the sneaker for reference.
Skip painting actual brand logos, especially if you post your sets or sell press-ons – trademarks are protected. The colorway alone is recognizable to anyone who knows shoes, and that subtlety reads as more expensive anyway.
8. Camo Print Nails
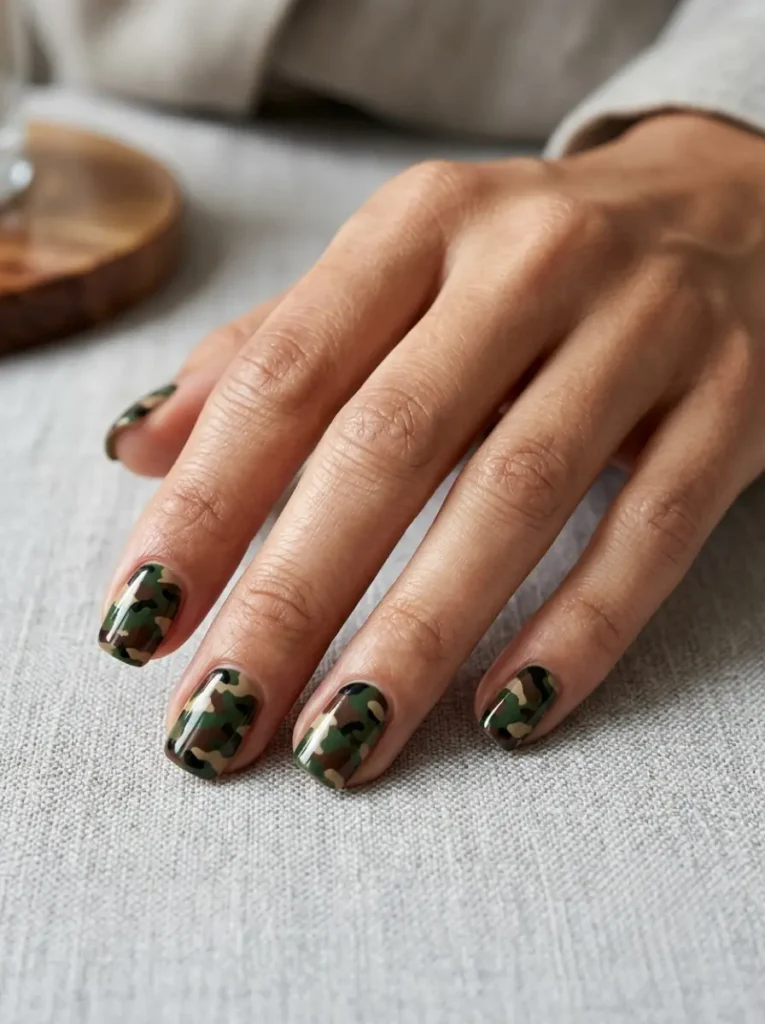
Camo nails layer irregular blobs of green, brown, and khaki (or grey-scale for urban camo) into the classic military pattern.
Best for: cargo-pants people; pairs naturally with earth-tone fits.
Difficulty: easy – camo blobs are supposed to be irregular.
Tools: three or four polishes in one camo family, a dotting tool or bobby pin, matte top coat.
Matte is non-negotiable here. A glossy finish makes camo look like a candy wrapper; matte makes it look like fabric.
9. Y2K Flame Nails
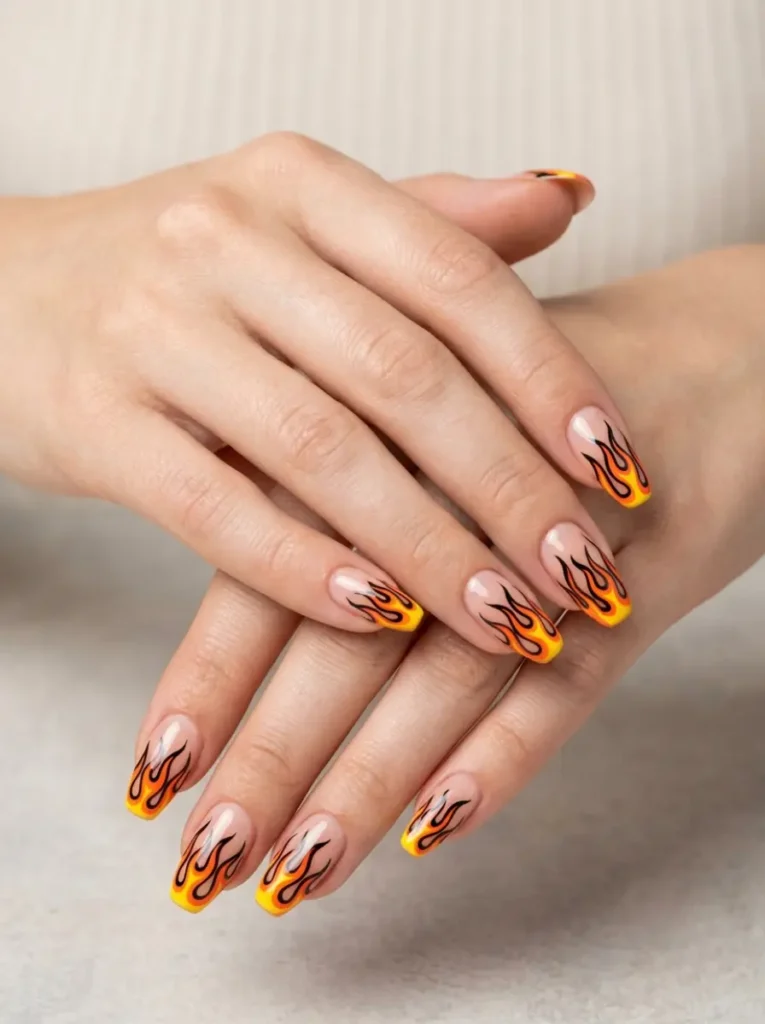
Flame nails run stylized fire up from the nail tip – a direct pull from 2000s hot-rod and rap aesthetics that never really left streetwear.
Best for: almond or stiletto shapes, where the flame follows the nail’s curve.
Difficulty: medium – freehand flames wobble; stickers and stamping plates don’t.
Tools: a base color, a contrast flame color (red on white, silver chrome on black), a fine brush or flame stickers.
Silver chrome flames on a black base is the most-requested version for a reason: it photographs like jewelry. Start the flame at the tip and let it thin out as it climbs – thick flames at the cuticle look upside-down.
10. Matte Black Grunge Nails
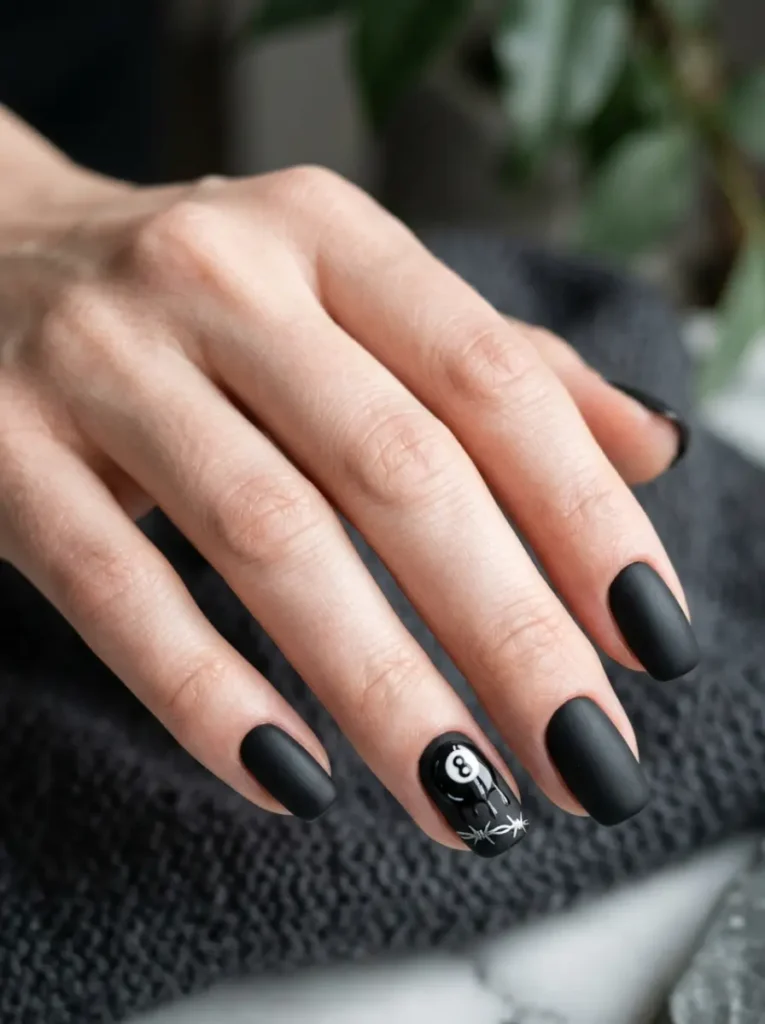
Matte black grunge nails keep nine nails plain matte black and put one loud accent – a smiley, an 8-ball, a barbed-wire line – on a single finger.
Best for: minimalists, men’s sets, and anyone new to nail art.
Difficulty: easy – one accent nail is the lowest-commitment design here.
Tools: black polish, matte top coat, one nail art pen or a single sticker.
This is the design I’d point beginners to first. If the accent nail goes wrong, you redo one nail, not ten – and matte black alone already carries the look.
How to Make Streetwear Nails Last
Bold designs show chips faster than nudes, so wear time matters. A gel-based set typically lasts two to three weeks with proper application; regular polish gets you closer to one. Here’s how to stretch it:
- Prep the nail properly – buff lightly and wipe with alcohol so polish has something to grip.
- Cap the free edge by running base, color, and top coat over the nail tip.
- Seal detailed art (drips, tags, flames) under a thick glossy or matte top coat within a day of doing it.
- Oil your cuticles daily; flexible nails chip less than dry ones.
- Glove up for dishes and cleaning – hot water and chemicals are what actually kill a set.
How to Match Streetwear Nails to Your Outfits
The easiest rule: pull one color from your rotation, not your whole closet. If your sneakers, beanies, and graphic tees keep repeating a color – that neon green, that washed blue — that’s your nail color, and suddenly every fit looks planned.
Loud fit, quiet nails; quiet fit, loud nails. A full graffiti set over an already-busy outfit fights for attention. The same set over a plain black hoodie becomes the outfit.
And if you rotate outfits more than you can rotate manicures, go neutral-bold: matte black, chrome, or grey-scale camo work with everything from track suits to tailored streetwear.
Common Mistakes to Avoid with Streetwear Nails
- Overloading every nail. Ten busy nails read as noise; two or three statement nails read as design.
- Skipping the matte/gloss decision. Grunge and camo want matte; chrome and drips want gloss. The wrong finish undermines the whole style.
- Copying logos onto sets you post or sell. Colorways are fair game; trademarks aren’t.
- Ignoring nail shape. Flames want almond, checkerboard suits short square – pick designs that fit the shape you actually have.
- Cheap top coat. Detailed art without a hard-wearing top coat chips in days, and chipped streetwear nails just look grunge in the bad way.