
The first time I removed gel polish myself, I did it the worst way possible: I picked at a lifted edge during a boring meeting, and twenty minutes later I’d peeled off every nail. It was weirdly satisfying – until I saw what was left. My nails were thin, bendy, and covered in rough white patches that took months to grow out.
Here’s the thing I learned afterward: gel polish itself doesn’t ruin your nails. Bad removal does. When it’s taken off properly, gel comes away clean and your natural nails underneath stay smooth and healthy. This guide walks you through the exact salon method for removing gel polish at home — what you need, the step-by-step process, and the mistakes that cause the damage everyone blames on gel.
Why You Should Never Peel Off Gel Polish
Peeling off gel polish removes the top layers of your actual nail along with the color. Gel is cured onto your nail plate, so when you rip it off, it doesn’t separate cleanly – it takes thin sheets of keratin with it. That’s what causes the white patches, the papery bendiness, and the peeling that can take three to six months to fully grow out.
The frustrating part is that a lifted edge feels like an invitation. One corner comes loose in the shower and your fingers start negotiating with you. Resist. Every peeled nail sets your nail health back weeks, while proper removal takes about twenty minutes and costs almost nothing.
What You Need to Remove Gel Polish at Home
You only need five things, and most of them are probably already in your house:
- 100% pure acetone – regular nail polish remover is too weak to break down gel. Look for “pure acetone” on the label.
- Cotton balls or pads – cut or torn into nail-sized pieces.
- Aluminum foil – cut into ten squares, roughly 3 x 3 inches each.
- A coarse nail file (around 100/180 grit) – for breaking the seal on the top coat.
- A wooden cuticle stick – for nudging off the softened gel. Wood is gentler than metal.
Optional but worth it: a thick balm like petroleum jelly to protect the skin around your nails, and cuticle oil for afterward. If you plan to remove gel regularly, soak-off clips can replace the foil, but foil works perfectly fine.
How to Remove Gel Polish: Step by Step
Set aside twenty to thirty minutes, put on a show, and work through one hand at a time. Here’s the full routine:
- File the shiny surface off each nail using your coarse file. You’re not filing the gel away – just dulling that glossy top coat until the whole nail looks matte. This breaks the seal so acetone can actually reach the layers underneath. Stop as soon as the shine is gone.
- Protect the skin around each nail with a thin layer of petroleum jelly or a thick balm. Acetone is very drying, and this small step saves your skin from that tight, chalky feeling later. Keep the balm off the nail itself.
- Soak a piece of cotton in acetone until it’s fully saturated, then press it directly onto the nail so the whole surface is covered.
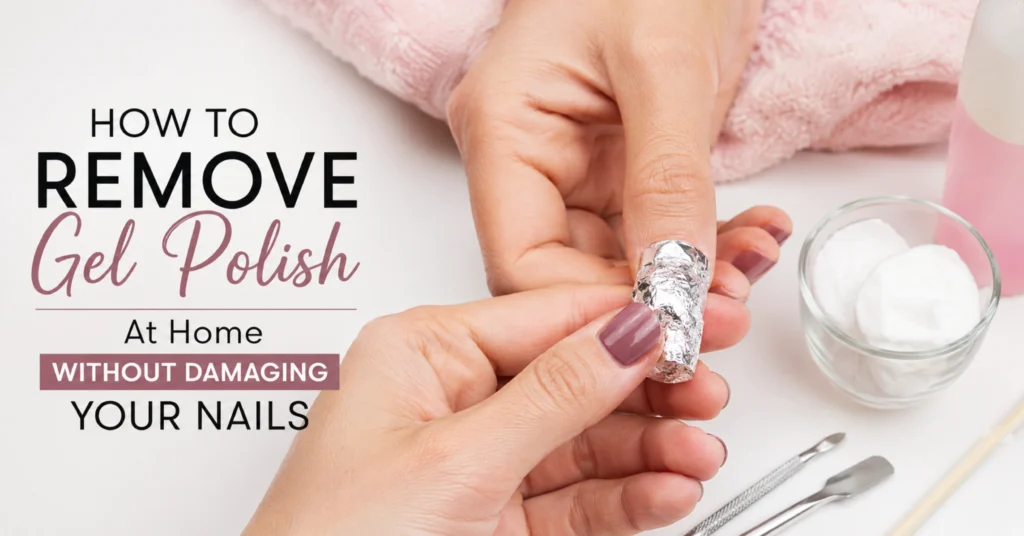
- Wrap each fingertip snugly in a foil square to hold the cotton in place and trap warmth. Warmth speeds up the process, so wrapping your foiled hand in a towel helps too. Work finger by finger – cotton, then foil, then the next nail.
- Wait ten to fifteen minutes. This is where every at-home removal succeeds or fails. Check one nail at the ten-minute mark: the gel should look wrinkled, cracked, or flaky – like paint lifting off old wood. If it still looks smooth and solid, rewrap and give it five more minutes.
- Push the softened gel off gently with the wooden stick, working from the cuticle toward the tip. Properly soaked gel slides off with almost no pressure. If you hit a patch that resists, don’t dig – put a fresh acetone-soaked cotton back on and rewrap for another five minutes.
The golden rule through all of this: the acetone does the work, not your hands. Any time you find yourself scraping hard, that’s the gel telling you it needs more soaking time.
What to Do Right After Removal
Once the gel is off, your nails have just been through a fifteen-minute acetone bath, so the next ten minutes matter. Wash your hands with gentle soap to remove residue, then lightly buff the nail surface only if there are small rough patches — a few soft passes, nothing aggressive.
Then rehydrate like it’s your job. Massage cuticle oil into every nail and the surrounding skin, follow with a rich hand cream, and repeat the oil daily for the next week. Acetone strips moisture fast, and dry nails become brittle nails. This one habit is the difference between nails that bounce back in days and nails that feel rough for weeks.
If you can, give your nails two or three polish-free days before the next manicure. They don’t technically need to “breathe” — nails get nutrients from your bloodstream, not the air – but a short break gives you time to oil them generously and spot any thin areas.
How Do You Know When Gel Is Ready to Come Off?
Gel is ready for removal when it looks visibly damaged by the acetone – wrinkled, bubbled, curling at the edges, or flaking when touched. If you push the stick under an edge and the gel glides, you’re there. If you feel resistance or see smooth, glossy patches, it needs more time.
Different gel brands and thicker builder layers can take twenty minutes or more, and that’s normal. Slow removal is not failed removal. The only failed removal is a forced one.
Common Gel Removal Mistakes to Avoid
- Using regular polish remover. Standard removers contain too little acetone (or none) to break down cured gel. You’ll soak forever and end up scraping. Pure acetone only.
- Skipping the filing step. With the glossy top coat intact, acetone just beads off the surface. Thirty seconds of filing saves fifteen minutes of pointless soaking.
- Soaking your whole fingers in a bowl of acetone. It works, but it drenches all the skin on your fingertips in acetone too. The cotton-and-foil method targets only the nail.
- Scraping with a metal tool. Metal pushers gouge soft, acetone-soaked nails easily. Wood forgives; metal doesn’t.
- Forcing stubborn patches. Any gel that fights back gets more acetone, not more pressure. Digging is just slow peeling.
- Skipping the aftercare oil. Removal without rehydration leaves nails dry and snap-prone – and then gel gets blamed for damage the acetone caused.
FAQs
Can I remove gel polish without acetone?
Not really – cured gel is designed to resist everything short of acetone. The “soap and oil soak” hacks you see online mostly work by loosening gel that was already lifting, which is closer to controlled peeling than removal.
How long does gel polish take to remove at home?
Plan for 20 to 30 minutes total: a few minutes of filing, 10 to 15 minutes of soaking, and a gentle push-off. Thick or builder-style gels can need an extra round of soaking.
Does removing gel polish hurt?
No – done correctly it’s completely painless. Stinging or soreness usually means acetone sitting on broken skin, or scraping that’s gone too deep. Stop, rehydrate, and re-soak instead.
Why are my nails white and rough after gel removal?
Small white, rough patches usually mean surface layers were pulled away during removal – a sign the gel needed more soaking time. Keep the area oiled and let it grow out; go gentler and slower next time.
Final Thoughts
Removing gel polish at home isn’t difficult – it’s just slow, and that’s the whole secret. File the shine, wrap in acetone, wait longer than feels necessary, and let the gel surrender on its own. Twenty patient minutes protects the months of healthy nail growing underneath.
And if you’ve already peeled a set off (no judgment — we’ve all sat through that meeting), your nails will recover. Keep them short, oil them daily, and be kind to them for a few weeks. The next manicure will thank you for it.


Pingback: 18 New Year Nail Ideas That Outshine Every Sparkler at Midnight - TheZelovo.com