The first festival I ever went to, I spent three days planning my outfit and about four minutes on my nails. Big mistake. Every single photo from that weekend has my hands in it somewhere – holding a drink, throwing a peace sign, gripping a flower crown that did not survive the crowd — and my chipped, plain beige polish is right there in all of them.
Since then, festival nails have become my favorite part of getting ready. Your outfit changes every day, but your manicure shows up in every photo, every video, every close-up of your wristband stack. It deserves real thought.
This guide walks you through 10 festival nail ideas that actually photograph well – from glow-in-the-dark constellations to pressed wildflowers — plus how to make them survive a full weekend of dancing, glitter, and questionable porta-potty doors. Skip around to whatever catches your eye.
What Counts as Festival Nails?
Festival nails are manicures designed to be bold, photogenic, and durable enough to last through a multi-day event – think high-shine finishes, playful nail art, 3D elements, and colors that pop in both daylight sets and nighttime stage lighting. Unlike everyday office-safe manicures, festival nails lean into maximalism: chrome, neon, glitter, charms, and hand-painted details all belong here.
The best festival nail designs share three things. They read clearly in photos (tiny, overly delicate art disappears on camera). They match the energy of the event, whether that’s a desert festival, an EDM weekend, or a folk-and-flowers situation. And they hold up – because nothing kills the vibe like a chipped accent nail on day one.
1. Aura Airbrush Nails
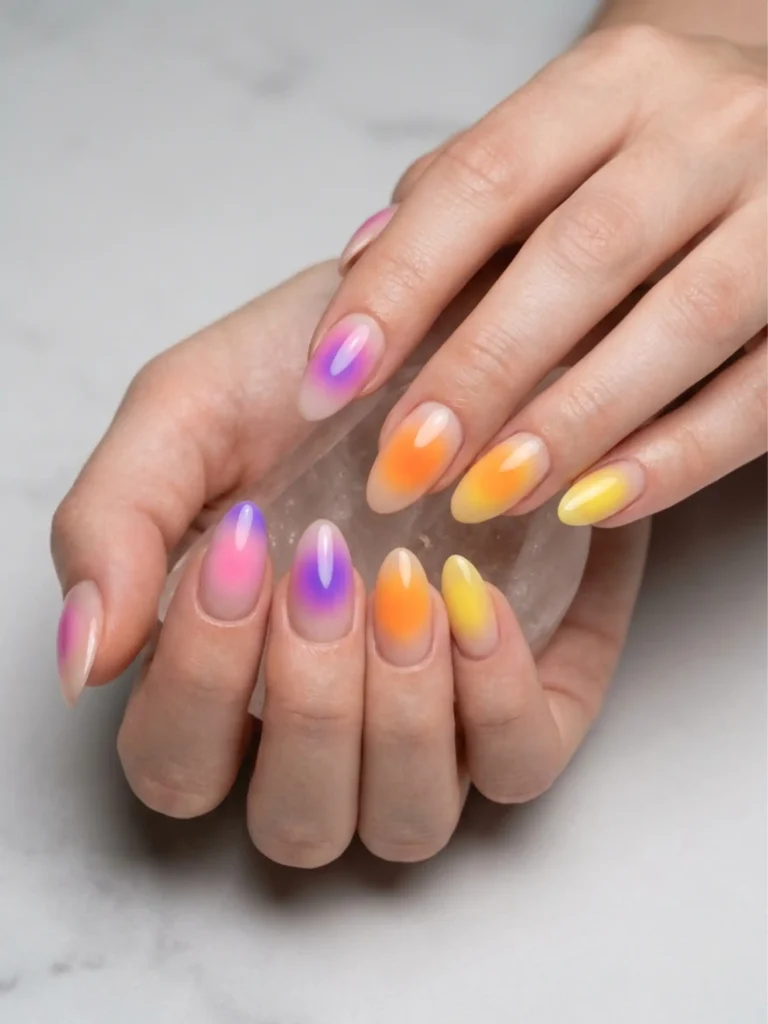
Aura nails feature a soft, glowing orb of color airbrushed onto the center of each nail, fading out toward the edges like an energy field. They’re dreamy, slightly psychedelic, and they photograph like nothing else – especially in pink-purple, orange-yellow, or blue-green combinations.
What makes aura nails perfect for festivals is how they catch stage lighting. That hazy gradient shifts depending on the light around you, so your nails look different at sunset than they do under lasers at midnight. If you’re doing them at home without an airbrush, a small makeup sponge and thin layers of polish get you surprisingly close.
My tip: keep the base sheer or milky white. Aura designs on a nude base can wash out in bright daylight photos, but a milky base makes the color glow.
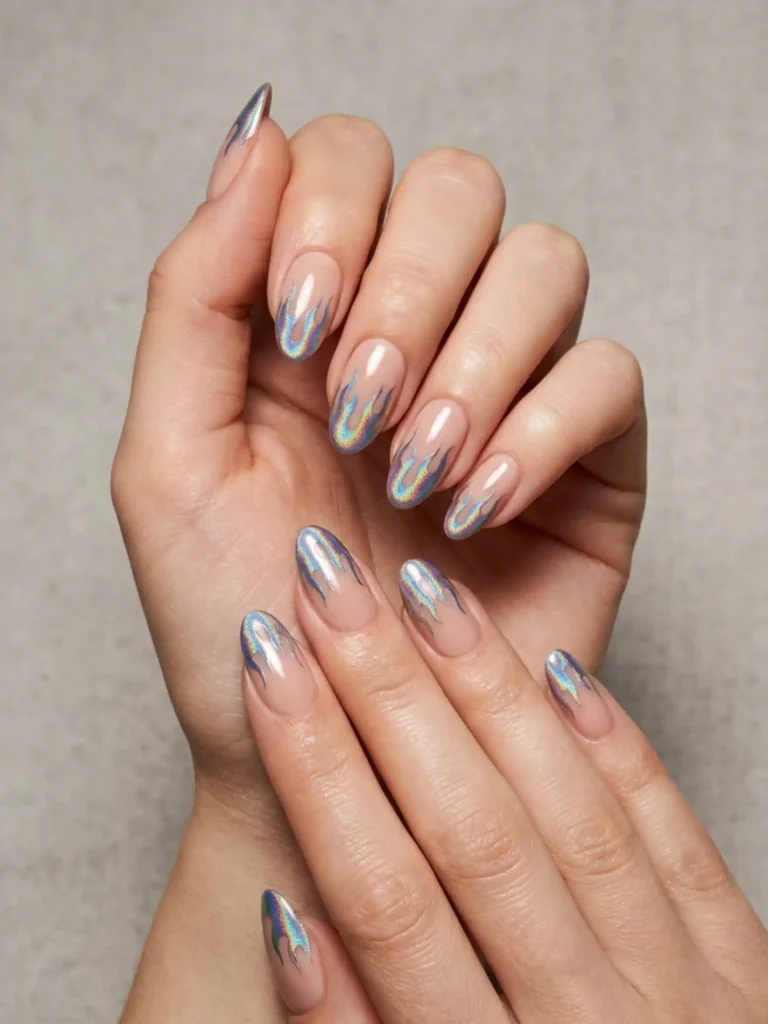
2. Holographic Flame French Tips Nails
This design swaps the classic white French tip for flames painted in holographic chrome, licking up from the free edge. It’s the manicure equivalent of a leather jacket – a little edgy, a little retro, and it makes every hand gesture look intentional.
Holographic flames work because they move. Every time your hand shifts, the chrome catches light, and the flames look like they’re flickering. On camera, especially in video, the effect is genuinely mesmerizing.
Go slightly longer with the flames than feels natural when you’re painting them. Flames that stop too short read as random squiggles in photos; flames that stretch toward the middle of the nail read as fire.
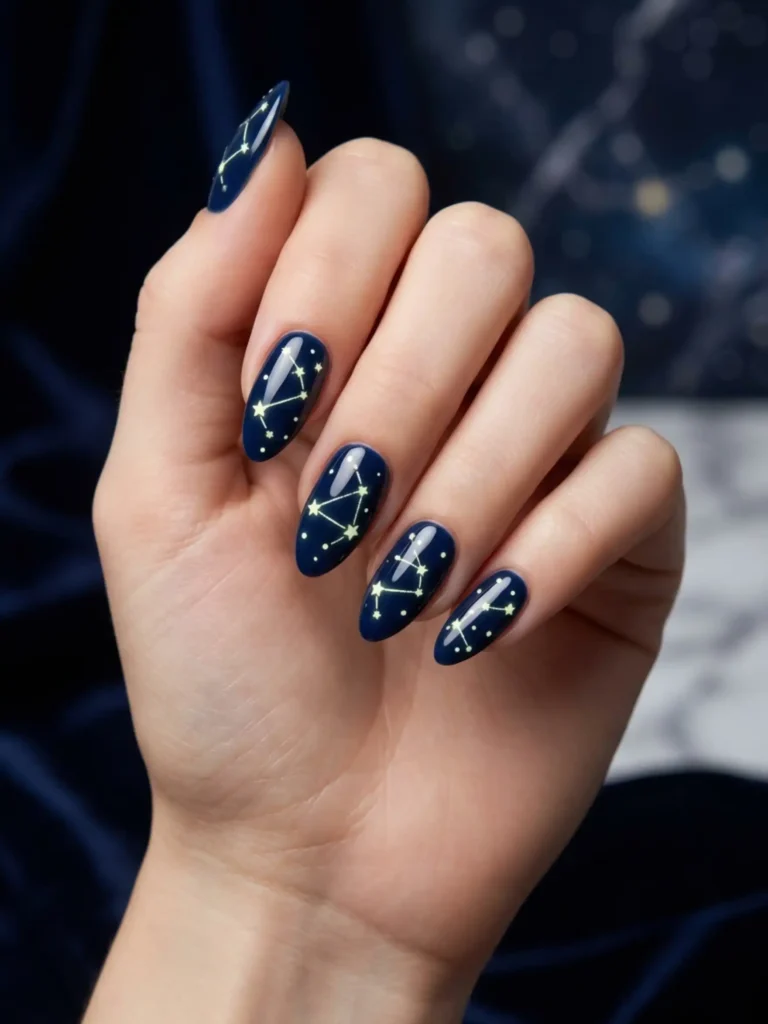
3. Glow-in-the-Dark Constellation Nails
Constellation nails use a deep navy or black base scattered with tiny glow-in-the-dark stars, dots, and connecting lines that mimic real star maps. In daylight, they look like elegant celestial art. Once the sun goes down and the stage lights hit, they literally glow.
This is the single best “surprise” manicure on this list. Nobody expects your nails to light up during the headliner’s set, and the moment someone notices, your hands become the conversation.
Charge them under a phone flashlight for thirty seconds before the night sets start. Glow polish fades over a few hours, and a quick recharge brings the stars right back.
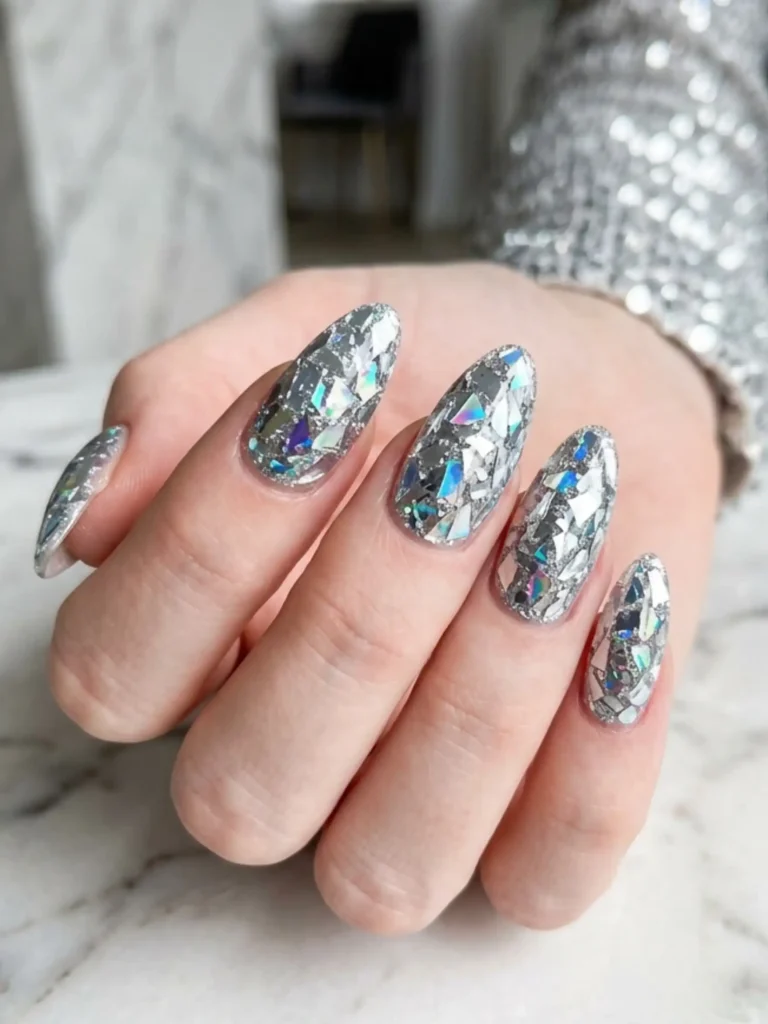
4. Disco Ball Glass Shard Nails
Disco ball nails are covered in irregular pieces of mirrored glitter foil or shattered-glass film, sealed under a thick glossy top coat so the whole nail reflects light like a mirrorball. They are unapologetically extra, and that’s the point.
These are the nails for EDM festivals and any event where the after-dark hours matter more than the daytime. Under strobes and lasers, every nail throws tiny reflections. In flash photos, they sparkle so hard they almost look edited.
One thing I learned the hard way: seal the edges properly. Mirror film that lifts at the corner will snag on everything — hair, fringe, mesh tops. Two layers of top coat, capping the free edge, solve it.
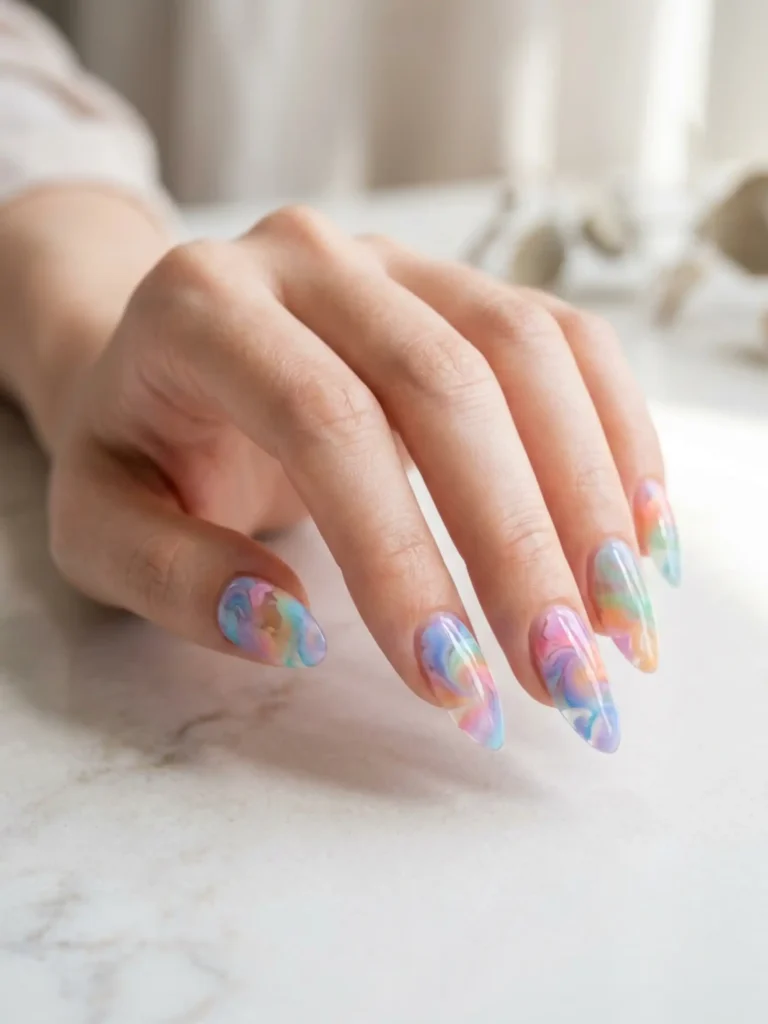
5. Tie-Dye Swirl Jelly Nails
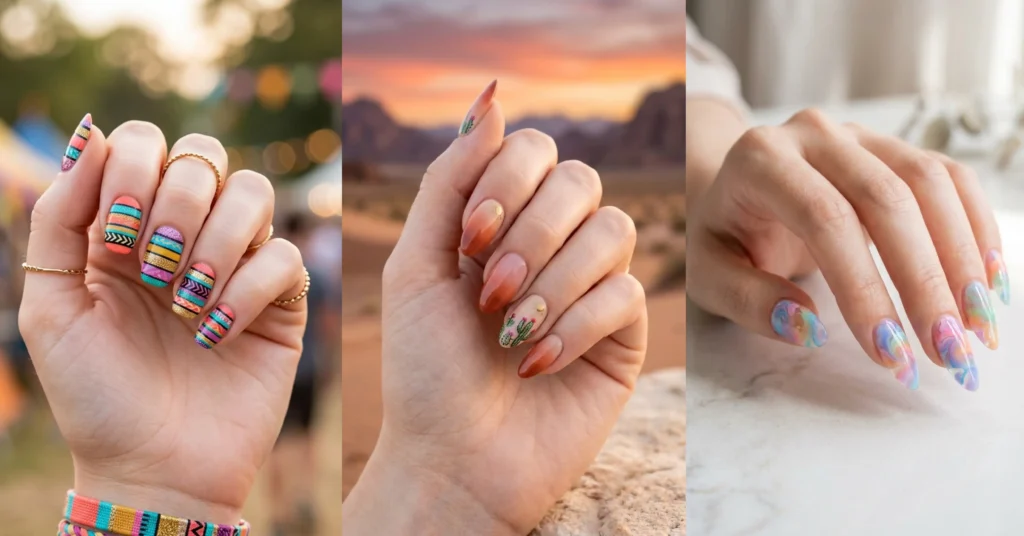
Tie-dye jelly nails combine a translucent, candy-like jelly base with soft swirls of two or three colors marbled together, so light passes through the design like stained glass. Pastel rainbow swirls, sunset oranges and pinks, or ocean blues and greens all work beautifully.
The jelly finish is what separates this from ordinary marble nails. Because the colors stay sheer, the swirls look juicy and dimensional rather than flat – and they flatter every skin tone because your natural nail glows through.
Thin layers are everything here. The moment the polish goes opaque, you lose the jelly effect. Build the swirl slowly and finish with the glossiest top coat you own.
6. Pressed Wildflower Nails
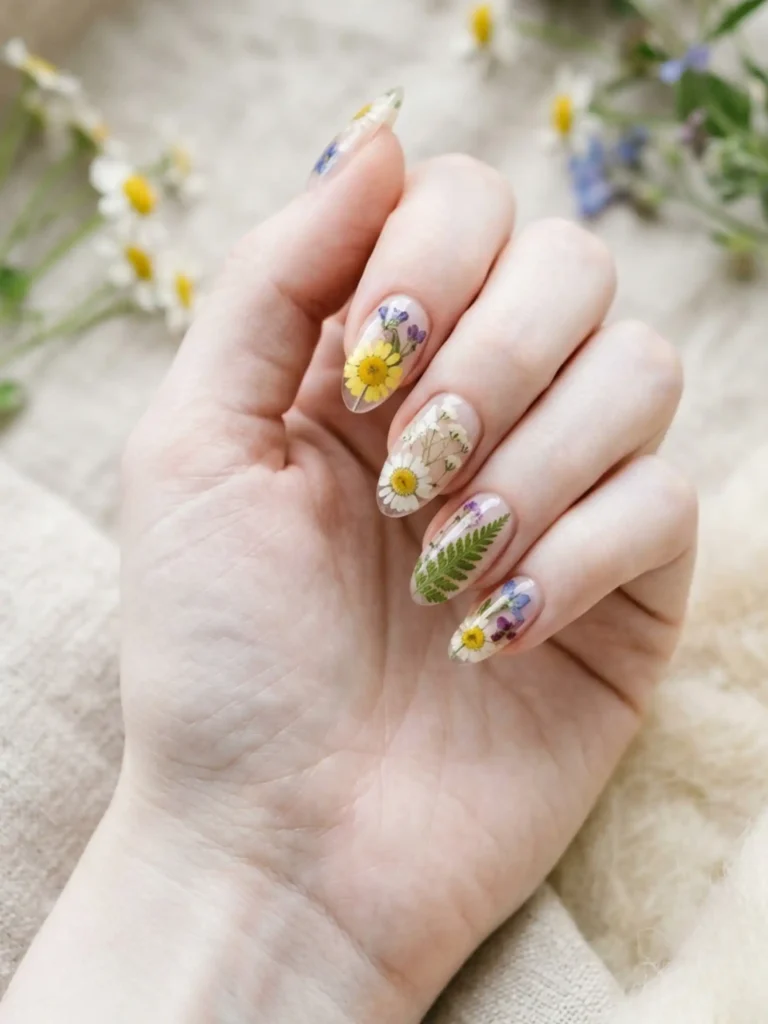
Pressed flower nails encapsulate real dried micro-flowers – tiny daisies, baby’s breath, pressed ferns – under a clear builder gel or thick top coat, creating a botanical, cottagecore look. For folk festivals, indie lineups, or anything with a flower-crown crowd, nothing fits better.
Real dried flowers photograph with a depth that painted florals can’t match. There’s texture, tiny natural imperfections, and that “wait, is that a real flower?” moment when someone looks closely.
Buy flowers sold specifically for nail art – they’re pre-pressed, thin enough to encapsulate smoothly. Flowers you press yourself are usually too thick and create bumps that catch on clothing all weekend.
7. Desert Sunset Ombré with Micro Cactus Art
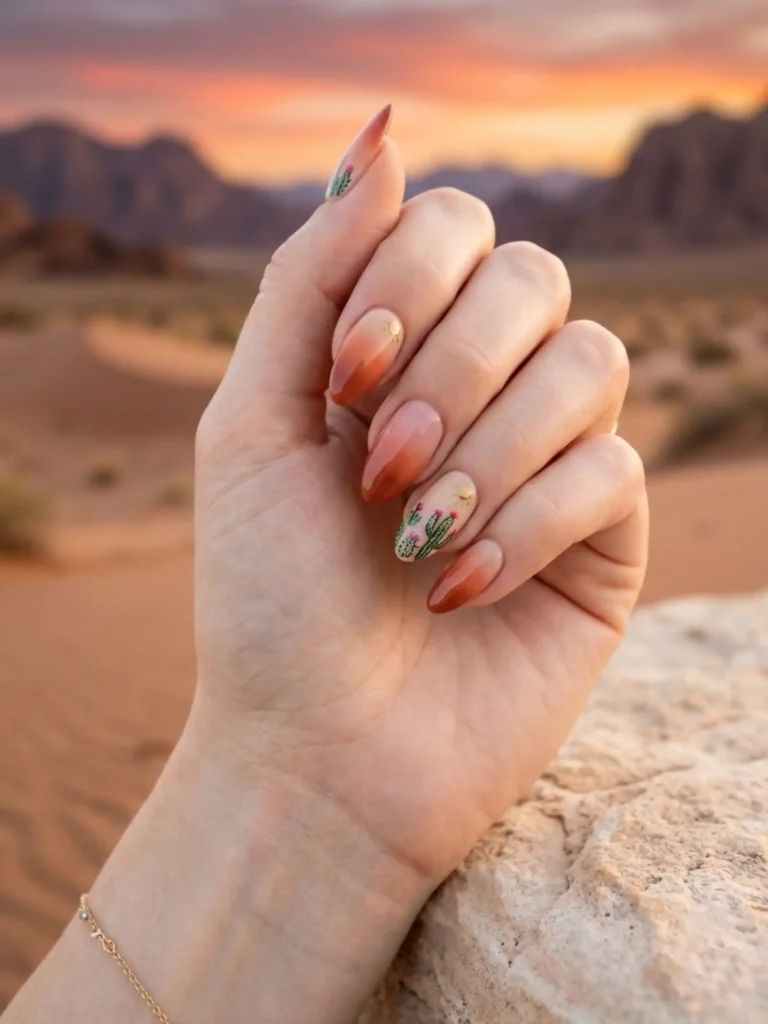
This design blends a warm ombré – deep terracotta melting into burnt orange, dusty pink, and pale sand – with one or two accent nails featuring tiny hand-painted cacti or a sun silhouette. It’s made for desert festivals, and it looks like the landscape got painted straight onto your hands.
The ombré does the heavy lifting, so the cactus art can stay simple: a green silhouette, a few white dots for spines, done. Simple silhouettes actually photograph better than detailed illustrations at nail scale.
Sponge the gradient in three thin passes rather than one heavy one. Heavy sponging creates streaks; light passes create that soft desert-sky melt.
8. UV-Reactive Neon Splatter Nails
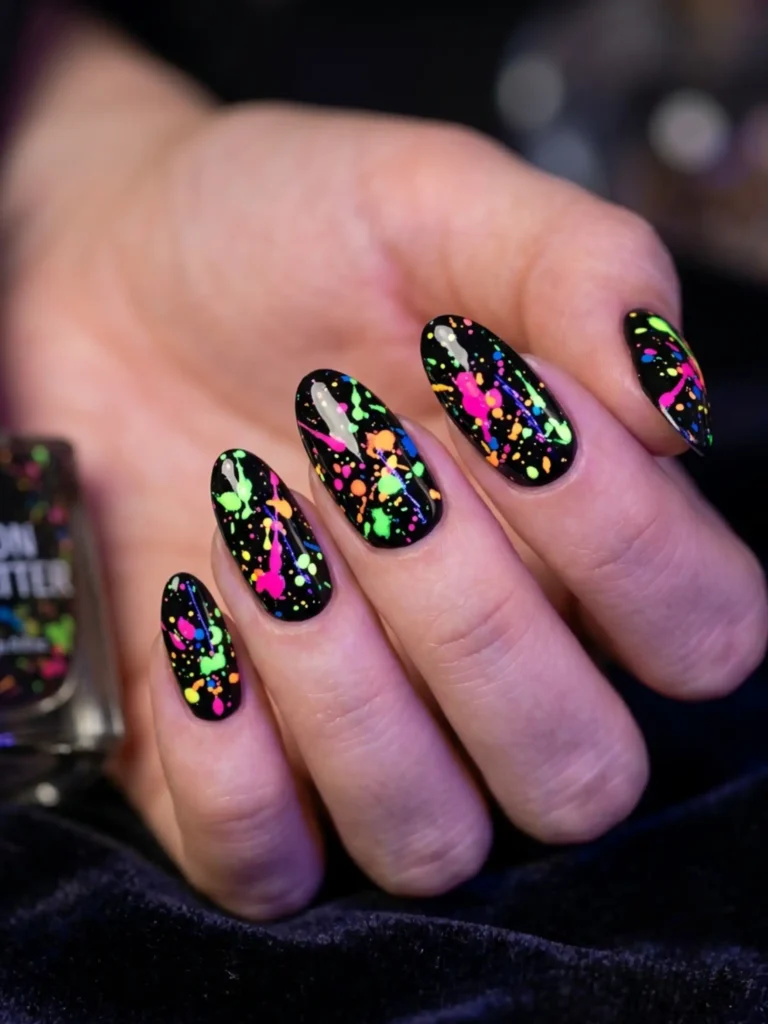
Splatter nails start with a white or black base flicked with random splatters of UV-reactive neon polish – hot pink, acid green, electric orange – like a paint fight happened on your hands. Under regular light they’re playful street-art nails. Under blacklight, they explode.
Many festival stages, art installations, and tents run UV lighting at night, which means these nails have a secret second life you don’t even have to plan for.
Do the splatter outdoors or over a garbage bag. I splattered a bathroom counter once and spent longer cleaning neon dots off the grout than I spent on the actual manicure. Tape around your fingers first and the cleanup on skin takes seconds.
9. Festival Wristband Stripe Nails
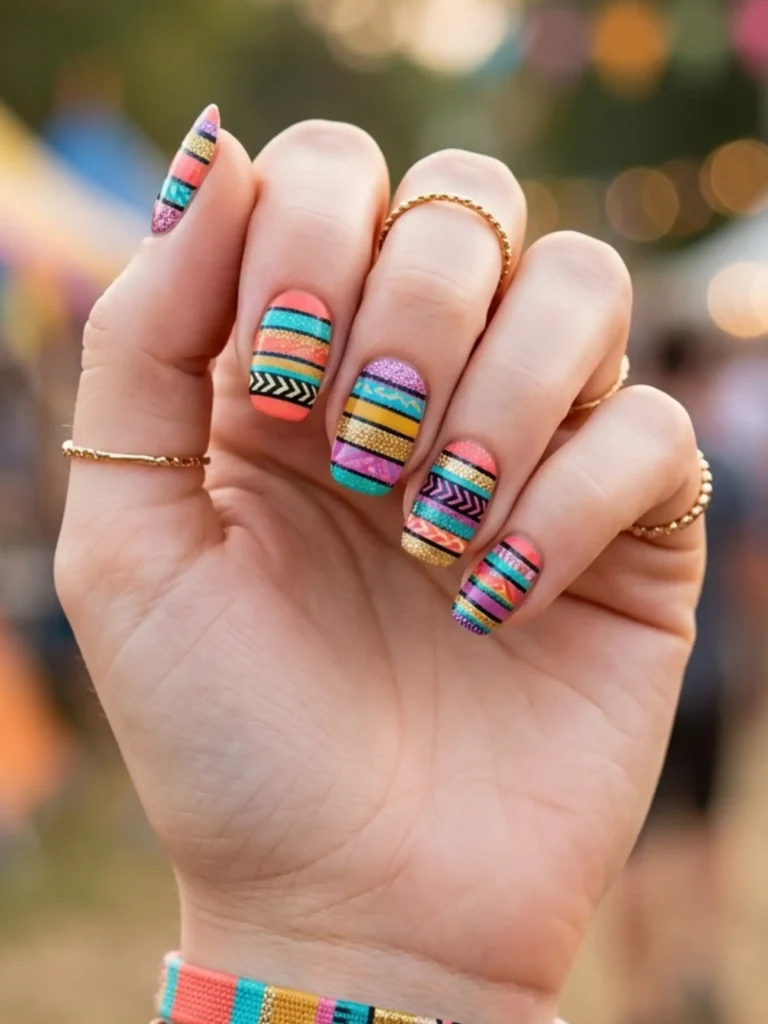
Wristband nails stack thin horizontal stripes of different colors, textures, and patterns across each nail – mimicking the pile of fabric wristbands, friendship bracelets, and entry bands that build up on your arm over festival season. Each nail becomes its own little bracelet stack.
This idea wins on personalization. You can pull stripe colors straight from your actual outfit, your festival’s branding, or wristbands from past years. It’s subtle storytelling that nail-art lovers on Pinterest genuinely stop scrolling for.
Vary the stripe widths. Identical stripes read as generic lines; mixing skinny stripes, chunky bands, and one glittery “bracelet” per nail is what sells the stacked-wristband effect.
10. Euphoria-Style Crystal Tear Nails
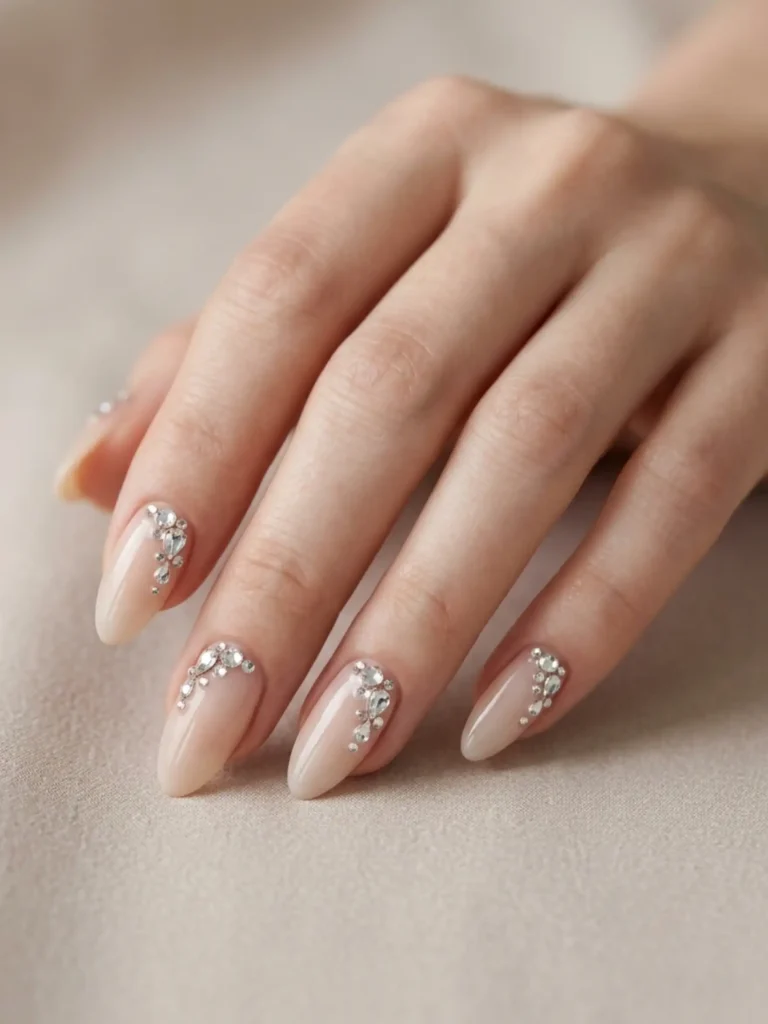
Crystal tear nails place small teardrop and round rhinestones in deliberate clusters near the cuticle or along one side of the nail, over a glossy nude, milky, or pastel base – inspired by the jeweled under-eye makeup the show Euphoria made famous. They’re delicate, sparkly, and dressier than most festival designs.
These are the nails for anyone who wants festival sparkle without neon. The nude base keeps things elegant; the crystals catch light every time you raise your hands, which at a festival is roughly every four minutes.
Use gel glue or builder gel to set the stones, not regular polish top coat. Top coat alone will surrender your crystals to the crowd by the second set.
How to Make Festival Nails Last All Weekend
A festival is brutal on a manicure — sunscreen, dancing, tent zippers, glitter application, and washing your hands in questionable sinks. Here’s the routine that keeps mine intact from gates-open to the final encore:
- Prep your nails properly the day before: push back cuticles, buff the surface lightly, and wipe with alcohol so polish has something clean to grip.
- Choose gel or builder gel over regular polish if you can. A cured gel manicure survives a three-day festival far better than air-dry lacquer.
- Cap the free edge with color and top coat by swiping across the very tip of each nail. This one step prevents most tip chipping.
- Pack a mini bottle of glossy top coat in your festival bag and refresh high-wear nails each morning.
- Apply sunscreen with the backs of your fingers when you can. Rubbing SPF in with your fingertips is a top cause of dulled, peeling festival polish.
- Carry a small nail file for snags, because catching a rough edge on fishnets at 2 p.m. on day one is a preventable tragedy.
How to Remove Glitter and Chrome Without Wrecking Your Nails
Glitter, chrome, and encapsulated designs do not come off with a casual cotton-ball swipe, and scraping them off will peel layers of your actual nail with them. For regular polish designs, use the foil method: soak a cotton pad in acetone, press it onto the nail, wrap the fingertip in foil, and wait ten minutes – the glitter slides off with gentle pressure.
For gel-based festival nails, file off the shiny top layer first, then soak the same way, and never pick or peel lifting gel. Afterward, your nails will be thirsty: massage in cuticle oil for a few days and give them a short break with just a strengthener before the next event on your calendar.
Common Mistakes to Avoid with Festival Nails
- Doing your nails the morning you leave. Fresh polish dents in transit and gel appointments run late. Do them one to two days before, so any fixes happen at home.
- Going on too long for the occasion. Extra-long extensions look incredible in photos but fight you on tent zippers, buttons, and portable toilets. Medium length is the festival sweet spot.
- Skipping the top coat on nail art. Hand-painted details without a sealing coat can smear from sunscreen and sweat within hours.
- Choosing designs that only work at night. Glow and UV nails are amazing after dark, but pair them with a daytime-friendly base so they photograph well at noon, too.
- Ignoring your toes. If your festival involves sandals, a simple matching pedicure in one of your palette colors finishes the look in full-outfit photos.