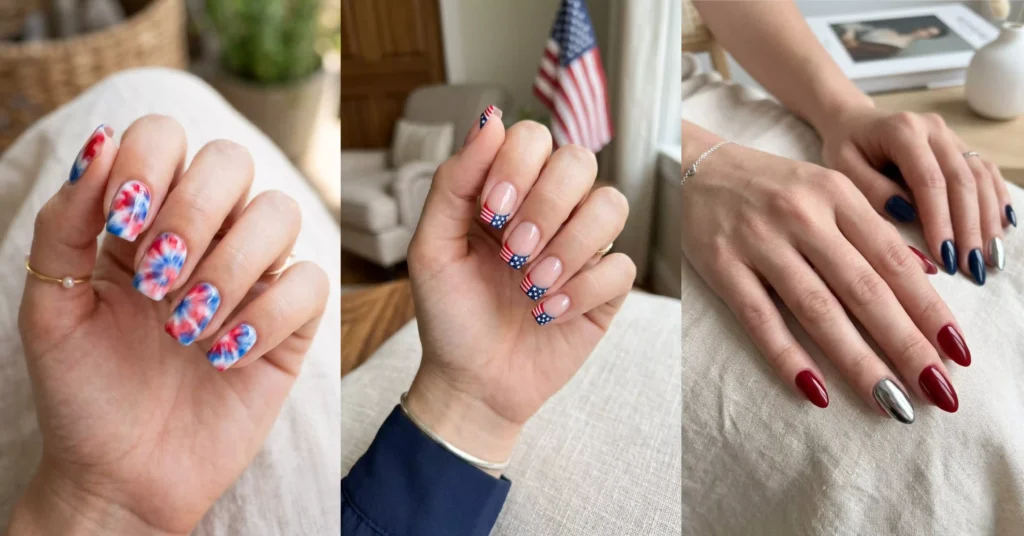
Every year around the end of June I get the same itch. The grill gets dragged out of the garage, someone starts arguing about potato salad, and I realize my nails look nothing like a summer holiday. The first time I tried to freehand a tiny flag, one nail looked great and the other nine looked like a toddler got hold of my polish. So I learned the shortcuts.
This guide rounds up 15 red, white, and blue nail ideas that actually look good at a backyard cookout, from a five-minute accent nail to a full firework moment if you’re feeling ambitious. Skip around to whatever matches your patience level and skill.
You don’t need to be a nail tech. A few of these take one color and a toothpick.
What Counts as a 4th of July Nail Design?
A 4th of July nail design is any manicure built around the American flag palette of red, white, and blue, usually with a festive motif like stars, stripes, or fireworks. That’s the whole rulebook. Some people go literal with a flag; others just wear a navy base with one silver star and call it patriotic.
The trick is balance. All three colors on all ten nails can look loud, so most of the ideas below use one or two nails as the “statement” and keep the rest simple. That’s what makes them wearable past the holiday too.
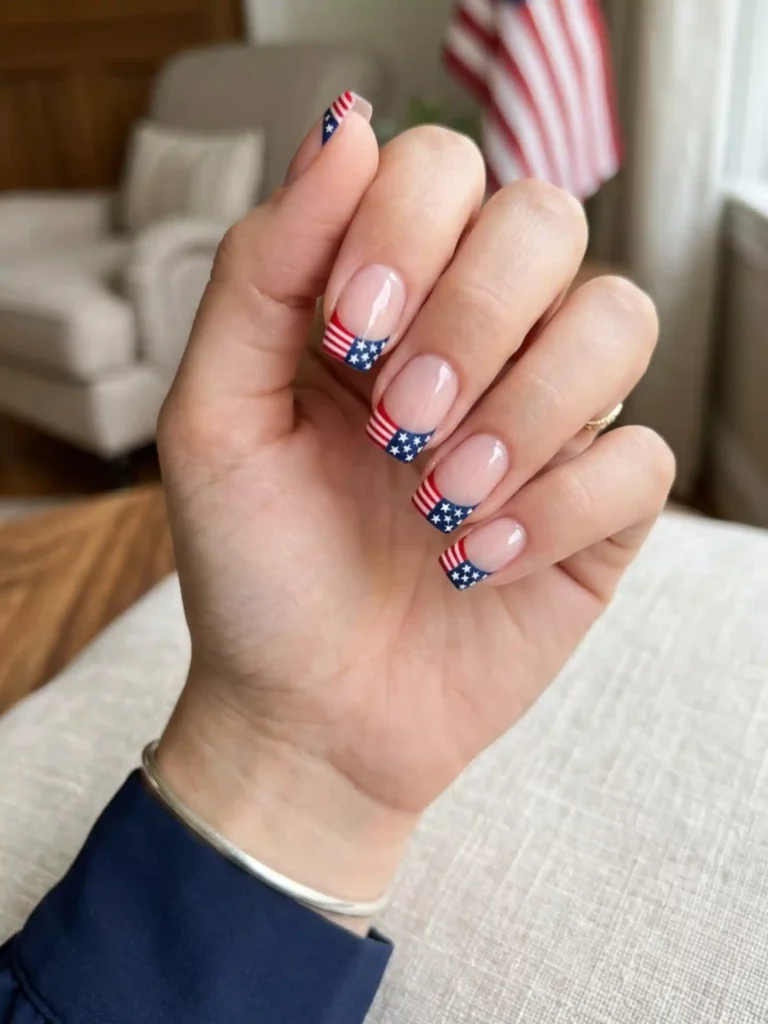
1. Classic American Flag Tips
Flag tips paint a mini stars-and-stripes design onto the free edge of the nail instead of the whole nail, so it reads patriotic without being overwhelming.
Best for: anyone who wants the obvious flag look but toned down.
Difficulty: medium.
Tools: red and blue polish, white striping polish or a thin brush, a dotting tool, glossy top coat.
Do the stripes with a striping brush, not your regular polish brush. My first attempt with the fat brush turned the red stripes into one red blob. Thin lines are the whole point.
2. Red, White, and Blue French Tips
This is a modern French manicure where each nail’s tip is a different holiday color instead of the usual white.
Best for: short and medium nails, office-friendly festivity.
Difficulty: easy.
Tools: French tip guides or tape, red, white, and navy polish, top coat.
Use the little curved tip stickers if freehanding a smile line stresses you out. Peel them off before the polish fully dries or they can tug the color up with them.

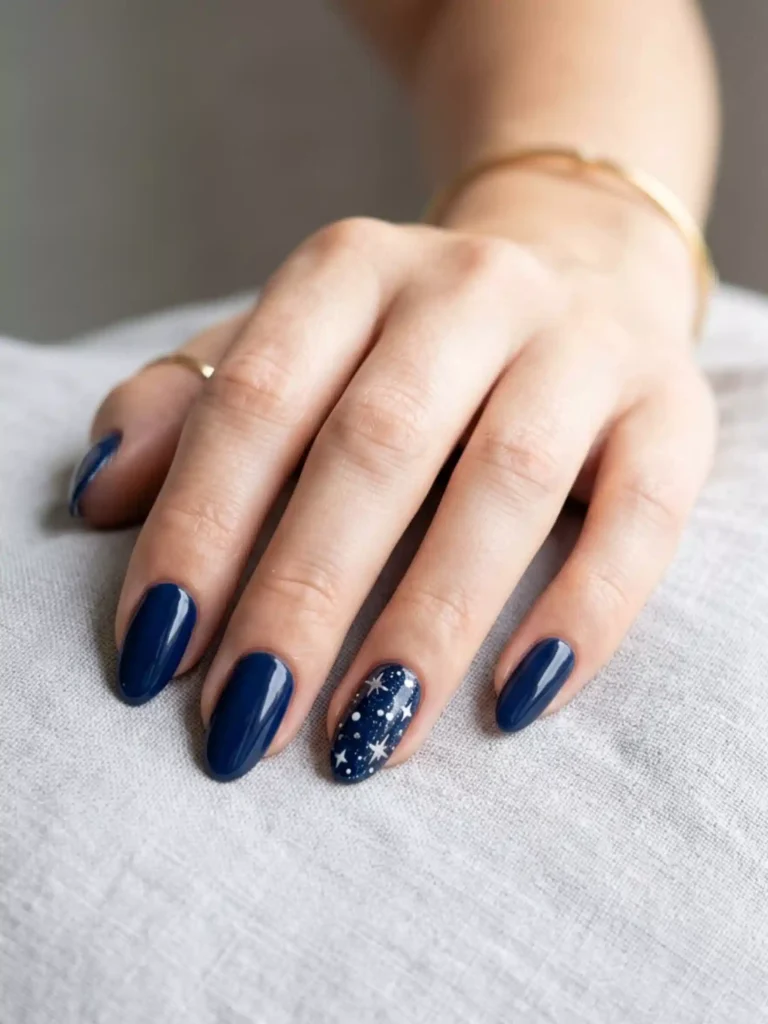
3. Star-Studded Accent Nail
A star accent nail keeps nine nails a solid color and turns one nail into a navy sky scattered with tiny white or silver stars.
Best for: people who want minimal effort with maximum payoff.
Difficulty: easy.
Tools: navy polish, a star-shaped nail stamp or small star stickers, silver polish.
Star-shaped rhinestones are the lazy person’s cheat code here. Press them into a wet top coat and they stay put. I’ve worn these through a full pool day and only lost one.
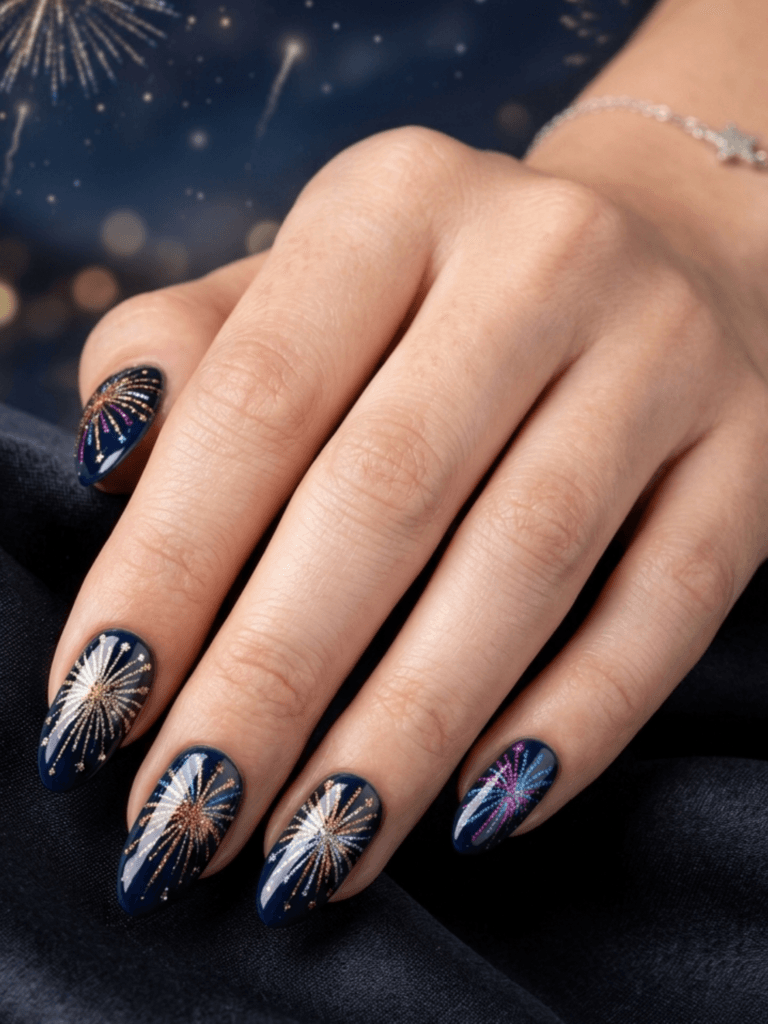
4. Firework Burst Nails
Firework nails use thin lines radiating out from a single point to mimic a firework exploding in the night sky.
Best for: a bold, eye-catching look for evening plans.
Difficulty: hard.
Tools: dark blue or black base, a thin liner brush, red/white/gold polish, fine glitter.
Start each burst from a center dot and drag outward while the lines are still fresh. Adding a few dots of glitter at the ends sells the “sparkle.” This one takes practice, so do a test on a paper nail wheel first.
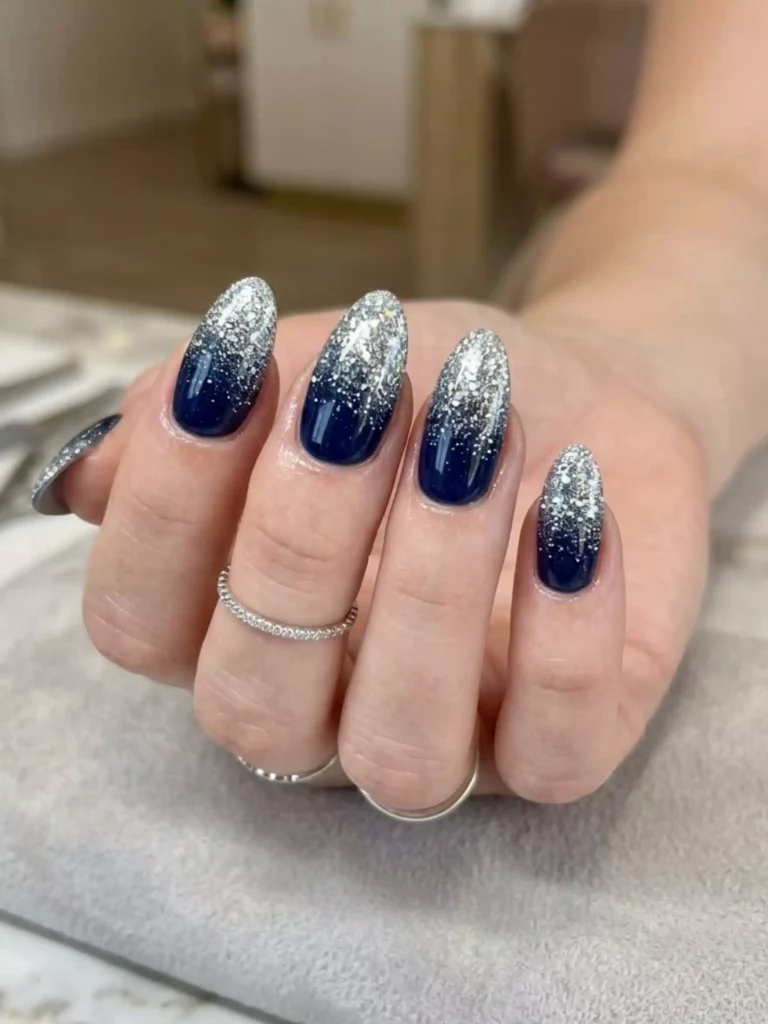
5. Glitter Ombré Nails
A glitter ombré fades from a solid navy at the base into dense silver glitter at the tip, like a sparkler catching light.
Best for: night events and anyone who loves shine.
Difficulty: medium.
Tools: navy polish, loose or pressed silver glitter, a small makeup sponge, top coat.
Build the glitter in thin layers with the sponge instead of dumping it on all at once. Two thin passes look like a real gradient. One thick pass looks like a mistake.
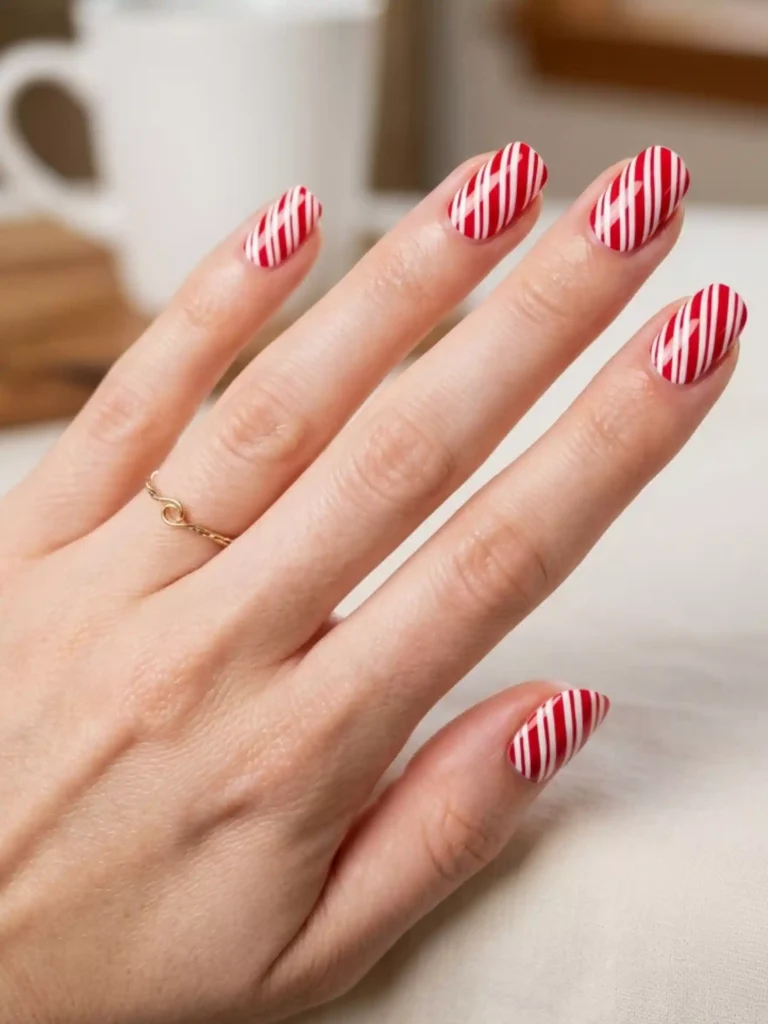
6. Candy Stripe Nails
Candy stripe nails alternate thin red and white vertical lines across the nail, like a peppermint or a carnival tent.
Best for: a retro, all-American picnic vibe.
Difficulty: medium.
Tools: white base, red striping tape or a thin brush, top coat.
Lay striping tape over a dry white base, paint red between the lines, then peel the tape while the polish is wet. Crisp stripes every time, no steady hand required.
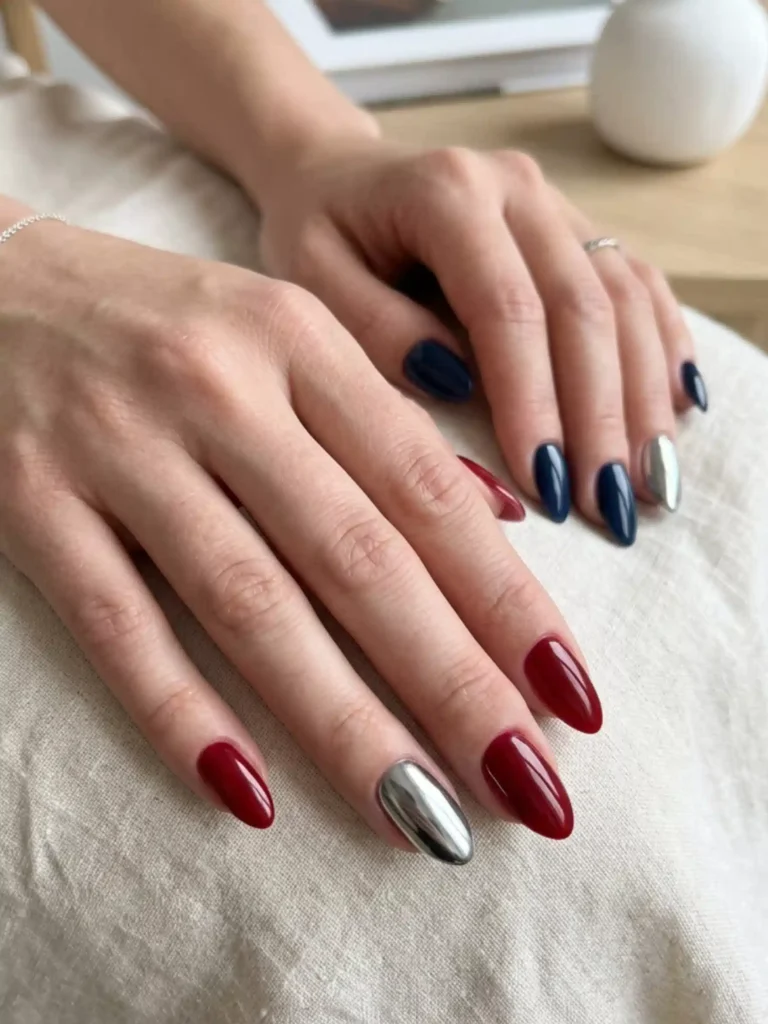
7. Chrome Silver Statement Nail
A chrome accent nail uses mirror-finish powder over a dark base to create a shiny metallic look that pairs cleanly with red and blue.
Best for: adding a cool, modern edge to a classic palette.
Difficulty: medium.
Tools: gel base and no-wipe top coat, chrome/mirror powder, an applicator or eyeshadow sponge.
Chrome powder really only pops over gel with a tacky no-wipe top coat. On regular polish it goes dull fast. Buff it on gently in circles until it turns mirror-like.
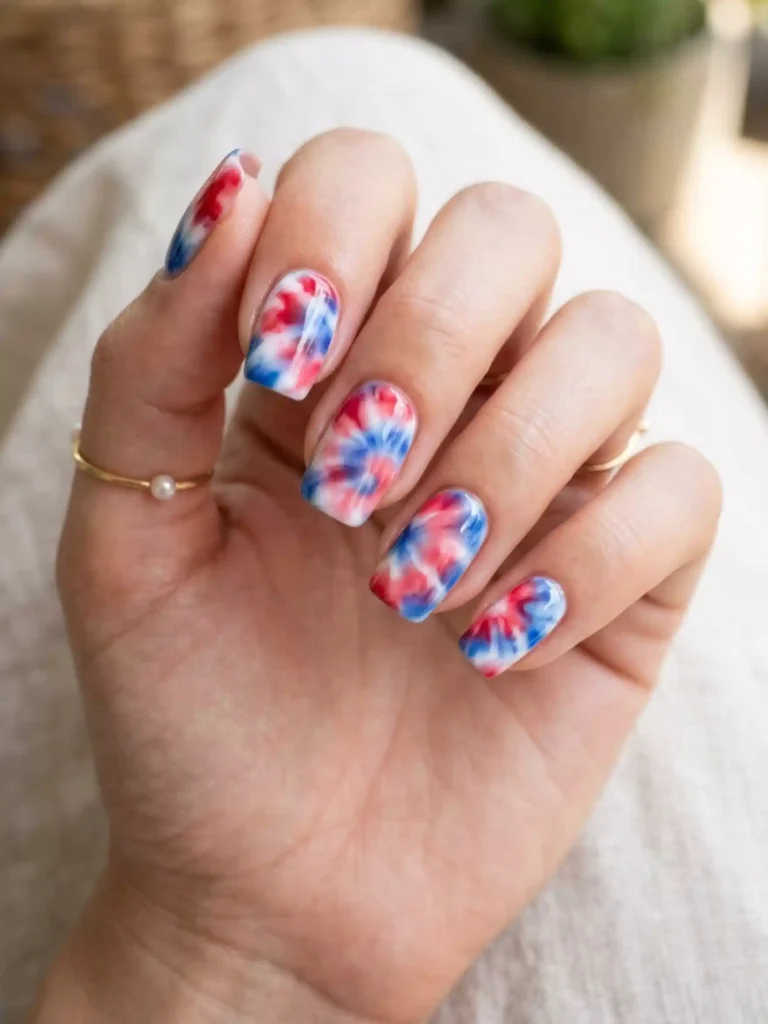
8. Tie-Dye Red, White, and Blue
Tie-dye nails blend the three colors into soft, swirling patches that look like a summer festival tee.
Best for: a relaxed, boho holiday look.
Difficulty: medium.
Tools: white base, red and blue polish, a small brush or cling film, top coat.
Dab little dots of red and blue onto a still-wet white base, then press a scrunched piece of cling film to blur them together. It never looks the same twice, which is kind of the charm.
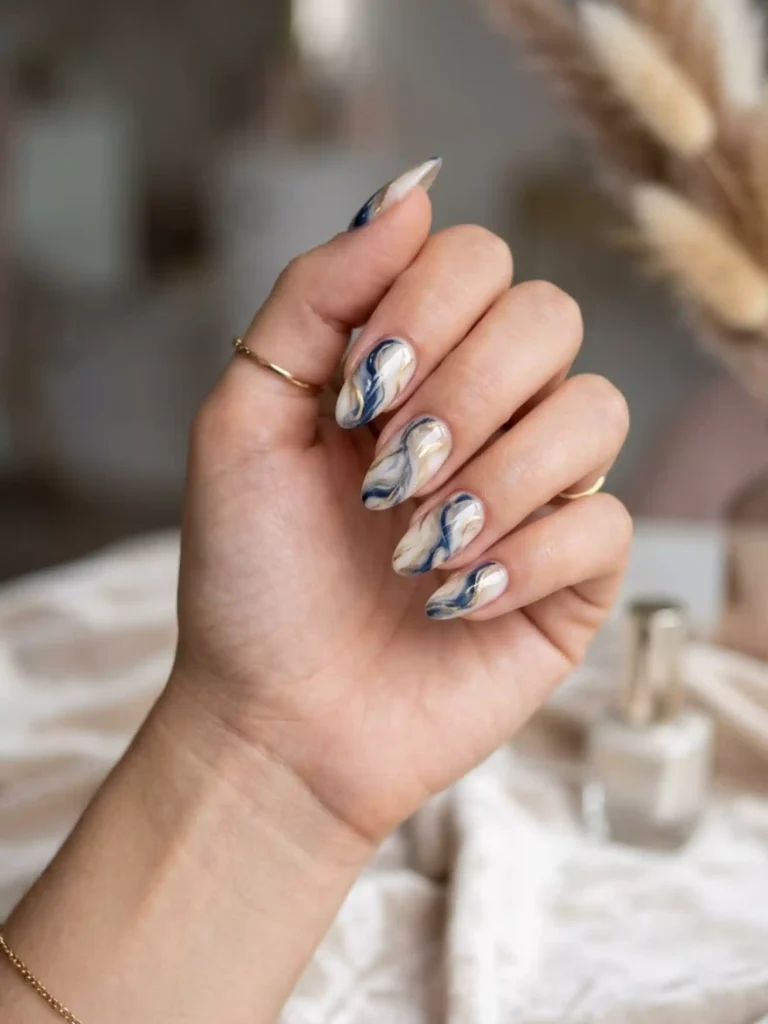
9. Marble Swirl Nails
Marble nails drag two or three colors together while wet to create a smooth, veiny swirl.
Best for: an elegant, less literal patriotic manicure.
Difficulty: medium.
Tools: white base, red and navy polish, a toothpick or thin brush, top coat.
Drop small dots of red and navy on a wet base and swirl gently with a toothpick. Don’t over-mix or you’ll get a muddy purple. Two or three swirls is plenty.
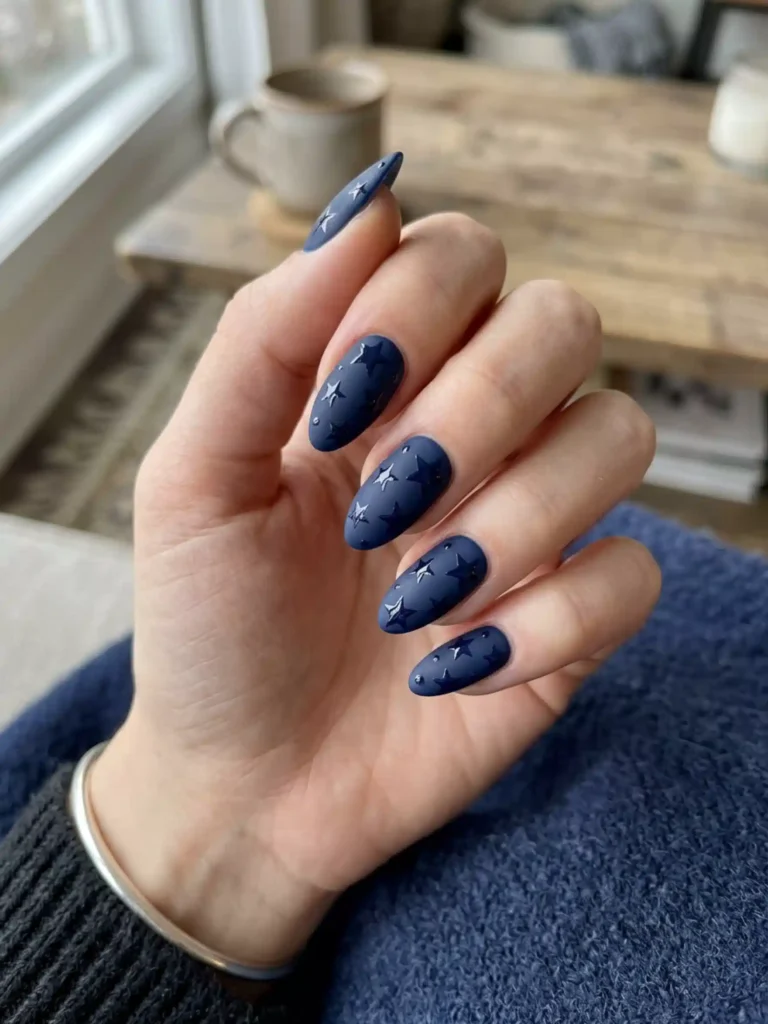
10. Matte Navy with Glossy Stars
This design keeps a matte navy base and adds glossy top-coat stars, so the stars catch light against the flat finish.
Best for: a subtle, grown-up nighttime look.
Difficulty: easy.
Tools: navy polish, matte top coat, glossy top coat, a fine brush.
Paint the whole nail with matte top coat, then dab glossy top coat in little star or dot shapes. The shine-on-matte contrast does all the work with basically one color.
How to Make Your 4th of July Nails Last Through the Weekend
A festive manicure is a waste if it chips before the fireworks even start. Here’s the routine I follow so mine survive the whole long weekend.
- Prep the nail. Push back cuticles, lightly buff the surface, and wipe each nail with rubbing alcohol so polish grips.
- Always use a base coat. It prevents staining from red and blue and gives the color something to hold onto.
- Paint thin layers. Two thin coats dry faster and chip less than one thick, gloopy coat.
- Cap the free edge. Swipe polish along the very tip of each nail to seal it and slow chipping.
- Top coat everything, then top coat again. A second layer of top coat a day later refreshes the shine and adds a chip barrier.
- Give it real dry time. Fast-motion tasks too soon are how you get sheet-print dents. Wait longer than you think.
How to Remove Glitter and Chrome Without Wrecking Your Nails
Glitter and chrome are the two finishes people dread taking off, and scraping them is the fastest way to thin out your nails. Soak a cotton pad in acetone, press it flat onto the nail, wrap the fingertip in a small square of foil, and leave it for about ten minutes. The glitter lifts off in one soft sheet instead of fighting you. Follow with a nourishing cuticle oil, because acetone is drying and your nails will thank you. If you used gel, don’t force it; re-soak rather than peel, since peeling takes a layer of your natural nail with it.
Common Mistakes to Avoid with 4th of July Nails
- Using all three colors on every nail. It reads chaotic. Let most nails stay simple and pick one or two statement nails.
- Skipping the base coat. Red and blue stain badly, and you’ll be walking around with pink-tinted nails for a week.
- Painting thick coats to save time. Thick polish stays soft underneath, dents easily, and peels off in chunks.
- Freehanding stripes with the bottle brush. It’s too wide. Use striping tape or a thin liner brush for anything with clean lines.
- Rushing the dry time before an event. Nothing ruins fresh art like a car-key smudge. Build in a buffer.