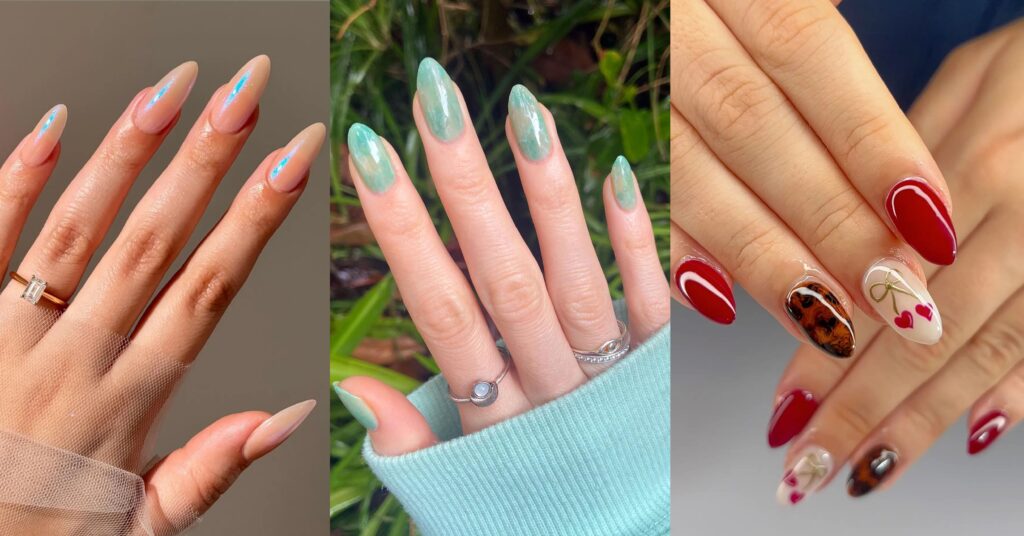
The first time someone asked me where I “got my nails done,” I’d actually done them myself at my kitchen table with a $9 bottle of polish. No art, no rhinestones, no two-hour salon appointment. Just one cozy fall shade and a good top coat.
That’s the thing about almond nails: the shape does so much of the heavy lifting that you barely have to try to look polished. Get the color and the finish right, and people assume you spent a fortune.
This guide walks through 12 almond nail ideas that read expensive without the effort — mostly glossy neutrals and rich autumn tones you can recreate at home. Skip around to whatever catches your eye, and steal the little tricks under each one.
What Makes Almond Nails Look Expensive?
Almond nails look expensive because the tapered, oval-to-point shape elongates and slims the fingers, while glossy or “healthy-nail” finishes mimic the look of well-cared-for hands. It’s less about the color and more about restraint and shine. A flawless single shade with a high-gloss top coat almost always reads pricier than a busy design with lots of art.
In short: the almond shape signals “intentional,” and the finish signals “maintained.” Put those two together and even a cheap polish can pass for a luxury manicure.
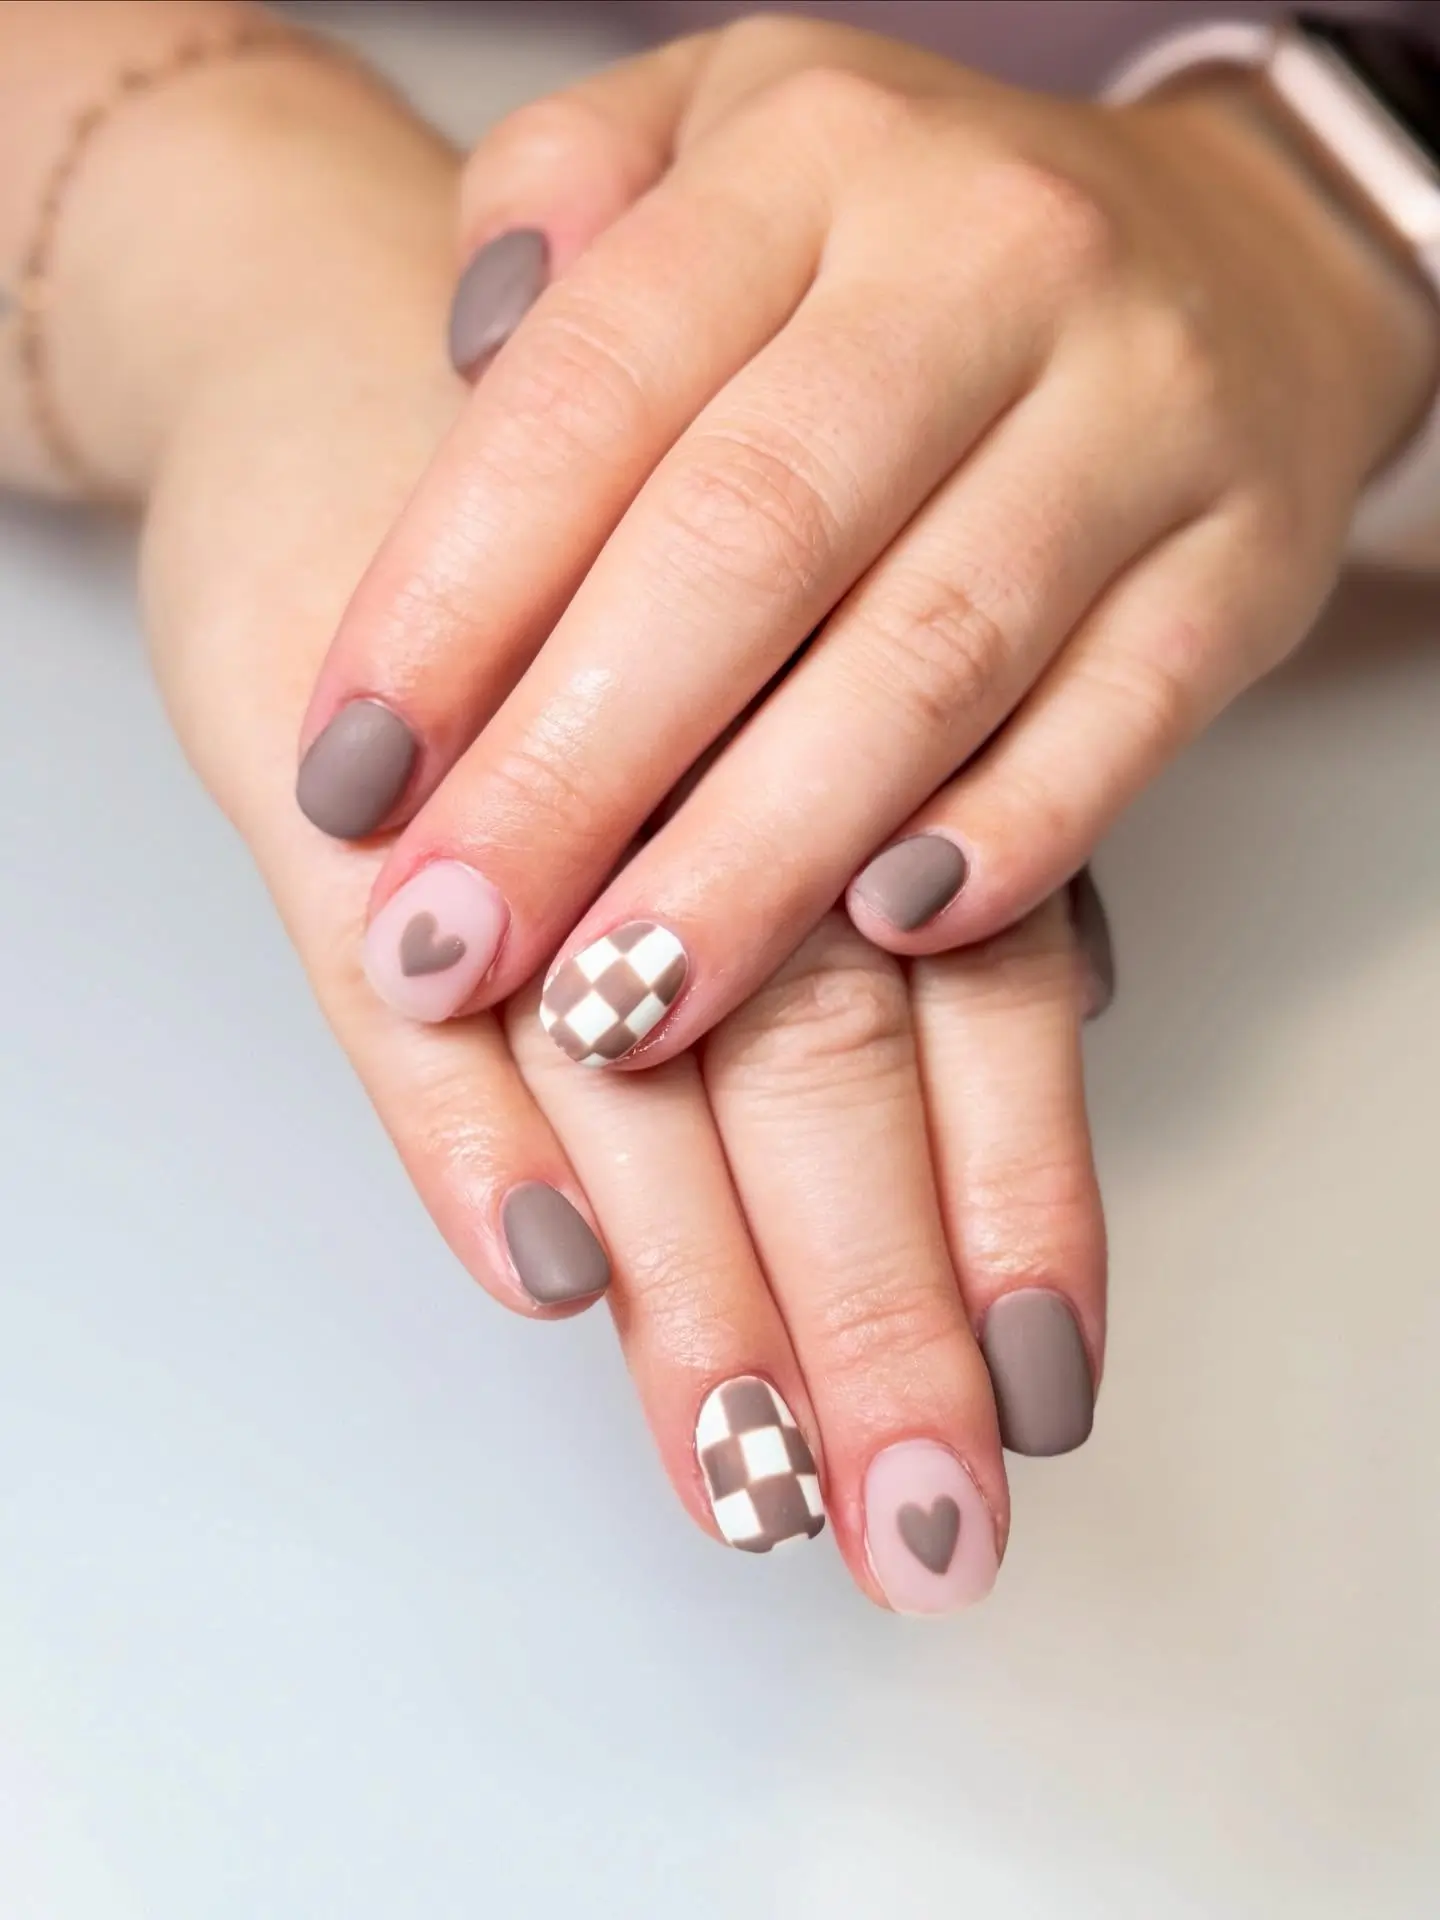
1. Glossy Chocolate-Brown Almonds
Glossy chocolate-brown almond nails are a deep, creamy cocoa shade finished with a high-shine top coat for a “melted chocolate” look.
Best for: everyday fall wear, office settings, and anyone who finds black too harsh.
Difficulty: easy.
Tools: a rich brown cream gel or polish, a glossy top coat.
The shine is the whole trick here. A flat, streaky brown looks cheap, but a smooth, glossy one looks like a designer nail. Two thin coats beat one thick one every time – that’s how you avoid the dreaded brush streaks.
2. Sheer Milky Nude
Sheer milky nude almond nails use a soft, translucent off-white base that gives your natural nail a lit-from-within glow instead of a flat, opaque coat.
Best for: short to medium nails and a clean, “your nails but better” look.
Difficulty: easy.
Tools: a milky or jelly-style sheer polish, a glass-like top coat.
This is the manicure I reach for when I want to look put-together but can’t be bothered. Keep it sheer — the translucency is the point. The first time I tried it I used too many coats and lost the glow, so go light.
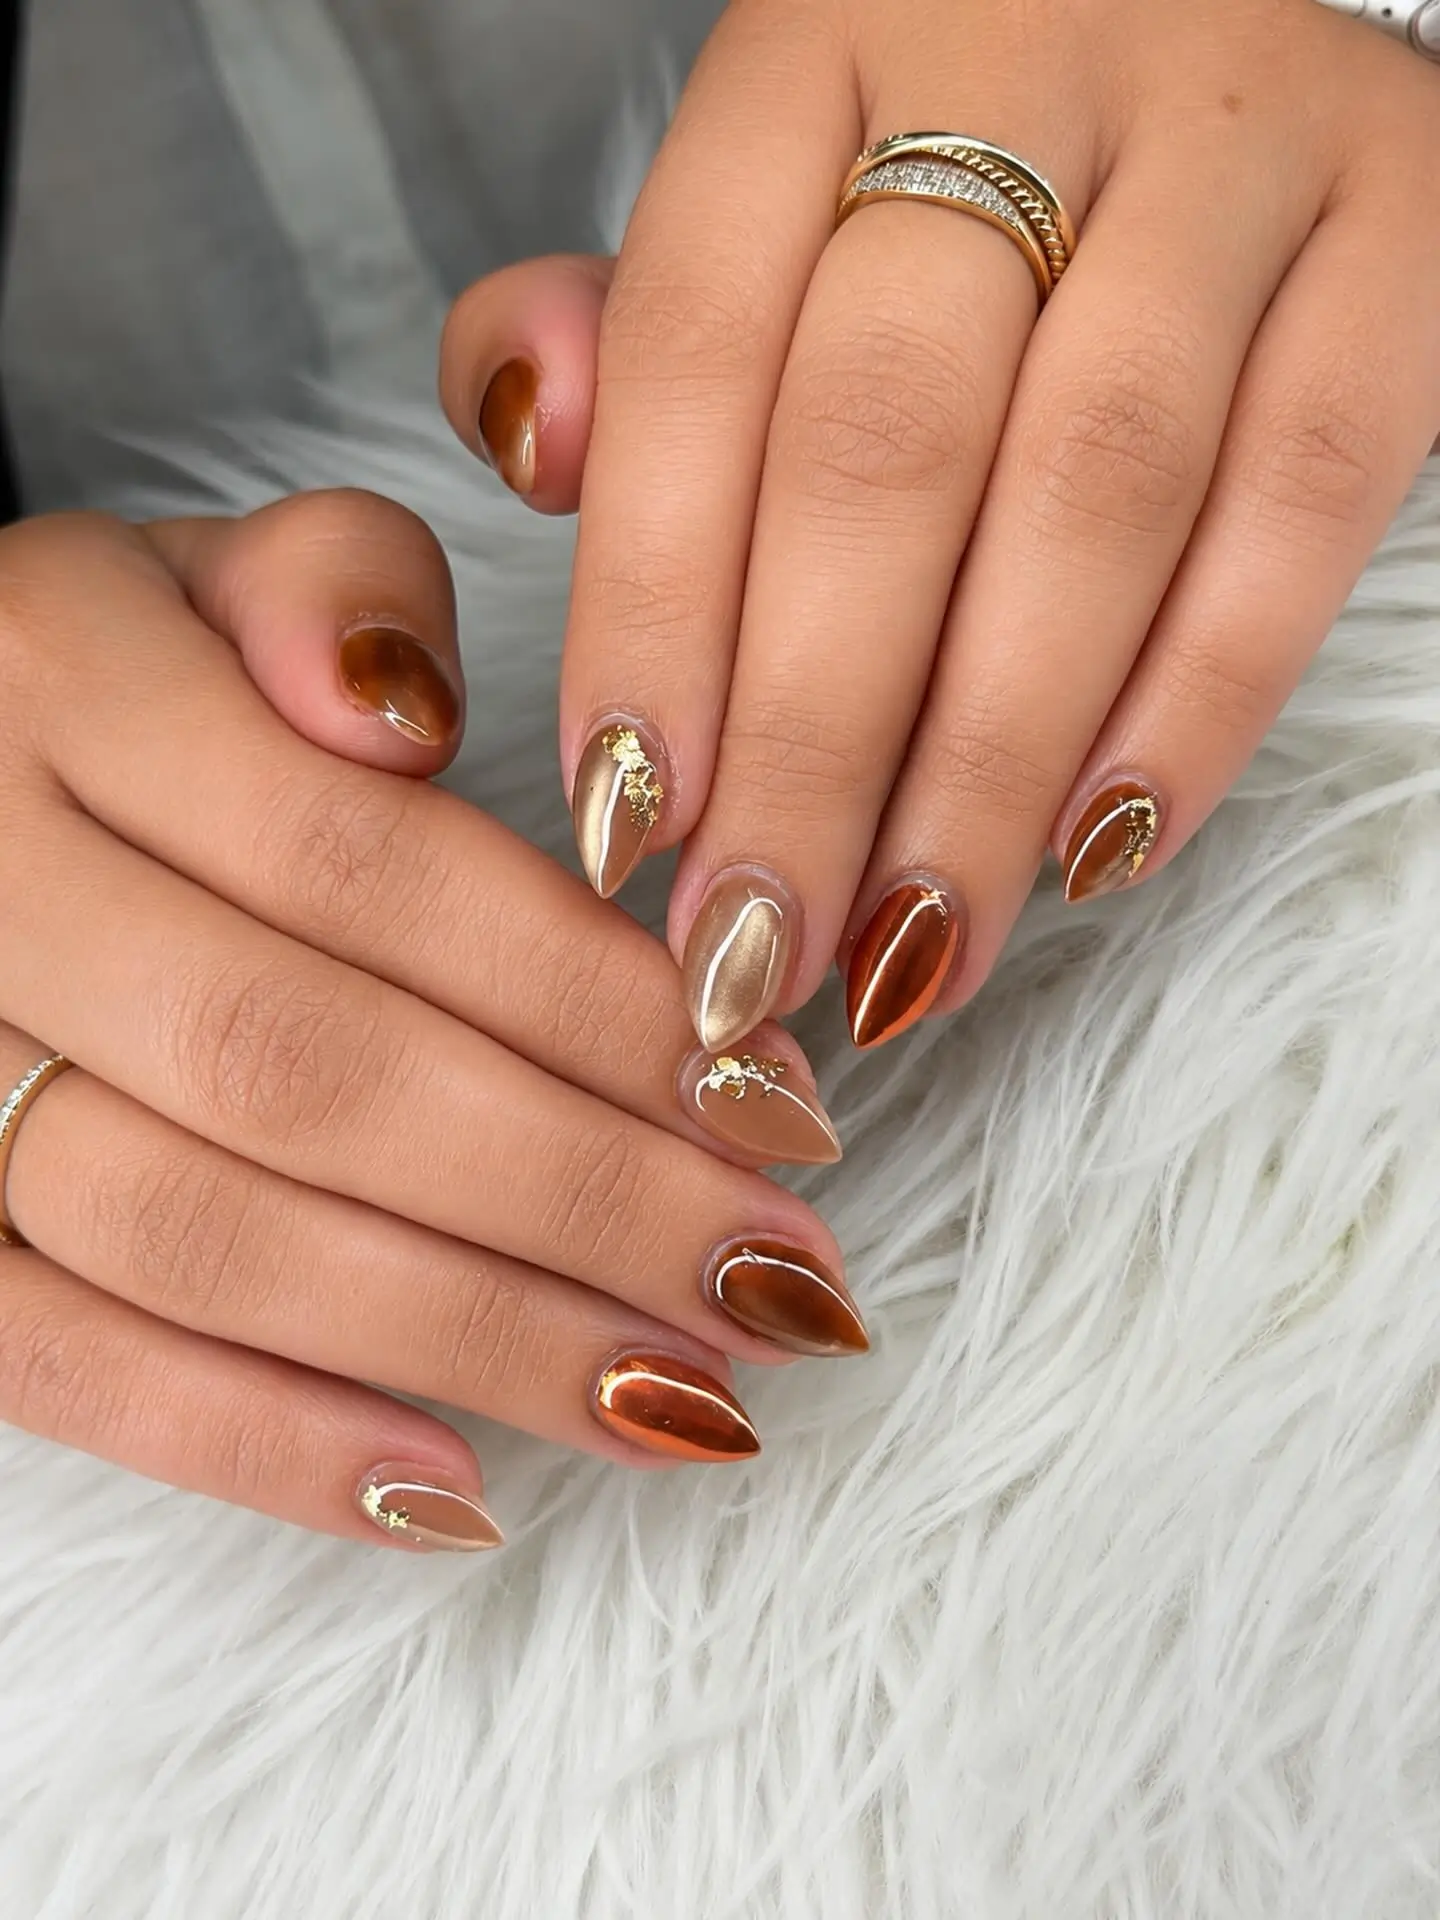
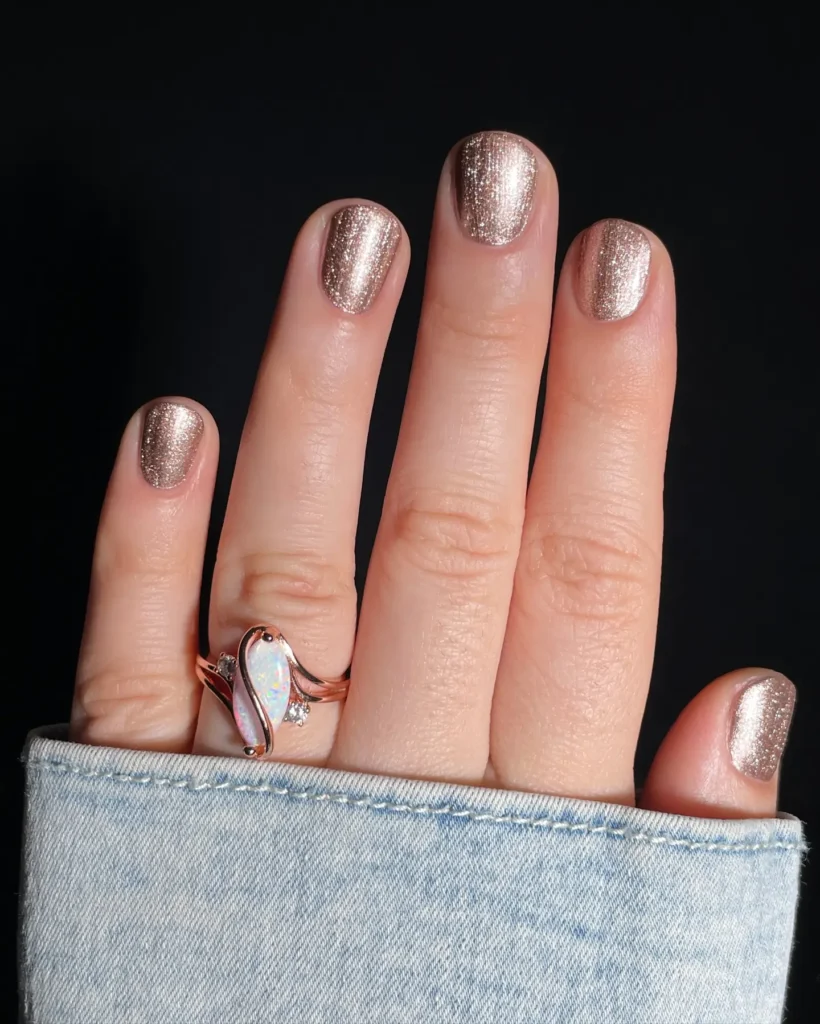
3. Caramel Maple-Syrup Chrome
Caramel maple-syrup chrome almond nails pair a warm amber-brown base with a soft chrome powder finish for a glazed, dimensional shine.
Best for: date nights, fall photos, and warm skin tones.
Difficulty: medium.
Tools: an amber or caramel gel base, chrome powder, a no-wipe top coat.
The secret almost nobody mentions: use chrome powder over a gel base, not a chrome-finish polish. The payoff is completely different — the powder gives that mirror-glazed look that catches the light and reads luxe. Seal it well, because chrome shows wear faster than plain gloss.

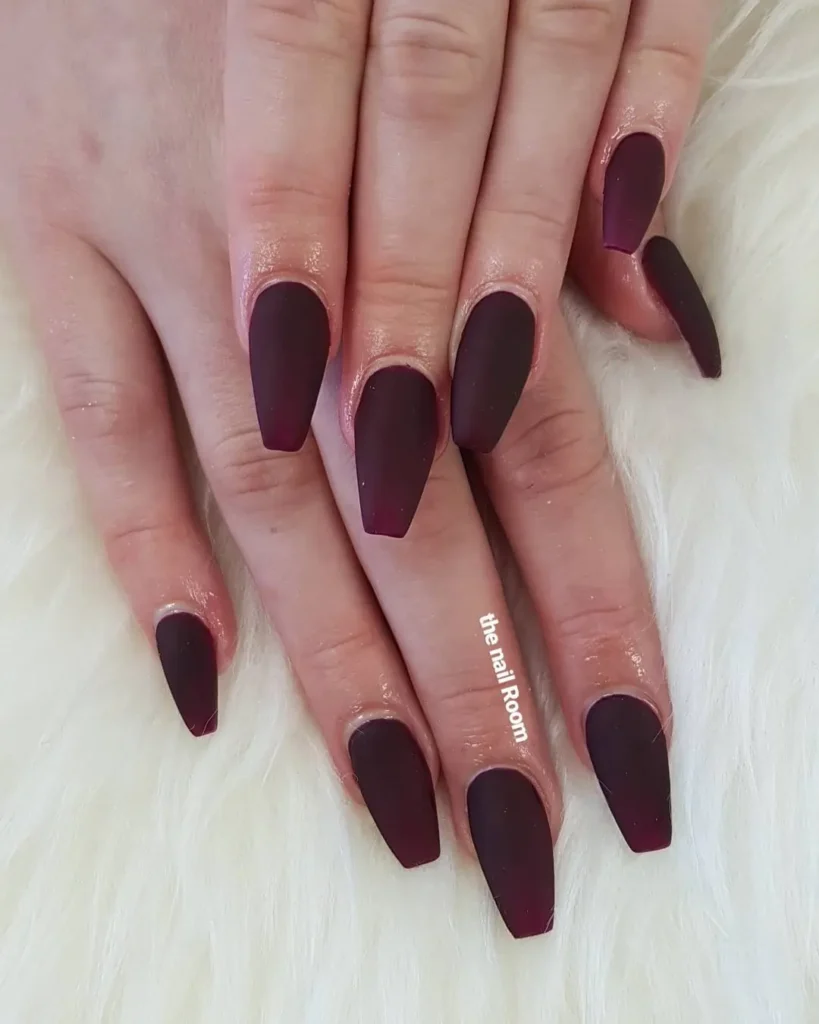
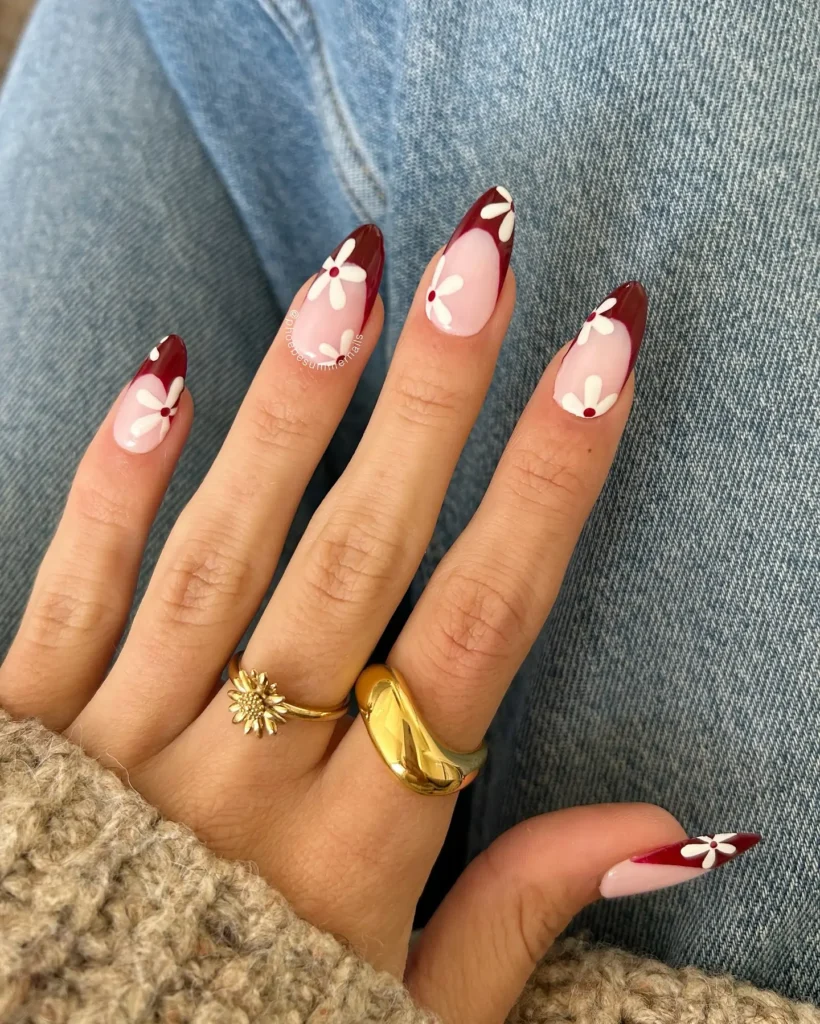
4. Matte Burgundy
Matte burgundy almond nails are a deep wine-red shade finished with a matte top coat for a soft, velvety, sophisticated surface.
Best for: formal dinners, holiday previews, and cool-weather outfits.
Difficulty: easy.
Tools: a true burgundy polish, a matte top coat.
Matte is what makes this look quietly expensive instead of loud. The almond shape keeps the dark color from feeling heavy, so it stays elegant rather than severe. One glossy accent nail is a nice optional touch if full-matte feels too flat for you.
5. Espresso With Negative Space
Espresso negative-space almond nails combine a near-black brown polish with bare, unpainted sections for a modern, editorial finish.
Best for: minimalists who want something a little fashion-forward.
Difficulty: medium.
Tools: a dark espresso polish, thin tape or a striping brush, a glossy top coat.
The open negative space keeps a deep color from feeling too dark, which is what makes it look intentional and designed. Curved cutouts near the cuticle are the easiest version. It also grows out gracefully, so you get more time between fills.

6. Warm Nude With Barely-There Gloss
Warm nude almond nails are a soft, skin-flattering beige finished with a clean gloss, like a good concealer for your hands.
Best for: work, weddings, and Monday-through-Saturday wear.
Difficulty: easy.
Tools: a warm nude polish matched to your undertone, a glossy top coat.
Match the shade to the undertone in your palm, not your knuckles — that’s what makes it look like a natural enhancement instead of paint. It’s the most forgiving look on this list and the one I recommend to anyone nervous about color.

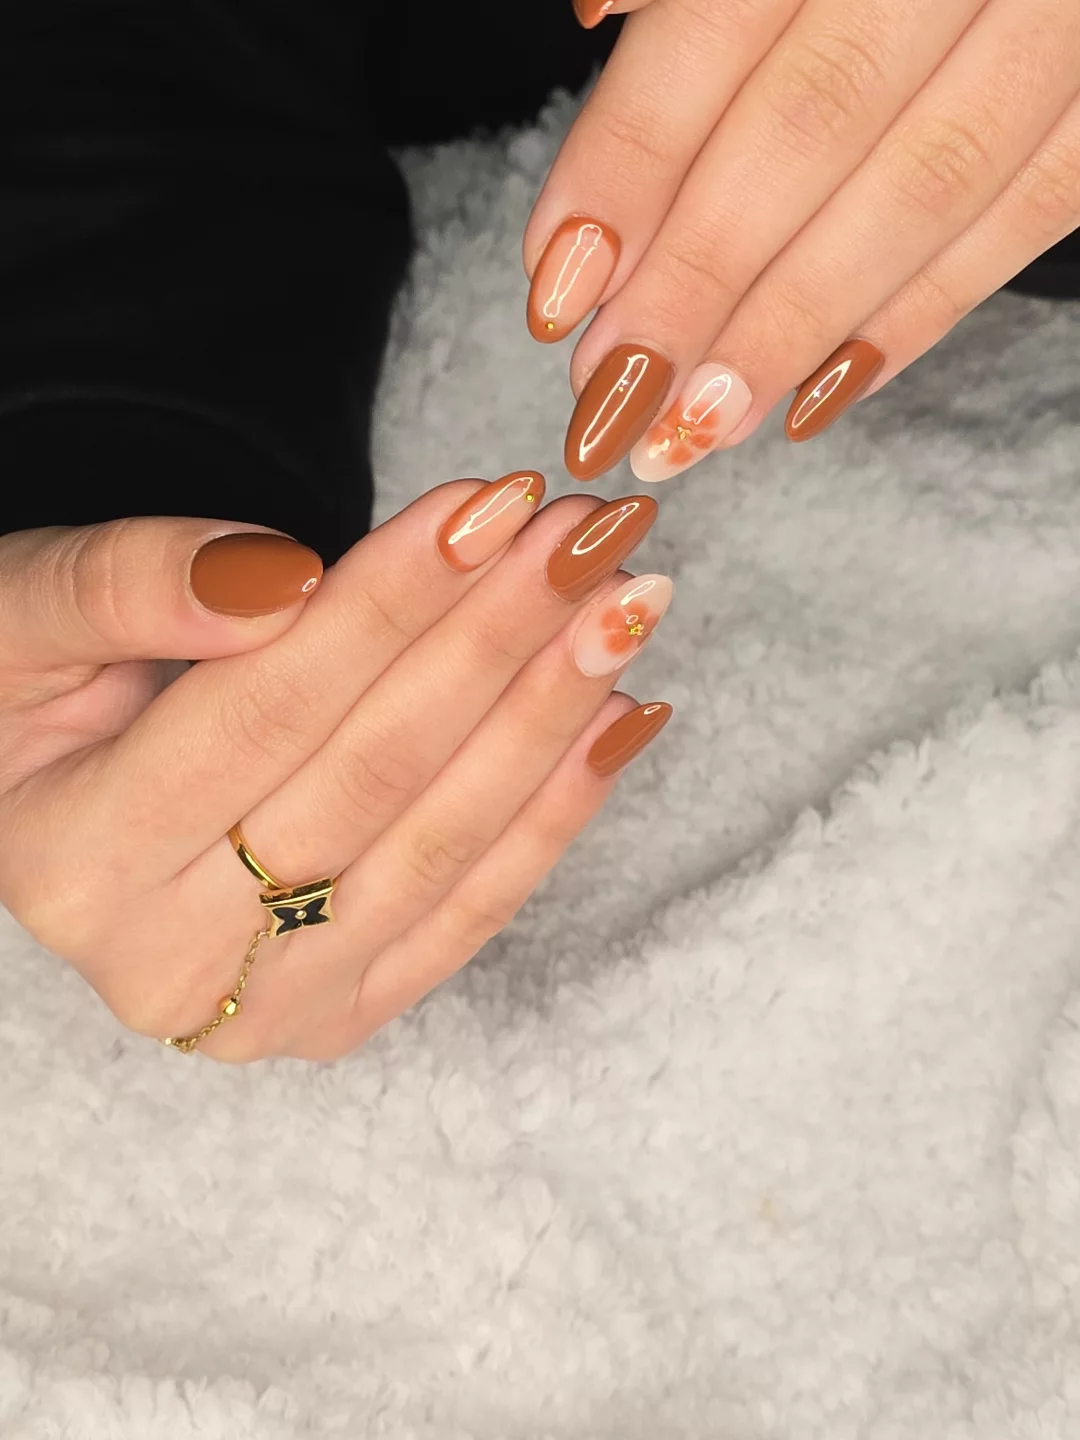
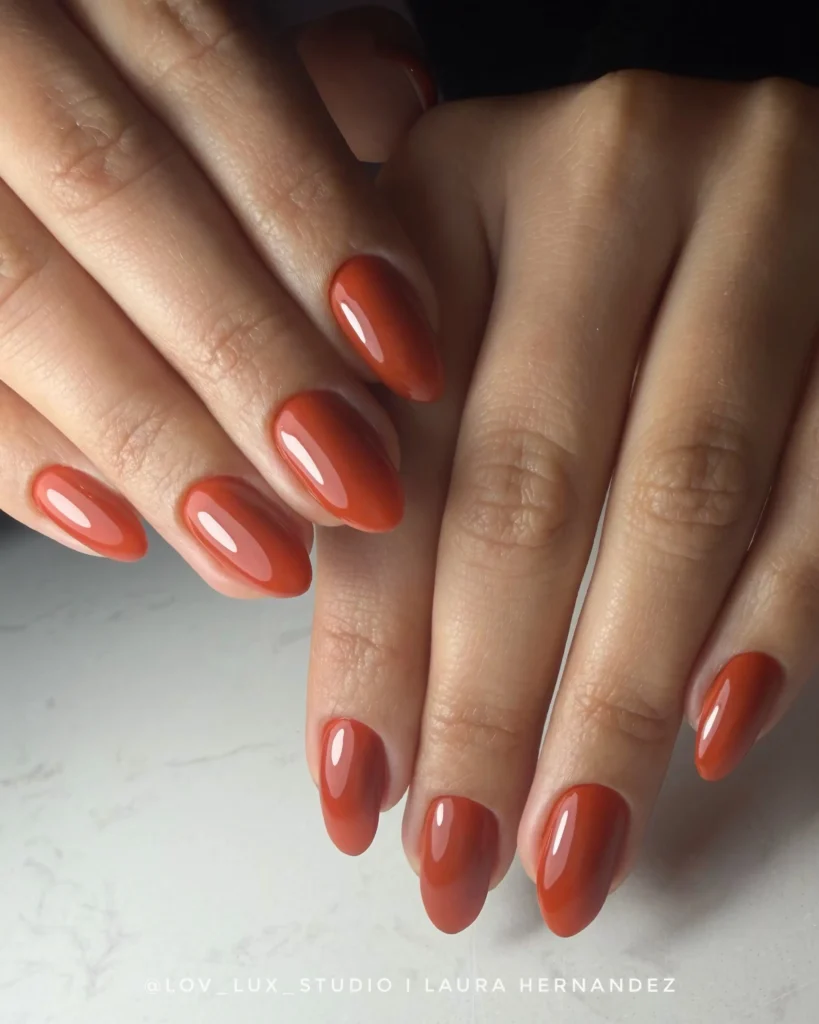
7. Terracotta Clay
Terracotta almond nails use an earthy, muted clay-orange shade with a clean cream finish and zero added detail.
Best for: the whole fall-into-winter stretch; warm and olive skin tones.
Difficulty: easy.
Tools: a terracotta or clay-toned cream polish, a glossy or satin top coat.
The color does all the work here, so you don’t need any art. It’s warmer and more wearable than a bright pumpkin orange, and it never looks out of season once the leaves turn. This one surprised me with how much it goes with — denim, camel coats, knits, everything.
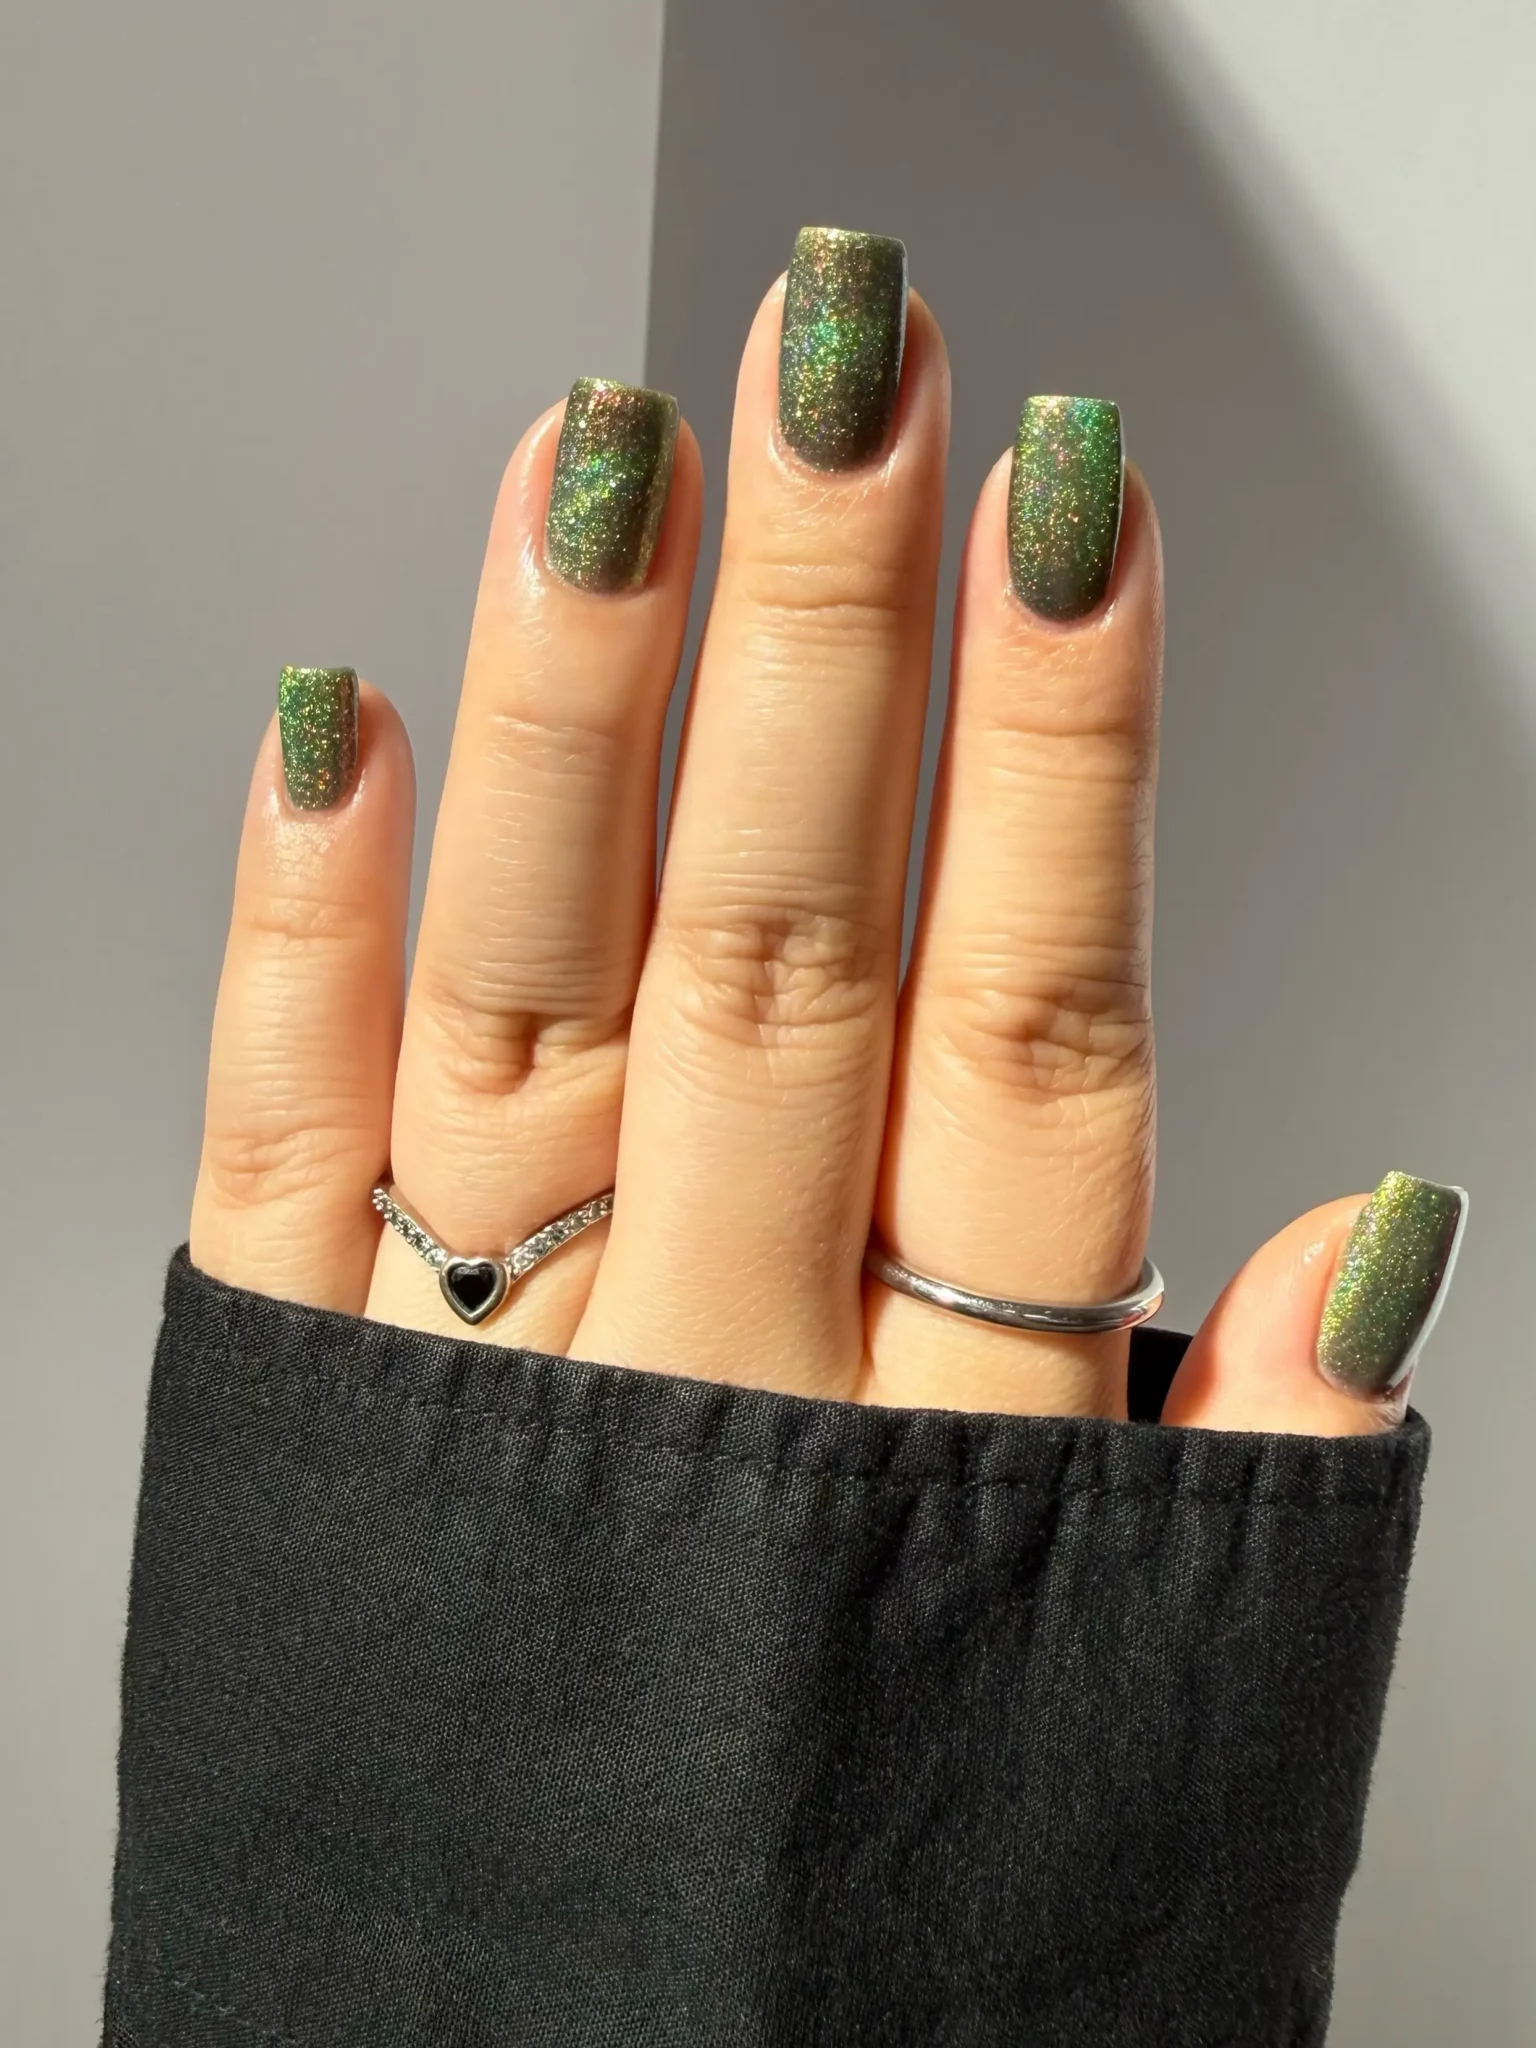
8. Olive Velvet
Olive velvet almond nails are a muted green shade finished with a magnetic or cat-eye top coat that creates a soft, shifting velvet sheen.
Best for: fall gatherings and anyone who wants color with a refined edge.
Difficulty: medium.
Tools: a magnetic olive gel polish, a magnet, an LED lamp.
The velvet finish is what lifts olive from “nice” to “expensive.” The shimmer shifts as you move your hand, which gives the color real depth. Hold the magnet close for a few seconds right after applying – that’s where the velvet effect comes from.

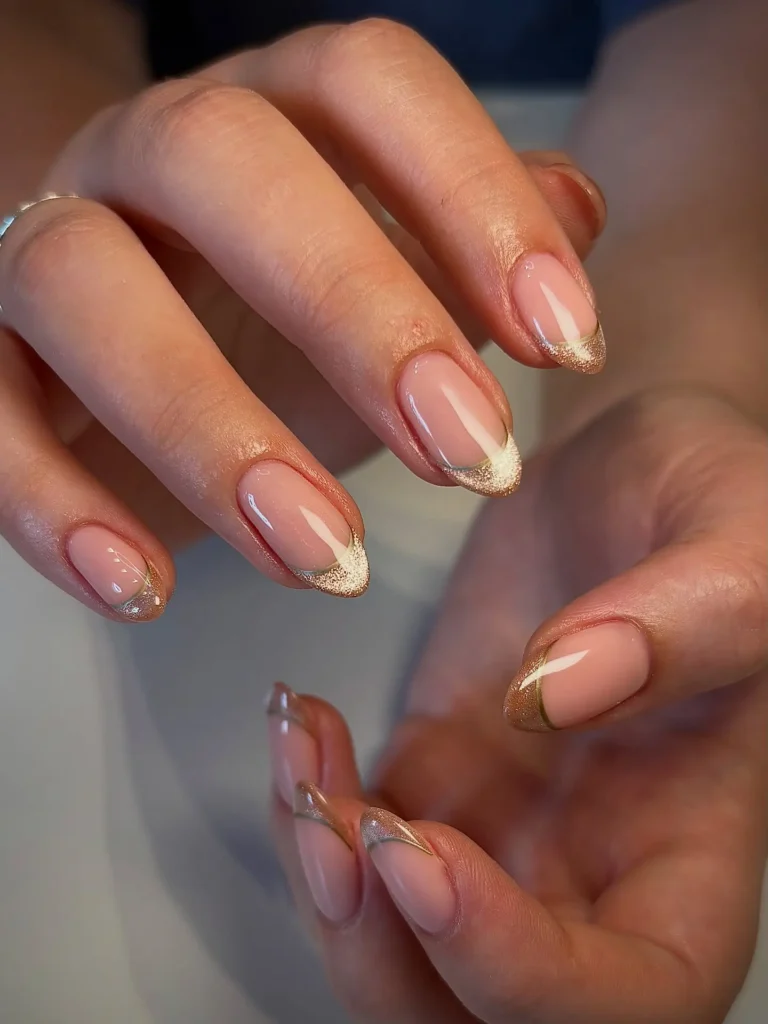
9. Champagne French Tip
Champagne French-tip almond nails swap the stark white tip of a classic French manicure for a soft, warm champagne gold.
Best for: people who love French manicures but want something less obvious.
Difficulty: medium.
Tools: a sheer nude base, a champagne or soft-gold polish, a thin brush, a glossy top coat.
Champagne instead of white instantly modernizes a French and makes it feel custom. The almond shape gives the tip a long, flattering frame. Keep the tip line thin and clean — that precision is the difference between salon-level and DIY-looking.
10. Taupe Matte Tip
Taupe matte-tip almond nails feature a soft greige-brown tip over a bare or sheer base with a matte top coat, like a muted, modern French.
Best for: anyone bored of white French tips who still wants something subtle.
Difficulty: medium.
Tools: a taupe polish, tape or a tip guide, a matte top coat.
A taupe tip has an editorial quality that a stark white one just doesn’t. The matte finish removes the formality, so it skews effortless. It looks complicated but takes about ten minutes with a strip of tape as a guide.

11. Mauve With Gold Foil
Mauve gold-foil almond nails pair a soft, muted-pink mauve base with a few scattered pieces of gold foil on one or two nails.
Best for: weddings, dinners, and softer fall wardrobes. Difficulty: easy. Tools: a mauve cream polish, gold foil flakes, tweezers, a glossy top coat.
The quiet base plus one small expensive-looking detail is the whole formula. Don’t cover the whole nail in foil — a few casually placed flakes catch the light and read elevated, not busy. It’s the kind of detail people notice up close but doesn’t shout from across the room.
12. Dark-Cherry Glass Gloss
Dark-cherry glass-gloss almond nails use a wine-toned shade between burgundy and black, finished with a mirror-like high-shine top coat.
Best for: evenings out and anyone who wants maximum impact with zero art.
Difficulty: easy.
Tools: a dark-cherry polish, a high-gloss or glass top coat.
This is the lazy-girl power move: one rich color, one mirror finish, done. The almond shape makes the deep shade look longer and more slender, and the glass gloss reflects light so it photographs beautifully. A chrome overlay on a single nail adds extra dimension if you want it.
How to Make Your Almond Nails Look Expensive at Home
A salon look comes more from prep and finish than from fancy art. Here’s the routine I follow:
- Shape your nails into a soft almond – file the sides at a gentle angle toward a rounded point, not a sharp one.
- Prep the nail by pushing back cuticles and lightly buffing the surface so polish grips evenly.
- Base coat first, always – it prevents staining from deep fall shades and helps color last.
- Apply two thin color coats instead of one thick one; thin layers cure smoother and streak less.
- Seal with a quality top coat – glossy for shine, matte or magnetic for finish-specific looks. This step is what reads as “expensive.”
- Finish with cuticle oil around the nail; hydrated, glossy skin makes the whole hand look cared-for.
How to Keep Them Looking Salon-Fresh
The fastest way to make a manicure look cheap is to let it chip, so a little upkeep goes a long way. Re-apply a thin layer of top coat every two or three days to refresh the shine and protect the edges, especially on glossy and chrome finishes that show wear first. Wear gloves for dishes and cleaning, since hot water and detergents dull polish and weaken gel. A daily swipe of cuticle oil keeps the surrounding skin smooth, which matters more than people think – chipped polish over dry, ragged cuticles always looks worse than the chip alone. If you wear gel, resist peeling it off; soak it in acetone or visit a salon for removal so you don’t damage the natural nail underneath.
Common Mistakes to Avoid With Almond Fall Nails
- Choosing the wrong base color for your undertone. A nude or brown that fights your skin tone looks off; test against your palm, not the back of your hand.
- Skipping the top coat. Without it, even an expensive polish looks flat and dull, and it chips far faster.
- Going too long, too soon. Very long almond tips look dramatic but break easily; medium length is more wearable and lower-maintenance.
- Over-decorating a “simple” look. The expensive effect comes from restraint, so adding lots of art usually cheapens a clean neutral.
- Painting too thick. One heavy coat streaks and bubbles; two thin coats cure smoother and last longer.